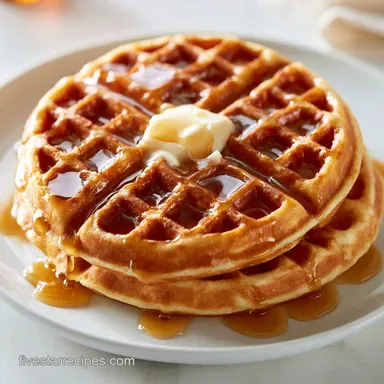
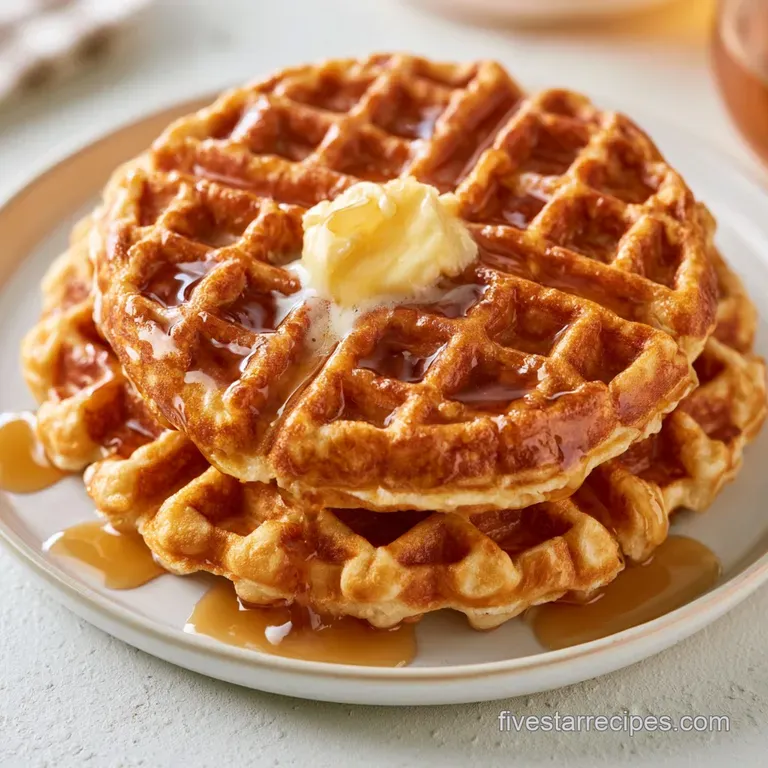
Belgian Waffles: Ultra Crispy and Fluffy
- Time: 10 min active + 15 min cook = Total 25 mins
- Flavor/Texture Hook: Shatter crisp edges with a cloud like center
- Perfect for: Slow Sunday brunches and family gatherings
The smell of browning butter and vanilla hitting a hot iron is enough to wake anyone up. I remember one particular rainy October morning when I decided to treat my parents to a full spread. The house was cold, but the kitchen was a sauna of sweet, toasted aromas.
I had the coffee brewing and the berries simmering, but the real star was the sound of the waffle iron clicking open, releasing a cloud of fragrant steam.
It's that specific moment where you see the deep golden grid and know you've got the texture right. For a long time, I just used a mix, but those always felt a bit flat and one dimensional. Switching to a scratch method changed everything.
You get this incredible contrast between the crisp shell and the airy middle that you just can't get from a box.
We're going for a gourmet result here, but the process is actually quite straightforward. These Belgian Waffles rely on a few precise steps to get that five star hotel feel at home. I'll walk you through the bits that actually matter, so you don't end up with something that tastes like a soggy sponge.
Trust me on this, the effort of separating the eggs is where the magic happens.
The Secret to Crispy Belgian Waffles
The goal here isn't just "cooked" batter, it's a specific structural engineering project. Most people treat waffle batter like pancake batter, but Belgian Waffles need more air and a different fat to starch ratio to achieve that signature crunch.
Air Trapping: Whipping egg whites creates thousands of tiny air bubbles that expand when they hit the heat. This pushes the batter outward and upward, creating a light, porous structure.
Starch Gelatinization: The combination of whole milk and melted butter creates a rich liquid base that allows the flour to hydrate properly. As it cooks, the starches set quickly, locking in the air bubbles before they can collapse.
Steam Release: The high heat of the iron evaporates moisture rapidly from the surface. This creates a dry, crisp crust while the center remains moist and tender.
| Approach | Prep Time | Texture | Flavor Profile |
|---|---|---|---|
| From Scratch | 25 mins | Shatter crisp | Rich, buttery, nuanced |
| Pre made Mix | 10 mins | Soft/Cakey | Sweet, artificial vanilla |
| Frozen/Toasted | 5 mins | Hard/Dry | Bland, toasted grain |
Right then, let's look at what's actually happening inside the batter. It's not just about mixing ingredients; it's about how they interact under heat.
Component Analysis
| Ingredient | Science Role | Pro Secret |
|---|---|---|
| All Purpose Flour | Structure | Sift it if your flour is clumped for a smoother crumb |
| Egg Whites | Aeration | Beat to stiff peaks to ensure the waffles don't flatten |
| Baking Powder | Chemical Lift | Use a fresh tin; old powder leads to dense, flat waffles |
| Unsalted Butter | Browning | Cool it slightly so it doesn't scramble the egg yolks |
Gathering Your Essentials
For the dry base, we need a foundation that can hold the weight of the air bubbles without becoming tough. I recommend using a high-quality flour, as according to King Arthur Baking, the protein content in your flour directly impacts the final chew.
For the Dry Base
- 2 cups (250g) all purpose flour Why this? Provides the necessary gluten structure (Substitute: White wheat flour for a softer bite)
- 2 tbsp (25g) granulated sugar Why this? Aids in browning and sweetness (Substitute: Coconut sugar for a caramel note)
- 1 tbsp (12g) baking powder Why this? Essential for the initial rise (Substitute: Baking soda + cream of tartar)
- ½ tsp (3g) salt Why this? Balances the richness of the butter (Substitute: Fine sea salt)
For the Wet Mix
- 2 large egg yolks Why this? Adds richness and emulsification (Substitute: 1 tbsp heavy cream for a denser feel)
- 1 ¾ cups (415ml) whole milk Why this? Fat content ensures a velvety interior (Substitute: Buttermilk for a tangier taste)
- ½ cup (115g) unsalted butter, melted and cooled Why this? Creates the crisp exterior (Substitute: Melted coconut oil for dairy-free)
- 1 tsp (5ml) vanilla extract Why this? Classic aromatic depth (Substitute: Almond extract for a nutty twist)
For the Lift
- 2 large egg whites Why this? The primary source of aeration (Substitute: Aquafaba for a vegan style lift, though less stable)
Essential Cooking Tools
You don't need a professional kitchen, but a few things make this foolproof. A Belgian style waffle iron is a must because the grids are deeper, which allows more of that airy batter to expand.
I've found that using a hand mixer for the egg whites is way better than a whisk by hand. It's just faster and more consistent. Also, grab a silicone spatula. You'll need it for the folding process, and it helps you get every last bit of batter out of the bowl without overworking it.
Chef Note: If your iron doesn't have a non stick coating, use a pastry brush to apply a thin layer of melted butter between every single waffle. Don't over grease, or the batter will slide around and create uneven thicknesses.
Step by step Process
Now we get to the part where we actually build these Belgian Waffles. Precision is key here, so follow the order of operations closely.
Phase 1: Building the Foundation
Whisk the flour, sugar, baking powder, and salt in a large bowl. Make sure you stir them well so the baking powder is evenly distributed. In a separate medium bowl, blend the melted butter, egg yolks, milk, and vanilla until smooth. Now, pour the wet ingredients into the dry and stir until just combined.
Note: Stop as soon as the flour streaks disappear; overmixing develops too much gluten, which makes them tough.
Phase 2: Creating the Aeration
In a clean bowl, beat the egg whites using a hand mixer. You're looking for stiff peaks, meaning when you lift the beaters, the foam stands straight up without drooping. This is a critical precision checkpoint. If the peaks are too soft, your Belgian Waffles will be more like pancakes.
Phase 3: The Final Fold & Sear
Gently fold the whipped egg whites into the batter using a spatula. Use a cut and fold motion slice through the middle, scoop under, and turn over. Don't stir vigorously or you'll pop all those bubbles you just worked so hard to create. Pour the batter onto a preheated, lightly greased iron.
Cook 15 mins until the steam stops escaping and the waffle is a deep golden brown.
| Original Ingredient | Substitute | Why It Works |
|---|---|---|
| Whole Milk (415ml) | Oat Milk (full fat, 415ml) | Similar viscosity. Note: Slightly nuttier flavor |
| All Purpose Flour (250g) | gluten-free Blend (250g) | Mimics structure. Note: May be slightly grainier |
| Unsalted Butter (115g) | Melted Ghee (115g) | Higher smoke point. Note: More intense buttery taste |
Once the waffles are out of the iron, don't stack them immediately. If you do, the steam trapped between them will turn that shatter crisp crust into a soggy mess.
Fixing Common Problems

Even with a precise method, things can go sideways. Usually, it comes down to temperature or mixing technique.
Troubleshooting Common Issues
| Issue | Solution |
|---|---|
| Why Your Waffles Are Sticking | This usually happens if the iron isn't hot enough when the batter hits the surface or if you're opening the lid too early. The batter needs to "set" and create a crust before it can be released. If yo |
| Why the Center Is Gummy | A gummy center often means the batter was too wet or the heat was too high, searing the outside before the inside could cook through. Ensure your measurements are exact, especially the flour. |
| How to Stop Sogginess | The biggest enemy of Belgian Waffles is humidity and stacking. To keep them crisp, place them in a single layer on a wire rack. This allows air to circulate around the entire waffle, preventing steam |
Consistency Checklist:
- ✓ Egg whites reached stiff peaks before folding.
- ✓ Batter was folded gently, not stirred.
- ✓ Waffle iron was fully preheated before pouring.
- ✓ Waffles were removed only after steam stopped.
- ✓ Cooled on a wire rack, not a plate.
Adjusting the Batch Size
If you're just cooking for yourself or hosting a crowd, you can scale these Belgian Waffles, but you have to be smart about the ratios.
For a smaller batch (half), you can't easily split an egg. Beat one egg in a small cup and use exactly half of it by weight or volume. Use a smaller pan if you're doing a modified version, and reduce the total cooking time by about 20% if the batter layer is thinner.
When scaling up (2x or 4x), don't just multiply the salt and spices by four. I usually go to 1.5x for salt and vanilla to avoid an overpowering taste. Work in batches; if you make too much batter and let it sit for an hour, the baking powder will lose its punch and the egg whites will deflate.
Quick Decision Shortcut:
- If you want a deeper crunch, add an extra tablespoon of melted butter.
- If you want a lighter, cloud like feel, whip the egg whites for an extra 60 seconds.
- If you want a sweeter base, swap the granulated sugar for brown sugar.
Common Kitchen Myths
You'll hear a lot of advice about waffles, but some of it is just noise. Let's clear a few things up.
One big myth is that you should let the batter rest for 30 minutes. While this works for pancakes to relax the gluten, for Belgian Waffles, it's a disaster. Resting the batter allows the whipped egg whites to collapse, meaning you lose that signature lift. Mix and cook immediately.
Another one is that "more sugar equals more crisp." Actually, too much sugar can cause the waffles to burn on the outside before the middle is cooked. The crispness comes from the fat in the butter and the aeration from the eggs, not the sugar.
Storage and Waste
If you have leftovers, don't just throw them in a plastic bag. Store them in the fridge for up to 3 days in an airtight container, but only after they are completely cold.
For long term storage, these Belgian Waffles freeze beautifully. Place a piece of parchment paper between each waffle so they don't stick together, then freeze in a heavy duty freezer bag for up to 2 months. To reheat, skip the microwave it makes them rubbery.
Use a toaster or a 180°C (350°F) oven for 5 minutes until they regain their shatter crisp edges.
To avoid waste, if you have a bit of leftover batter, you can stir in some leftover blueberries or diced apple and cook them as "pancake waffles" the next morning. If you have leftover melted butter, save it in a jar in the fridge for sautéing vegetables.
Best Topping Ideas
Now for the fun part. Since these Belgian Waffles are so rich and airy, they can handle some heavy hitting toppings without feeling overwhelming.
For a gourmet touch, try a dollop of mascarpone cheese mixed with a bit of honey and fresh raspberries. The tanginess of the cheese cuts through the buttery flavor of the waffle perfectly. If you're feeling traditional, a knob of salted butter and a generous pour of warm, Grade A maple syrup is unbeatable.
For something different, try a savory sweet combo: a slice of salty prosciutto and a drizzle of fig jam. The contrast of the salty meat against the velvety interior of the waffle is brilliant. Whatever you choose, just make sure you're serving them immediately while they're still hot from the iron.
Once you've mastered the timing and the fold, these Belgian Waffles will become your go to for any special morning. It's all about that balance of precision and passion in the kitchen. Right then, get your iron heated up and let's get cooking!
Recipe FAQs
What makes a Belgian waffle different?
They are significantly lighter and airier. This texture is achieved by beating egg whites to stiff peaks and gently folding them into the batter.
Which waffles are good for diabetics?
None from this specific recipe. These contain all-purpose flour and granulated sugar, which are high in carbohydrates and can impact blood glucose levels.
Are Belgian waffles originally from Belgium?
Yes, they are. The style originated in Belgium, eventually branching into distinct varieties like the Brussels and Liège waffles.
What is the difference between Brussels and Belgian waffles?
Brussels waffles are a specific type of Belgian waffle. While "Belgian" is a general term, Brussels waffles are known specifically for their rectangular shape and light, crisp texture.
Why are my waffles sticking to the iron?
The iron is likely not hot enough or the lid was opened too early. The batter needs enough time to set and create a crust before it can be released cleanly.
How to reheat frozen waffles?
Use a toaster or a 180°C (350°F) oven for 5 minutes. Avoid the microwave, as it makes the waffles rubbery instead of crisp.
Why is the center of my waffle gummy?
The batter was likely too wet or the heat was too high. This causes the outside to sear before the inside cooks through, so ensure your flour measurements are exact.
Crispy Belgian Waffles