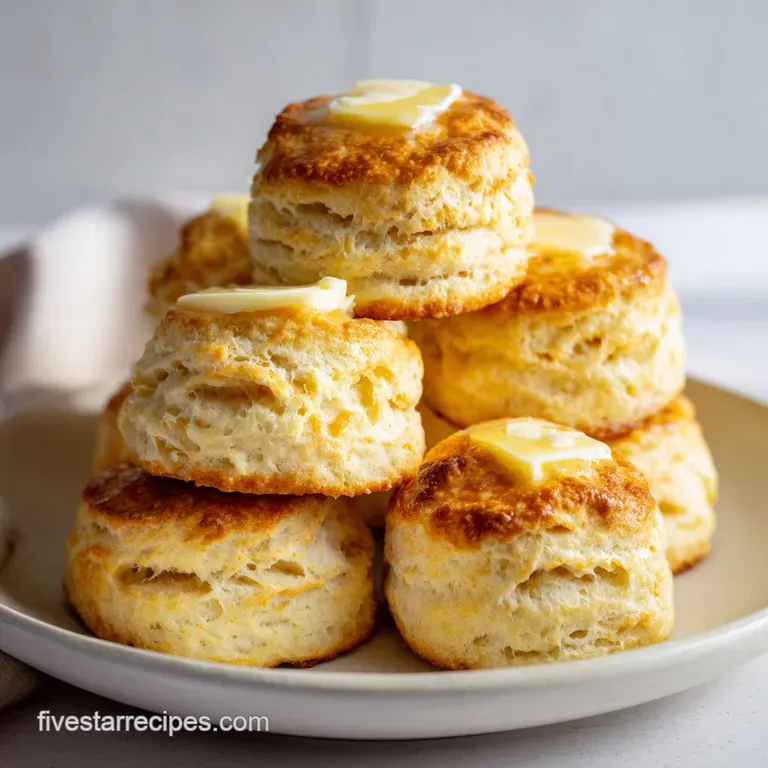
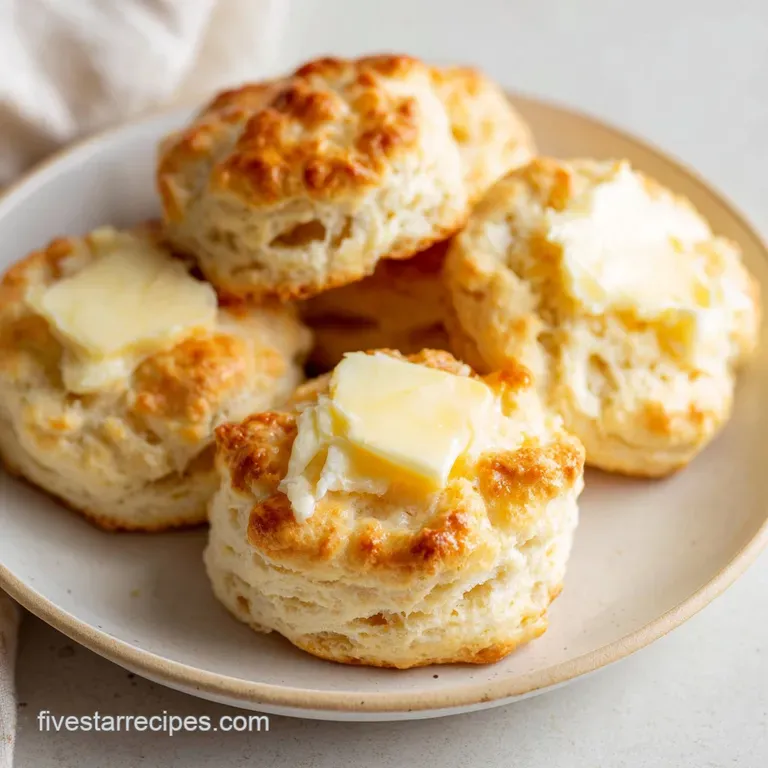
Southern Buttermilk Biscuits: Flaky and Tall
- Time:20 minutes active + 15 minutes baking = Total 35 minutes
- Flavor/Texture Hook: Tangy, buttery, and mahogany colored with a flaky interior
- Perfect for: Sunday brunch, holiday breakfasts, or a comforting side for dinner
- The Secret to High Rising Buttermilk Biscuits
- Ingredient Role and Science
- The Necessary Baking Tools
- Step-by-Step Baking Process
- Avoiding Common Biscuit Mistakes
- Creative Flavor Variations
- Storage and Freezing Guide
- What to Serve with Biscuits
- Precision Baking Adjustments
- Common Baking Misconceptions
- Recipe FAQs
- 📝 Recipe Card
The scent of browned butter and toasted flour hitting a hot oven is basically my love language. There's nothing quite like that moment when you pull a tray out and the tops are just starting to crack, releasing a cloud of warm, tangy steam.
But let's be real, most people struggle with a specific, frustrating failure: the rubbery biscuit. You know the one. It's dense, it's chewy, and it feels more like a hockey puck than a cloud. This usually happens because of over working the dough or using butter that's too warm, which kills the lift.
This version of Buttermilk Biscuits fixes that by focusing on temperature and structure. We aren't just mixing ingredients; we're building layers. I'll show you how to get that five star, tall standing result every single time without needing a professional kitchen.
The Secret to High Rising Buttermilk Biscuits
The magic isn't in a secret ingredient, but in how we handle the fat. When cold butter hits a 220°C oven, the water in the butter evaporates instantly, creating steam that pushes the dough upward. If the butter melts before it hits the oven, you lose that lift and end up with a flat, greasy disc.
- Steam Pockets
- Tiny bits of solid butter melt and evaporate, forcing the flour layers apart.
- Acid Reaction
- Buttermilk reacts with baking powder to create an immediate lift.
- Gluten Control
- Minimal stirring prevents the proteins from becoming too elastic, keeping the texture tender.
- Lamination
- Folding the dough creates physical sheets of fat and flour, similar to a pastry.
| Feature | Fresh Cut Method | Shortcut/Drop Method |
|---|---|---|
| Texture | Shatter crisp layers | More cake like/crumbly |
| Height | Very tall and structured | Moderate, rounded rise |
| Effort | Requires folding and cutting | Stir and scoop |
| Best For | Gourmet brunch | Quick weeknight sides |
Ingredient Role and Science
Understanding what each part does helps you avoid mistakes. For example, according to King Arthur Baking, the protein content in your flour significantly impacts how much the biscuit will rise.
| Ingredient | Science Role | Pro Secret |
|---|---|---|
| All Purpose Flour | Provides the structural frame | Spoon it into the cup or weigh it (250g) to avoid density |
| Cold Butter | Creates steam for lift | Grate it while frozen for a more even distribution |
| Buttermilk | Tenderizes gluten with acid | Use full fat for a more velvety crumb |
| Baking Powder | Primary leavening agent | Check the expiration date; old powder equals flat biscuits |
The Necessary Baking Tools
You don't need a fancy lab, but a few specific tools make the process foolproof. A pastry cutter is great, but two knives or a fork work just as well to incorporate the butter.
I always use a heavy bottomed baking sheet. Thin pans tend to warp in a 425°F oven, which can lead to uneven bottoms. If you have a biscuit cutter, make sure it has a sharp edge. A dull cutter squashes the sides of the dough, sealing the edges and preventing the Buttermilk Biscuits from rising.
For the surface, a wooden board or a clean countertop works, but make sure it's not too warm. If you're baking in a hot kitchen, I actually pop my mixing bowl in the freezer for 10 minutes before starting. It's a small step, but it keeps the butter from softening while you work.
Step-by-step Baking Process
Right then, let's get into the actual build. Precision is everything here, so keep your ingredients cold until the very second they enter the bowl.
Step 1: The Cold Prep
Preheat your oven to 425°F (220°C) and line a baking sheet with parchment paper. In a large bowl, whisk together 2 cups (250g) of all purpose flour, 1 tbsp (12g) baking powder, 1 tsp (6g) sugar, and 1/2 tsp (3g) salt until no clumps remain.
Note: Whisking aerates the flour for a lighter start.
Step 2: Integrating the Fat
Add 1/2 cup (113g) of ice cold, cubed unsalted butter. Use a pastry cutter to work the butter in until the mixture looks like coarse crumbs. Stop when you still see pea sized chunks. These chunks are the "fuel" for your layers.
Step 3: Hydrating the Dough
Pour in 3/4 cup (180ml) of cold buttermilk. Stir gently with a spatula just until the flour is moistened. Do not over mix; the dough should look a bit shaggy and barely held together.
Step 4: The Lamination Fold
Turn the dough onto a floured surface and pat it into a rectangle. Fold the dough in half, turn it 90 degrees, and pat it down again. Repeat this 5-6 times. This creates the structural layers that make these Buttermilk Biscuits so flaky.
Step 5: Cutting and Baking
Pat the dough to a 1 inch (2.5cm) thickness. Press a 2.5 inch cutter straight down without twisting. Place them on the sheet so they are just touching. Bake for 12-15 minutes until the tops are mahogany colored.
Step 6: The Final Touch
Immediately brush the tops with 2 tbsp (28g) of melted unsalted butter. This softens the crust slightly and adds that gourmet, glossy finish.
Avoiding Common Biscuit Mistakes
If your first batch didn't quite hit the mark, don't sweat it. Most issues come down to temperature or handling. For instance, if you've noticed your dough is too sticky, you might be over mixing it, which develops too much gluten and makes the dough "fight" the rise.
Why Your Biscuits Are Flat
This usually happens because the butter melted before the biscuits hit the oven, or the cutter was twisted. Twisting the cutter seals the edges of the dough, which acts like a belt around the biscuit, preventing it from expanding upward.
Why Your Biscuits Are Tough
Rubbery texture is almost always the result of over working the dough. The more you stir, the more gluten forms. You want the dough to be "just" combined. If it looks a bit messy, you're doing it right.
| Problem | Root Cause | Solution |
|---|---|---|
| Flat tops | Twisted the cutter | Press straight down and lift straight up |
| Rubbery texture | Over mixing the dough | Stir only until flour disappears |
| Pale color | Oven temp too low | Use an oven thermometer to verify 220°C |
Precision Checklist:
- ✓ Butter is ice cold (feels hard to the touch)
- ✓ Dough is patted to exactly 1 inch thickness
- ✓ Cutter is pressed straight down (no twisting)
- ✓ Oven is fully preheated to 425°F (220°C)
- ✓ Buttermilk is chilled
Creative Flavor Variations
Once you've nailed the base recipe for Buttermilk Biscuits, you can start playing with additions. The key is to keep the additions dry or very finely minced so they don't throw off the hydration ratio.
The Southern Classic: Fold in 1/2 cup of sharp cheddar cheese and a pinch of cayenne pepper. The cheese creates little fried pockets of gold on the sides of the biscuit.
The Sweet & Salty: Add 1 tsp of cinnamon to the dry ingredients and swap the melted butter topping for a honey butter glaze. These are incredible when paired with Homemade Vanilla Whipped Cream for a dessert style treat.
The Herbed Version: Mix in 1 tbsp of fresh chopped rosemary or thyme. This is great if you're serving these alongside a roast or a hearty stew.
Chef's Tip: To get an even deeper flavor, try substituting 2 tablespoons of the flour with cornmeal. It adds a subtle grit and a more rustic, golden color to the crust.
Storage and Freezing Guide
These are best eaten warm, but you can definitely plan ahead. If you have leftovers, store them in an airtight container at room temperature for 2 days or in the fridge for up to 5 days.
Reheating: Never use a microwave; it turns them rubbery. Instead, pop them in a 350°F (180°C) oven for 5 minutes or use a toaster oven. This brings back the shatter crisp exterior.
Freezing: You can freeze the raw cut biscuits on a tray before baking. Once frozen solid, transfer them to a freezer bag. Bake them straight from the freezer, adding 2-3 minutes to the cooking time.
Zero Waste: If you have leftover buttermilk, don't toss it! It's a fantastic marinade for chicken, as the acid breaks down the proteins and makes the meat incredibly tender. You can also use it in pancake batter for extra fluffiness.
What to Serve with Biscuits
Because of their rich, buttery profile, Buttermilk Biscuits need something to cut through the fat. A sharp jam or a salty gravy is the traditional route.
For a full meal, I highly recommend making Biscuits and Gravy. The creaminess of the sausage gravy seeps into those flaky layers we worked so hard to create. If you're feeling more adventurous, you can use these as the base for a sweet treat, similar to the layers in Monkey Bread.
If you want something lighter, try serving them with a side of fresh berries and a dollop of clotted cream. The acidity of the berries balances the richness of the butter perfectly.
Precision Baking Adjustments
When you need to change the batch size, you can't just double everything blindly, especially with leavening agents.
Scaling Down (1/2 batch): Use a smaller baking sheet and reduce the bake time by about 2 minutes. Since you'll be using half an egg or small amounts of liquid, use a digital scale for precision.
Scaling Up (2x batch): Work in batches. If you crowd too many Buttermilk Biscuits on one tray, the oven temperature drops too much, and they won't get that mahogany crust. Also, only increase the salt and baking powder by 1.5x to avoid a metallic aftertaste.
| Goal | Adjustment | Result |
|---|---|---|
| Extra Flake | Freeze butter 10 mins more | More distinct layers |
| Softer Bite | Add 1 tbsp heavy cream | More velvety crumb |
| Darker Crust | Brush with egg wash | Deeper gold color |
Common Baking Misconceptions
There are a few myths about this dish that I want to clear up. First, some people think you need a specialized "biscuit flour" to get a high rise. While low protein flour helps, the lamination (folding) process is far more important for the actual structure.
Another myth is that you should "knead" the dough to make it strong. In bread, yes, but in Buttermilk Biscuits, kneading is the enemy. Kneading develops gluten, which creates a tough, bready texture rather than a flaky, tender one.
Finally,, don't believe that you need to chill the dough for hours. While it doesn't hurt, the most critical part is that the ingredients start cold. As long as you work quickly, you can go from bowl to oven in 20 minutes.
Recipe FAQs
Why must the butter be ice-cold?
Cold butter creates steam pockets. As the butter melts in the 425°F oven, it releases steam that lifts the dough, creating essential flaky layers.
How to create structural layers in the dough?
Pat the dough into a rectangle and fold it in half. Turn the dough 90 degrees and pat down, repeating this folding process 5 6 times before cutting.
What happens if I over mix the dough?
The biscuits will become tough and dense. Over mixing develops too much gluten, which prevents the dough from rising properly.
How to cut the biscuits for the highest rise?
Press the cutter straight down without twisting. Twisting seals the edges of the dough, which prevents the biscuits from climbing upward during baking.
Can I use regular milk instead of buttermilk?
No, buttermilk is necessary for the rise and tang. If you enjoy the fluffy texture of banana pancakes, you'll recognize how acid helps the baking powder react for a better lift.
Is it true that reheating biscuits in the microwave is the best method?
No, this is a common misconception. Microwaving makes biscuits rubbery; instead, use a 350°F oven for 5 minutes to restore the crisp exterior.
How to freeze the biscuits for later use?
Freeze the raw cut biscuits on a tray. Once frozen solid, transfer them to a freezer bag and bake straight from the freezer, adding 2 3 minutes to the cook time.
Flaky Buttermilk Biscuits

