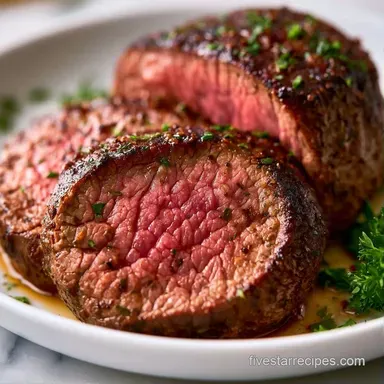
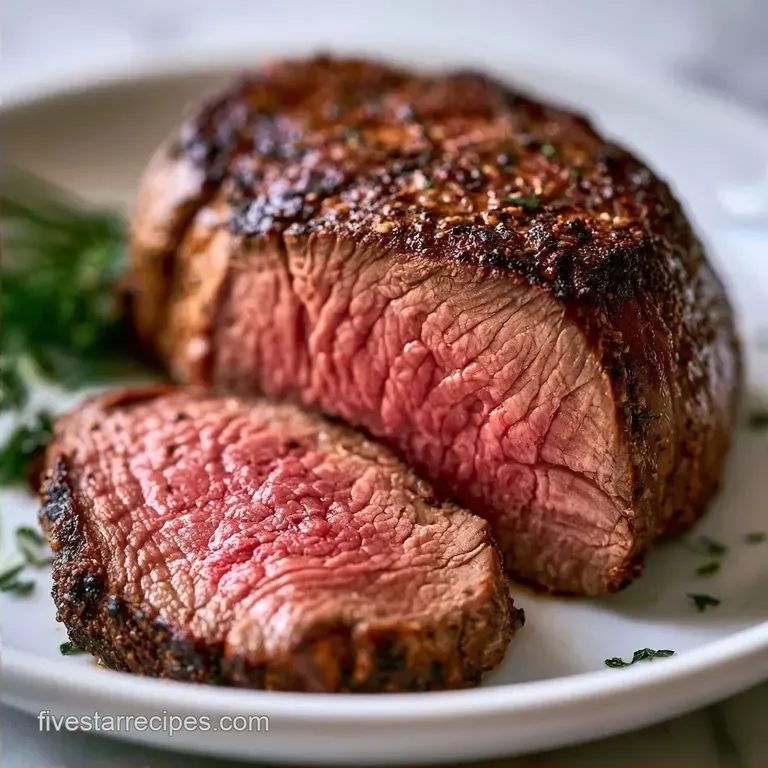
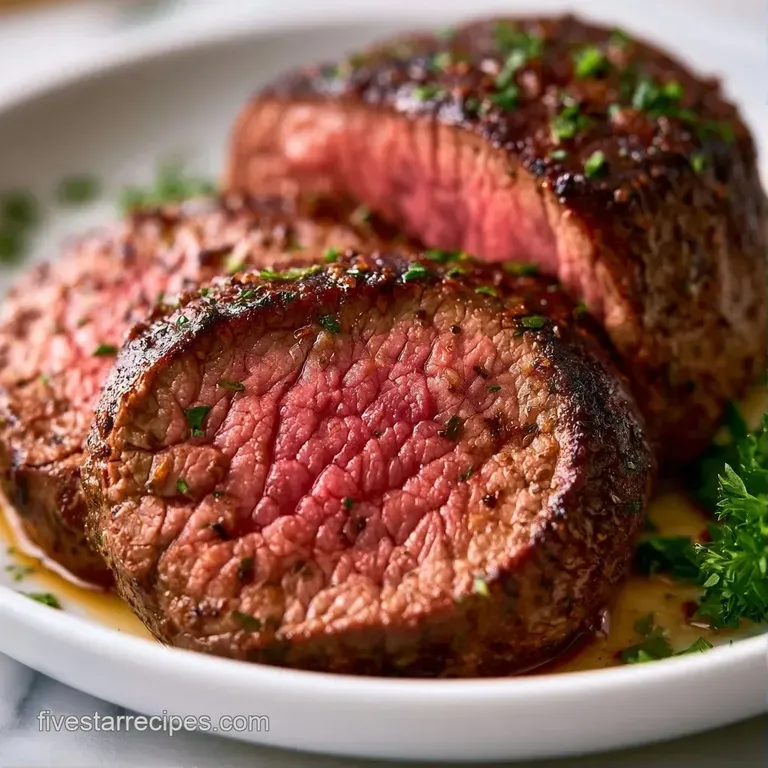
Perfect Grilled Tenderloin Steak: Mahogany Crust
- Time: 15 min active + 15 min cooking + 10 min resting
- Flavor/Texture Hook: Mahogany dark crust with a juicy, tender center
- Perfect for: Date nights or celebrating a win
Ever wondered why steakhouse beef always seems to have that deep, dark crust while home grilled steaks often look grey? I used to think it was just the expensive grills they used. I spent years trying to mimic that look, often overcooking my meat in the process because I stayed on the high heat too long.
The trick isn't the grill, but how you manage the heat zones. When I stopped treating the grill like one big hot plate and started using a "safe zone," everything changed.
You can expect a meal that feels like a high end experience but only takes a few minutes of actual work. We're making a Perfect Grilled Tenderloin that stays juicy and tender, avoiding that rubbery texture that happens when you panic and leave the meat on the fire too long.
Guide to Perfect Grilled Tenderloin
Right then, let's get into the meat of this. The goal here is contrast. We want a charred, savory exterior and a center that barely reaches medium rare. Because tenderloin is so lean, it doesn't have the fat buffers that a ribeye has, so your window of success is smaller.
I've found that the most important part of the process happens before the meat even touches the grate. If the steak is cold or damp, you'll end up steaming the meat instead of searing it. You want a hiss, not a bubble.
This recipe relies on a simple rub and a strict temperature pull. We aren't using heavy marinades that mask the beef flavor. Instead, we use a few key spices to highlight the natural richness of the center cut beef.
Hidden Truths About Beef
The Temp Gap: Meat continues to cook after you take it off the grill. This is called carryover cooking, and according to Serious Eats, the internal temperature can rise by 5 to 10 degrees while resting.
Moisture Control: Water is the enemy of a good sear. Any moisture on the surface of the beef turns into steam, which prevents the meat from reaching the temperatures needed for a brown crust.
The Salt Timing: Salting too early without enough time for the moisture to re absorb can actually draw juices out of the meat. I prefer salting right before the oil and rub go on for this specific cut.
| Method | Time | Texture | Best For |
|---|---|---|---|
| Stovetop | Fast | Great crust, uneven center | Single steaks |
| Oven | Slow | Even, but lacks char | Whole roasts |
| Grill | Medium | Smoky, deep crust | Perfect Grilled Tenderloin |
Quick Recipe Specs
For this recipe, we're focusing on center cut steaks to ensure consistency across all four servings.
Precision Checkpoints:
- Pull Temp: 125°F (52°C) for medium rare.
- Sear Time: 3-4 minutes per side.
- Rest Time: 10 minutes on a wire rack.
Decision Shortcut:
- Want it more charred? Increase sear to 5 mins per side.
- Prefer medium? Pull at 135°F.
- Using a charcoal grill? Add a handful of hickory chips for extra depth.
Ingredient Deep Dive
Every item here serves a purpose. We aren't just adding flavor; we're managing how the meat reacts to the flame.
| Ingredient | What It Does | Best Swap |
|---|---|---|
| Avocado Oil | High smoke point prevents burning | Grapeseed oil |
| Kosher Salt | Draws out flavor and creates crust | Sea salt |
| Smoked Paprika | Adds a subtle "outdoor" aroma | Ancho chili powder |
| Garlic Powder | Provides a savory base without burning | Onion powder |
Necessary Grilling Tools
You don't need a professional rig, but a few tools make the Perfect Grilled Tenderloin much easier to handle. A digital meat thermometer is non negotiable here. Guessing by "the finger test" is how you end up with an overcooked steak.
I recommend a wire rack for resting. If you put the meat directly on a plate, the bottom sears itself in its own juices and gets soggy. A rack keeps the airflow moving, preserving that crust we worked so hard for.
Finally, use long handled tongs. Avoid using a fork to flip the meat. Poking holes in the tenderloin lets the juices leak out, which is a tragedy for such a lean cut of beef.
The Cooking Process
Now we get to the actual work. Let's crack on.
- Remove steaks from the fridge 30-60 minutes early. Note: This ensures the center cooks evenly with the outside.
- Pat the meat completely dry with paper towels. Note: This removes surface moisture for a better sear.
- Rub avocado oil over the steaks.
- Apply salt, pepper, garlic powder, and smoked paprika. Note: Press the rub in with your palms so it sticks.
- Preheat the grill to 450°F (230°C) on one side, leaving the other side low.
- Place the meat over high heat. Sear 3-4 minutes per side until a deep, mahogany colored crust forms.
- Move steaks to the cool zone. Note: This prevents the outside from burning while the inside finishes.
- Close the lid and monitor with a probe.
- Remove from grill when 5°F below target (.g., 125°F for medium rare).
- Transfer to a wire rack and tent loosely with foil for 10 minutes.
Pro Tips and Pitfalls
One mistake I made early on was ignoring the "two zone" setup. I tried to cook the whole thing over high heat and ended up with a burnt exterior and a raw center. By moving the meat to the cool side, you're essentially using the grill like an oven to gently bring the center up to temp.
If you find your grill is having flare ups from the oil, don't panic and move the meat constantly. Just slide it a few inches to the side. Moving it too much prevents that dark crust from forming.
For those who love a more complex flavor, you can add a pat of garlic herb butter during the last 2 minutes of resting. It melts into the crust and adds a rich, glossy finish. If you're in the mood for something different, my chimichurri tenderloin is a great way to add acidity to the richness.
Dealing with Flare Ups
Flare ups happen when fat drips onto the burners. Keep a spray bottle of water handy or simply move the meat to the indirect zone.
Solving Overcooked Meat
If you overshot your temp, don't slice it immediately. Let it rest longer. While you can't "un cook" it, a longer rest helps redistribute what moisture is left.
| Problem | Root Cause | Solution |
|---|---|---|
| Grey exterior | Meat was too wet or grill too cold | Pat dry; preheat longer |
| Tough texture | Overcooked or didn't rest | Pull at 125°F; rest 10 mins |
| Rub burned | Too much sugar or too high heat | Use high smoke point oil; use two zone |
Creative Flavor Swaps
The Perfect Grilled Tenderloin is a blank canvas. While the smoked paprika version is my go to, you can easily shift the profile. For a more intense, woody flavor, I highly suggest trying the smoky grilled tenderloin method.
If you want to go in a different direction, try swapping the paprika for a teaspoon of ground cumin and a pinch of cinnamon for a Moroccan vibe. For a more classic steakhouse feel, skip the paprika and just use a heavy hand with the coarse black pepper.
If you're watching your salt intake, you can swap Kosher salt for a potassium based salt alternative. Just be aware that some alternatives have a slightly metallic aftertaste, so use a bit more garlic powder to balance it out.
Storage and Waste Tips
If you have leftovers, let them cool completely before wrapping them tightly in foil and placing them in an airtight container. They'll stay good in the fridge for 3-4 days.
To reheat, don't use the microwave it'll turn your beef into rubber. Instead, slice the meat and flash sear the slices in a hot pan with a tiny bit of butter for 60 seconds per side.
Don't throw away the fat trimmings from the steak. I save them in the freezer and render them down to make a beef tallow. It's the best fat for roasting potatoes or searing other meats.
Serving and Enjoying
To make this a gourmet experience, focus on color balance on the plate. The deep brown of the Perfect Grilled Tenderloin needs bright accents to pop.
- - Bright Green
- A heap of fresh parsley or blanched asparagus.
- - Vibrant Red
- Roasted cherry tomatoes or sliced radishes.
- - Sunny Yellow
- A squeeze of fresh lemon or a side of grilled corn.
Add the green and red elements first, then place the steak on top. Finish with the yellow accent as a garnish. This creates a visual contrast that makes the meal feel like a special occasion.
Trust me on the resting time. I know it's tempting to slice into that steak the second it comes off the grill, but those 10 minutes are when the magic happens. The juices settle back into the fibers, ensuring every bite is tender. Right then, grab your tongs and get grilling!
Recipe FAQs
How to cook beef tenderloin on a gas grill?
Preheat the grill to 450°F using a two-zone heat system. Sear for 3-4 minutes per side over high heat, then move to the cool zone until it reaches 5°F below your target temperature.
How to cook beef tenderloin on a charcoal grill?
Create a two-zone fire by piling hot coals on one side. Sear the beef directly over the coals for 3-4 minutes per side and finish on the indirect heat side with the lid closed.
How long should you grill beef tenderloin?
Sear for 3-4 minutes per side and use a digital probe for the finish. Always remove the meat from the heat 5°F before it reaches your desired final internal temperature to allow for carryover cooking.
How to cook a 2 lb beef tenderloin?
Remove the meat from the fridge 30-60 minutes early to take the chill off. Pat the surface completely dry and use the two-zone grilling method to ensure the 2 lb cut cooks evenly.
What is the best rub for grilled beef tenderloin?
Combine salt, pepper, garlic powder, and smoked paprika. If you loved the flavor balancing here, see how we use a similar approach in our Balsamic Glazed version.
Is it true that tenderloin must be marinated to stay juicy?
No, this is a common misconception. Beef tenderloin is naturally the most tender cut of beef; focusing on a dry rub and proper resting is more effective for maintaining juiciness.
How to reheat leftover grilled tenderloin?
Flash sear slices in a hot pan for 60 seconds per side. Avoid using a microwave, as it will turn the beef rubbery.
Perfect Grilled Tenderloin