Double Chocolate Cookie Dough Ice Cream in 45 Minutes
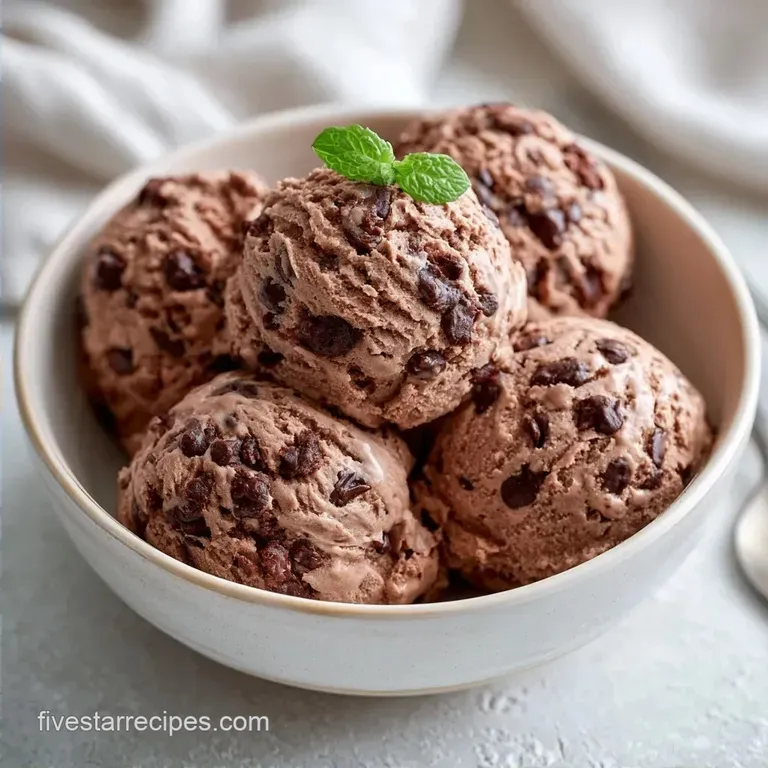
- Time: 30 min active + 6 hours 30 mins freezing
- Flavor/Texture Hook: Intense cocoa base with thick, fudge-like dough chunks
- Perfect for: Gourmet dessert nights or beginner-friendly hosting
The scent of cocoa powder heating in a pan is my cue to start. There is something deeply comforting about the smell of toasted flour and melting chocolate. When I first made this, I neglected to freeze the cookie dough balls beforehand.
Folding them in while warm caused them to dissolve into the cream, leaving me with a muddy brown swirl instead of distinct, chewy chunks of dough.
You will love how easily this comes together. No expensive equipment is required, just a couple of bowls and a little bit of patience. This Chocolate Cookie Dough Ice Cream offers a heavy, indulgent chocolate flavor reminiscent of a professional creamery, but the process is very straightforward once you've managed the flour safety.
The objective is a contrast in mouthfeel. You want the airy, frozen chocolate base to pop against the salty, dense richness of the dough. It requires a bit of effort, but since most of the process is simply waiting for the freezer, it is an easy win for anyone craving a gourmet treat.
What Makes the Texture Work
Condensed Milk: Using this instead of a custard base removes the need for churning. It has less water than regular milk, which means fewer ice crystals and a much smoother mouthfeel.
Heat Treated Flour: We bring the flour to 160°F to make it safe to eat raw. This removes pathogens without actually "cooking" the dough, so it stays soft and dense rather than turning into a baked cookie.
Pre Frozen Dough: Chilling the dough chunks for 20 minutes before folding them in is a must. It keeps them from sinking to the bottom of the container and prevents them from melting the whipped cream base.
| Method | Time | Texture | Best For |
|---|---|---|---|
| Stovetop Flour | 5 mins | Evenly toasted | Precision control |
| Microwave Flour | 2 mins | Fast heat | Quick prep |
| Baked Cookies | 12 mins | Crunchy/Firm | Traditional style |
If you're looking for a different flavor profile, you might like the clean taste of a Ice Cream for 8 recipe, but for pure indulgence, this cocoa version wins.
Essential Ingredient Roles
For the dough, we rely on brown sugar to get that chewy, fudge like consistency. White sugar would make the dough too crumbly and dry. The milk provides just enough hydration to bind the cocoa and flour without making the dough sticky.
The ice cream base is a balance of fats. The heavy cream provides the air and lift, while the sweetened condensed milk provides the structure and sweetness. Sifting the cocoa powder is a non negotiable step here.
If you don't, you'll end up with tiny bitter pockets of dry powder in your cream, which ruins the glossy finish.
For the chocolate chips, mini chips are better than standard ones. Large chips can be too hard when frozen, making the ice cream feel like it has pebbles in it. Mini chips melt slightly on the tongue, blending into the dough.
What You'll Need
For the Edible Chocolate Cookie Dough
- 1 cup all purpose flour Why this? Provides the structural base for the dough
- 1/2 cup unsalted butter, softened Why this? Creates a creamy, rich mouthfeel
- 1/3 cup brown sugar, packed Why this? Adds molasses notes and chewiness
- 2 tbsp milk Why this? Binds the dry ingredients
- 2 tbsp cocoa powder Why this? Gives the dough a deep chocolate flavor
- 1 tsp vanilla extract Why this? Enhances the cocoa profile
- 1/4 tsp salt Why this? Balances the sugar
- 1/2 cup mini chocolate chips Why this? Adds textural contrast
For the Chocolate Ice Cream Base
- 2 cups heavy whipping cream, cold Why this? Provides the airy, fluffy lift
- 14 oz sweetened condensed milk Why this? Prevents ice crystals without churning
- 1/2 cup unsweetened cocoa powder Why this? Creates the dark chocolate base
- 1 tsp vanilla extract Why this? Rounds out the sweetness
- 1/8 tsp salt Why this? Cuts through the richness
| Original Ingredient | Substitute | Why It Works |
|---|---|---|
| Brown Sugar | Coconut Sugar | Similar moisture. Note: Slightly more caramel flavor |
| Heavy Cream | Full Fat Coconut Cream | Same fat content. Note: Adds coconut notes |
| All Purpose Flour | Oat Flour (Certified GF) | Similar density. Note: Earthier taste, denser dough |
If you love this level of chocolate, you should definitely try my Cookies with Brown Butter recipe for a baked version of these flavors.
Equipment Needed
While you don't need a scientific setup, a couple of items will simplify the process. The most essential "specialty" tool is a digital meat thermometer, ensuring your flour reaches precisely 160°F.
A stand mixer, like a KitchenAid, is excellent for whipping the cream, though a hand mixer is a perfectly fine alternative. Use a large, chilled metal bowl for the cream; keeping the bowl cold stabilizes the fat molecules, allowing peaks to form more quickly and maintain their structure.
You will also require a baking sheet for the dough balls and a freezer-safe vessel, ideally a 9x5 inch loaf pan or a plastic container with a secure lid.
Step-by-step Instructions
Preparing the Safe Cookie Dough
- Heat treat the flour. Place the flour in a skillet over medium heat, stirring constantly until it reaches 160°F (71°C). Let it cool entirely. Note: This step is essential for food safety, as per USDA guidelines, to eliminate bacteria in raw flour.
- Cream together the softened butter and brown sugar. Beat until the mixture is pale and fluffy.
- Stir in the milk, vanilla, cocoa powder, and salt. Mix until a smooth, mahogany-colored paste forms.
- Incorporate the mini chocolate chips. Use a spatula to fold them in by hand.
- Scoop dime-sized balls of dough onto a baking sheet. Freeze for 20 minutes until they are firm to the touch.
Making the Chocolate Base
- Sift the cocoa powder and salt into the sweetened condensed milk. Whisk until the mixture is glossy and lump-free.
- Beat the cold heavy whipping cream and vanilla. Mix until stiff peaks form. Be careful not to over-beat, or you'll end up with chocolate butter.
- Fold the whipped cream into the chocolate condensed milk. Use a gentle cutting-and-folding motion until no white streaks remain.
Final Assembly
- Pour half of the chocolate base into your container. Drop in half of the frozen dough chunks.
- Top with the remaining base and the rest of the dough. Gently swirl the dough with a knife, cover with plastic wrap touching the surface, and freeze for at least 6 hours.
Fixes for Common Problems

Most problems with Chocolate Cookie Dough Ice Cream are caused by temperature. If the dough is too soft, it tends to bleed into the base. If the cream is too warm, it won't trap air, leaving you with a dense, icy mass rather than a light scoop.
Dealing with Sticky Dough
If the dough won't roll into balls, the butter was likely too warm, causing the fat to separate and the flour to slide. Adding a tablespoon of extra heat-treated flour usually corrects the consistency.
Solving Icy Textures
Ice crystals form when air escapes or water freezes slowly. To stop frost from forming, press the plastic wrap firmly against the cream to block air exposure.
Handling Runny Base
A thin base typically means the whipped cream wasn't beaten enough. Without stiff peaks, the internal structure collapses. While you can't re-whip it after mixing, you can freeze it for a longer time to firm it up.
| Problem | Root Cause | Solution |
|---|---|---|
| Dough Sinking | Dough was too warm | Freeze dough balls for 20 mins before adding |
| Grainy Base | Cocoa powder not sifted | Sift cocoa through a fine mesh strainer |
| Hard to Scoop | Frozen too long/too cold | Let sit at room temp for 5 mins before scooping |
Mix It Up
Feel free to customize this Chocolate Cookie Dough Ice Cream to suit your preferences. For a more indulgent experience, try a "Double Chocolate" version by stirring 1/2 cup of chopped dark chocolate chunks into the ice cream base as well as the dough.
If you prefer a minty flavor, stir a drop of peppermint extract into the whipped cream. The coolness of the mint balances the heavy cocoa, making the dessert feel a bit lighter. For an elegant touch, fold in toasted pecans or hazelnuts for added crunch.
Decision Shortcut:
- Extra fudgey? → add 2 tbsp extra cocoa to the dough
- Nutty notes? → fold in 1/4 cup toasted hazelnuts
- Less sweet? → reduce condensed milk by 2 oz
Adjusting the Batch Size
If you're making this for a small group, you can halve the recipe. Use a smaller 4x6 container. When halving, you'll need to beat one egg if you were using them (not applicable here, but a good rule for other doughs). For this recipe, just halve everything and reduce the final freeze time by about 20%.
Scaling up for a party (2x or 4x) requires a bit more care. Don't just quadruple the salt and spices, as they can become overpowering. Increase salt and vanilla to 1.5x only. Work in batches when whipping the cream, as most home mixers can't handle 8 cups of heavy cream at once without splashing.
If you're doubling the recipe in a larger pan, lower the freezer temperature slightly if possible, and expect it to take 8-10 hours to set completely in the center.
Common Dessert Myths
A lot of people think you need an expensive churner to get a smooth texture. That's not true. The high sugar content in condensed milk lowers the freezing point of the mixture, which prevents large ice crystals from forming.
Another myth is that "raw" flour is fine as long as you don't use eggs. Flour is a raw agricultural product and can carry bacteria. Heat treating it to 160°F is the only way to ensure the dough is safe without changing the texture.
Some say adding alcohol prevents freezing. While a lot of vodka would make it a soup, a tablespoon of Irish cream or vanilla liqueur actually helps the ice cream stay softer in the freezer by further lowering the freezing point.
Freezing and Scraps
Keep your Chocolate Cookie Dough Ice Cream in a sealed container. It will last in the freezer for as long as 2 months, after which it may begin to absorb odors from other frozen foods.
To minimize waste, store any remaining heat-treated flour in a tight jar in your cupboard for future no-bake recipes. Any leftover whipped cream can be folded into fresh berries for a simple dessert.
Regarding "reheating", since you obviously wouldn't heat ice cream, we are actually talking about tempering. For the perfect scoop, transfer the container to the refrigerator for 15 minutes before serving. This softens the outer edges while keeping the middle chilled.
Great Flavor Pairings
Since this dessert is quite decadent, aim for pairings that introduce acidity or a temperature shift. Pouring warm raspberry coulis over a chilled scoop of Chocolate Cookie Dough Ice Cream provides a fantastic contrast.
It also tastes great with sliced strawberries or a few fresh raspberries. The tart fruit helps balance the richness of the cream and the sweetness of the condensed milk. For beverages, a bold, unsweetened espresso or cold almond milk offsets the sugar perfectly.
If you are hosting a dinner party, a tiny bit of flaky sea salt on top will help the chocolate notes stand out.
Recipe FAQs
Do they make chocolate chocolate chip cookie dough ice cream?
You can make a double-chocolate version by folding cocoa-flavored dough into a chocolate base.
Tip: use mini chocolate chips for better distribution in every scoop.
How to turn cookie dough into ice cream?
Fold chilled dough chunks into a mixture of whipped cream and chocolate condensed milk.
Tip: freeze the dough balls for 20 minutes first to prevent them from sinking.
Is it true you can bake the dough from this ice cream?
No, and here's why. The recipe is designed for raw eating and lacks the lifting agents required for baking.
Tip: stick to eating this version chilled.
What pairs well with this rich dessert?
Fresh strawberries or raspberries cut through the heavy chocolate flavors.
Tip: serve these alongside a fruit board for a complete dessert spread.
Chocolate Cookie Dough Ice Cream in 45 Min