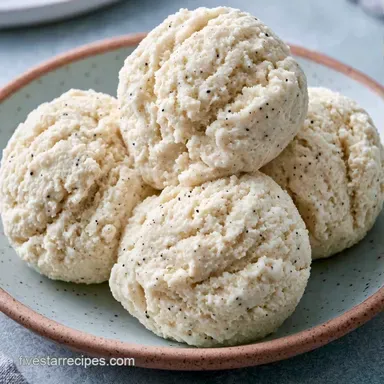
Rich and Dense Vanilla Bean Ice Cream
- Time: 15 min active + 6 hours 15 mins chilling/cooking
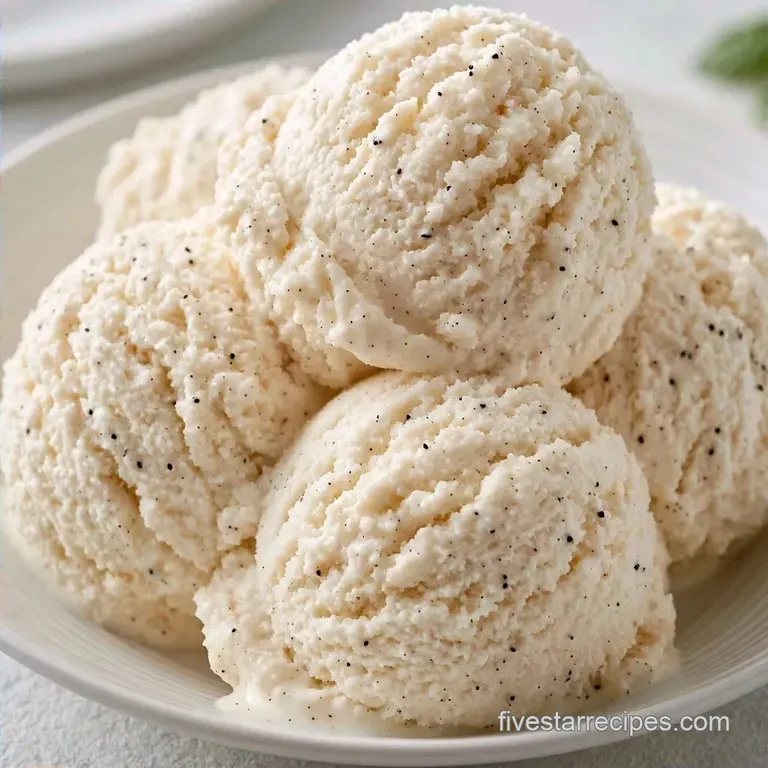
- Flavor/Texture Hook: Rich, dense custard with visible vanilla specks
- Perfect for: Dinner party desserts or a gourmet weekend project
The smell of a freshly sliced vanilla bean is something else. It's not just "vanilla" like the extract in the cupboard, but earthy, floral, and deep. I used to rely on just the bottle, but the difference is night and day once you scrape those tiny black seeds into the cream.
This version isn't a quick mix. It's a proper custard that requires a bit of patience. You'll get a result that feels heavy on the spoon and melts slowly, rather than that airy, whipped feel of store-bought pints.
We're going for a dense, creamy consistency. Because we're using egg yolks, the base is stable and rich. It's the kind of dessert that doesn't need toppings, though a few fresh berries always help.
Vanilla Bean Ice Cream Essentials
The Egg Yolks: Yolks act as emulsifiers, binding the fat and water so the texture stays smooth. The Chilling Period: A cold base prevents large ice crystals from forming during the churn.
| Method | Time | Texture | Best For |
|---|---|---|---|
| Custard Base | 6+ hours | Dense & Rich | Gourmet desserts |
| Quick Mix | 1 hour | Airy & Light | Last minute cravings |
What Each Ingredient Does
| Ingredient | What It Does | Best Swap |
|---|---|---|
| Heavy Cream | Provides fat for creaminess | Full fat coconut cream (adds nuttiness) |
| Egg Yolks | Emulsifies and thickens | Cornstarch slurry (results in less richness) |
| Vanilla Bean | Adds depth and visual specks | Double fold vanilla paste |
Choosing the Right Ingredients
I always tell people to look for Grade B vanilla beans if they can find them. They have a higher vanillin content, which means the flavor is more intense. When you slice into one, it should be moist and pliable, not dry or brittle.
Don't try to save money by using low-fat milk or half and half here. The fat content is what prevents the ice cream from becoming a block of ice in your freezer. I use a high fat heavy cream, usually around 36%, to ensure it stays scoopable.
For the sugar, standard granulated white sugar works best. It dissolves quickly in the warm milk and doesn't alter the clean vanilla flavor. A pinch of fine sea salt is non negotiable, as it cuts through the richness of the cream.
Gear for Smooth Churning
A standard electric ice cream maker is the way to go for this recipe. If you have a canister style, make sure it's been in the freezer for at least 24 hours. If the bowl isn't frozen solid, your base will never set.
A fine mesh strainer is another must have. Even with careful tempering, a few tiny bits of cooked egg can sneak into the custard. Straining ensures that the final product is completely smooth.
I also recommend using a digital thermometer. While you can use the "spoon test," knowing the custard has hit 82°C (180°F) takes the guesswork out of the process.
The Process from Pod to Pint
- Slice the vanilla bean lengthwise and scrape the seeds into a saucepan; add the empty pod as well.
- Add 480ml heavy cream, 240ml whole milk, 150g sugar, and 1/4 tsp salt to the saucepan. Heat over medium low until the sugar dissolves and it reaches a gentle simmer.
- Remove from heat, cover, and let the mixture steep for 15 minutes. Note: This pulls the oils out of the bean pod.
- In a separate bowl, whisk 5 large egg yolks until smooth.
- Slowly temper the yolks by pouring about 120ml of the warm cream mixture into them while whisking constantly. Note: This prevents the eggs from scrambling.
- Pour the egg mixture back into the saucepan. Cook over low heat, stirring constantly, until the mixture thickens and coats the back of a spoon.
- Pour the base through a fine mesh strainer into a bowl to remove the pod and egg bits, then stir in 1 tsp pure vanilla extract.
- Cover the surface directly with plastic wrap and refrigerate for at least 6 hours. Note: Contact prevents a skin from forming.
- Pour the chilled mixture into an ice cream maker and churn according to manufacturer's directions until it reaches a soft serve consistency.
Avoiding Custard Disasters
The most common issue is "scrambled egg" syndrome. This happens when the hot cream is added too quickly to the yolks, or the heat is too high during the thickening phase. If you see clumps, don't panic, but you'll need to strain them out.
Another problem is an icy texture. This usually means the base wasn't cold enough before churning or the freezer is too warm. According to Serious Eats, the speed of freezing directly impacts the size of the ice crystals.
Your Ice Cream is Gritty
The sugar likely didn't dissolve completely in the heating phase.
| Problem | Root Cause | Solution |
|---|---|---|
| Gritty Texture | Undissolved Sugar | Heat base slightly longer before steeping |
| Icy Crystals | Warm Base | Chill for a full 6 hours before churning |
| Too Soft | Not enough fat | Use heavy cream, not half and half |
Flavor Variations to Try
If you want to move beyond plain vanilla, this base is a great canvas. For a chocolate version, whisk in 50g of melted dark chocolate during the straining step. It makes a rich, decadent treat.
For those who don't use eggs, you can make an Ice Cream Without Machine recipe by using a cornstarch slurry for thickening. It's a bit lighter but still satisfies the craving.
If you're using a Ninja Creami, you can skip the churn and freeze the base in the pint container for 24 hours. Just be sure to leave a small divot in the top to protect the blade.
Chef's Tip: To deepen the flavor, add a pinch of freshly grated nutmeg to the cream while it simmers. It doesn't make it taste like nutmeg, but it makes the vanilla pop.
Storage and Prep Guidelines
Store your Vanilla Bean Ice Cream in an airtight container. I recommend placing a piece of parchment paper or wax paper directly on the surface of the ice cream before sealing the lid. This stops freezer burn from forming on the top layer.
It stays fresh in the freezer for about 2 weeks. After that, the texture can start to degrade as larger ice crystals form. If it's too hard to scoop, let it sit on the counter for 5 minutes.
Don't throw away the vanilla pod! After you strain the custard, rinse the pod and put it in a jar of granulated sugar. In a few weeks, you'll have vanilla infused sugar that's great for baking.
Serving Your Frozen Treat
This dessert is a star on its own, but it pairs beautifully with a warm fruit compote. I love serving a scoop alongside a Vanilla Bean Panna Cotta for a textured vanilla experience.
For a more classic approach, serve it with a drizzle of salted caramel or a handful of toasted pecans. The salt in the caramel balances the heavy cream perfectly.
If you're serving a crowd, scoop the balls ahead of time and keep them in a separate container in the back of the freezer. It saves you from fighting with a frozen block while your guests are waiting.
Key Tips for Success
One thing I've learned is that the "spoon test" is your best friend. Dip a metal spoon into the custard; if you can run your finger across the back and the line stays clean without dripping, it's done.
Don't over churn. Once the ice cream looks like soft serve, stop the machine. Over churning can actually push too much air into the mix , worse, start to melt the edges if your bowl is losing its chill.
Finally, be patient with the cooling. It's tempting to churn it after 2 hours, but the 6 hour mark is where the magic happens. A truly cold base results in a much smaller ice crystal size, which is why this recipe feels so smooth.
| If you want... | Do this... |
|---|---|
| Extra Richness | Add one extra egg yolk |
| Faster Setup | Use a shallow container for freezing |
| More Flavor | Steep the pod for 30 minutes |
Recipe FAQs
How to make homemade vanilla bean ice cream?
Simmer cream, milk, sugar, salt, and vanilla seeds over medium-low heat. Steep for 15 minutes, temper the mixture into egg yolks, cook until thickened, and chill for 6 hours before churning.
What are the ingredients in vanilla bean ice cream?
This recipe uses heavy cream, whole milk, granulated sugar, a whole vanilla bean, fine sea salt, egg yolks, and pure vanilla extract. These ingredients create a rich, traditional custard base.
What is the difference between vanilla and vanilla bean ice cream?
Vanilla bean ice cream uses the actual seeds scraped from a pod. This results in a deeper flavor and characteristic black specks, while standard vanilla ice cream uses only extract.
How to prevent the egg yolks from scrambling during the cooking process?
Slowly temper the yolks by pouring 1/2 cup of warm cream into them while whisking constantly. This prevents the eggs from curdling. If you enjoyed mastering this emulsion, see how similar blending logic works in our Irish cream.
How to stop freezer burn from forming on the ice cream?
Place parchment or wax paper directly on the surface of the ice cream. This barrier stops air from contacting the top layer before you seal the airtight container.
What should I do with the leftover vanilla bean pod?
Rinse the pod and store it in a jar of granulated sugar. The sugar will absorb the remaining vanilla flavor, making it perfect for future baking.
How long should the ice cream base be refrigerated before churning?
Refrigerate the mixture for at least 6 hours. A thoroughly chilled base is essential for achieving a smooth, soft-serve consistency during churning.
Vanilla Bean Ice Cream for 6 Servings