Levain Chocolate Chip Cookies: Thick & Gooey
- Time: Active 20 minutes, Passive 10 minutes, Total 30 minutes
- Flavor/Texture Hook: Shattering outer crust with a velvety, half baked core
- Perfect for: Weekend baking projects or showing off at a dinner party
- The Ultimate Guide to Levain Chocolate Chip Cookies
- The Physics of the Structural Dome
- Precise Measurements for the Bakery Standard
- Essential Components for a Gourmet Texture
- Precision Tools for Success
- Step-by-Step Methodology for Flawless Results
- Identifying and Correcting Common Baking Failures
- Creative Variations and Dietary Adjustments
- Preservation Methods and Waste Prevention
- Presentation Ideas for a Five Star Experience
- Recipe FAQs
- 📝 Recipe Card
The Ultimate Guide to Levain Chocolate Chip Cookies
I remember the first time I stood under that tiny blue awning on the Upper West Side, the smell of toasted walnuts and browned butter hitting me like a physical wave. I handed over my cash and received a cookie that felt as heavy as a paperweight, wrapped in simple white paper.
When I broke it open, the center didn't just crumble; it yielded in this slow, molten pull of dark chocolate and soft dough that looked almost raw but tasted like absolute magic. It was a complete departure from the thin, crispy wafers I’d grown up eating.
Since that day, I’ve spent countless hours in my kitchen trying to replicate that specific structural integrity. I’ve had my share of failures flat discs that spread across the pan, or dry, cakey lumps that lacked that signature "goo." It took a deep dive into the thermodynamics of baking to realize that most home recipes fail because they treat these like standard cookies.
These aren't standard; they are architectural feats of flour and fat.
We are going for precision here. No room temp butter, no over creaming, and definitely no "eyeballing" the measurements. If you follow these checkpoints, you'll get that five star bakery result right in your own oven.
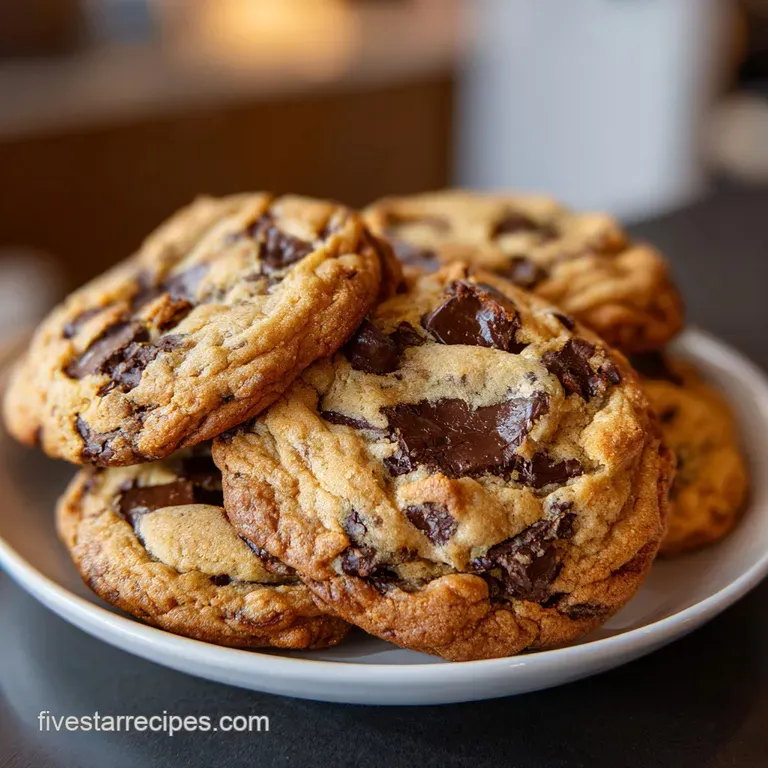
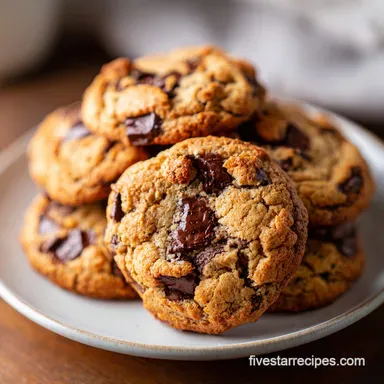
We're looking for that specific moment where the outside is mahogany and crisp, but the inside remains a lush, under baked landscape of chocolate. Trust me, once you see these towering mounds come out of the oven, you'll never go back to the flat stuff.
The Physics of the Structural Dome
Thermal Inertia: By using 1 cup (225g) of cold unsalted butter, we ensure the fat melts slowly in the oven, allowing the starch to set before the cookie can spread.
Starch Reinforcement: The 1 1/2 cups (180g) of cake flour provides a lower protein content that prevents toughness while the cornstarch adds extra structure to hold the "dome" shape.
Flash Baking: Blasting the dough at 400°F (200°C) creates immediate steam, which leavens the heavy 6 ounce balls rapidly before the interior has a chance to fully cook through.
Moisture Control: Using cold eggs prevents the dough from becoming too slack, which is essential for maintaining that iconic height during the initial minutes of baking.
| Baking Style | Texture Result | Internal Core | Best Use Case |
|---|---|---|---|
| Classic Levain | Shattering crust | Fudgy/Molten | The NYC Experience |
| Thin & Crispy | Snap throughout | Dry/Golden | Dipping in milk |
| Fast Bake (350°F) | Soft & Chewy | Fully set | Standard lunchbox |
When comparing the fast bake to the classic over high heat method, the difference is night and day. A standard 350°F oven gives the butter too much time to liquefy, resulting in a wider, thinner cookie.
The classic method relies on that initial 400°F shock to "sear" the outside, much like a gourmet steak, keeping the juices or in this case, the unbaked dough trapped inside.
Precise Measurements for the Bakery Standard
For the Iconic Tall Structure
The secret to the height is the ratio of AP flour to cake flour. Many people think you can just use all AP, but you lose that delicate, velvety crumb. The cake flour keeps things light despite the massive size.
If you don't have cake flour, you can technically make a DIY version, but for a true five star result, get the real stuff. The protein levels matter more than you think when you're dealing with a 6 ounce ball of dough.
To Achieve a Velvety Crumb
Cold butter is your best friend here. Most recipes tell you to "cream" butter and sugar until fluffy, but that incorporates too much air, which leads to a cake like texture. We want dense and gooey. By using cubed, cold butter, we create little pockets of fat that steam as they melt.
This is what creates that specific "shatter" on the outer crust while keeping the inside moist.
For That Shattering Mahogany Crust
The sugar ratio is calculated for specific results. We use 3/4 cup (150g) of light brown sugar for moisture and deep molasses notes, paired with 1/4 cup (50g) of granulated sugar for that crisp exterior. If you increase the white sugar, the cookie will spread more and lose its dome.
If you use too much brown sugar, it becomes too soft to hold its own weight. It’s all about the balance.
Essential Components for a Gourmet Texture
- 1 cup (225g) unsalted butter: Must be cold and cubed. Why this? Prevents spreading and creates a flaky, layered internal structure.
- 3/4 cup (150g) light brown sugar: Organic is best for moisture. Why this? Provides the chewy texture and deep caramel undertones.
- 1/4 cup (50g) granulated sugar: Standard white sugar. Why this? Aids in the Maillard reaction for a crispy outer shell.
- 2 large cold eggs: Straight from the fridge. Why this? Keeps the dough temperature low for better structural integrity.
- 1 1/2 cups (190g) all purpose flour: The structural backbone. Why this? Provides enough gluten to hold the heavy mix ins.
- 1 1/2 cups (180g) cake flour: Lower protein flour. Why this? Ensures the cookie isn't tough or overly bread like.
- 1 tsp cornstarch: The secret stabilizer. Why this? Softens the proteins and helps the cookie stay thick.
- 3/4 tsp baking soda: The leavening agent. Why this? Reacts with the brown sugar for lift and browning.
- 1/2 tsp kosher salt: Use Diamond Crystal if possible. Why this? Balances the intense sweetness of the chocolate.
- 1.5 cups (250g) dark chocolate chips: 70% cacao is ideal. Why this? high-quality fat content ensures a better melt.
- 1.5 cups (170g) toasted walnuts: Roughly chopped. Why this? Adds essential crunch and cuts through the sugar.
| Original Ingredient | Substitute | Why It Works |
|---|---|---|
| Cake Flour (1.5 cups) | AP Flour + Cornstarch | 1 1/4 cups AP + 1/4 cup cornstarch mimics low protein. |
| Dark Chocolate Chips | Semi Sweet Chunks | Chunks provide larger pools of melted chocolate. |
| Walnuts | Pecans | Similar fat content. Note: Adds a sweeter, buttery profile. |
If you find yourself craving a different flavor profile, you can always pivot toward my Peanut Butter Cup Cookies recipe which uses a similar high fat dough base. But for the classic NYC experience, stick with the walnuts. They aren't just for flavor; they act as "rebar" in the dough, providing physical support to keep the cookies tall.
Precision Tools for Success

You don't need a professional bakery setup, but a few specific tools make this foolproof. A stand mixer, like a KitchenAid, is preferred because the dough is quite heavy and cold butter is hard to cream by hand. You'll also want a sturdy baking sheet that won't warp at 400°F.
I highly recommend using parchment paper rather than silicone mats; parchment allows for better heat circulation on the bottom of the cookie, helping that crust develop.
A digital scale is non negotiable for this recipe. We are aiming for exactly 6 ounces (about 170g) per cookie. If they are different sizes, they will cook at different rates, leaving some raw and others dry. A large cookie scoop can help, but I usually just weigh the dough balls and roughly shape them with my hands.
Keep them jagged and craggy don't roll them into smooth spheres or you'll lose those beautiful crispy ridges.
step-by-step Methodology for Flawless Results
- Preheat your oven to 400°F (200°C). Note: This high heat is vital for the "flash bake" effect.
- Cube 1 cup (225g) of cold butter into small pieces. Note: Smaller cubes incorporate more evenly without warming up.
- Cream butter and sugars for 2-3 minutes until combined but not fluffy.
- Add 2 large cold eggs one at a time. Note: Mix only until the yellow streaks disappear to avoid over aeration.
- Whisk the dry ingredients (both flours, cornstarch, soda, salt) in a separate bowl.
- Incorporate dry ingredients into the wet mixture on low speed until just a few flour streaks remain.
- Fold in 1.5 cups chocolate and 1.5 cups walnuts using a sturdy spatula or the lowest mixer setting.
- Divide dough into 8 large mounds weighing roughly 6 ounces each. Leave the tops craggy and uneven.
- Place mounds on a parchment lined sheet with at least 3 inches of space between them.
- Bake for 10-12 minutesuntil the tops are golden brown and "set" to the touch.
Chef's Note: Do not overbake! These will look slightly underdone in the center when you pull them out. They will continue to "carry over cook" on the hot pan for another 10 minutes, which is how we achieve that foolproof molten center.
Identifying and Correcting Common Baking Failures
My Cookies Spread Too Thin
This is the most common heartache with this recipe. Usually, it happens because the butter was too warm or you over creamed it. If you whip the butter and sugar for too long, you incorporate air bubbles that expand and then collapse in the oven.
Another culprit is the oven temperature; if it’s not truly at 400°F, the "set" won't happen fast enough. Always use an oven thermometer to verify your settings.
The Center is Too Raw
While we want a gooey center, "raw" dough is a different story. This usually happens if the dough balls are too cold or if you didn't toast the walnuts first. Cold dough straight from the fridge takes longer for the heat to penetrate the center.
If you want that perfect balance, let the shaped dough sit on the counter for 5 minutes before sliding them into the oven.
| Problem | Root Cause | Solution |
|---|---|---|
| Greasy Bottoms | Butter was too soft | Use butter straight from the fridge; cube while cold. |
| Dry/Crumbly Texture | Over baked or too much flour | Remove when tops are light gold; use a digital scale for flour. |
| No "Goo" in Center | Temperature too low | Increase heat to 400°F to shock the exterior quickly. |
Common Mistakes Checklist: - ✓ Never use room temperature butter (it must be cold to the touch). - ✓ Avoid over mixing once the flour is added (prevents tough gluten). - ✓ Don't flatten the dough balls; keep them as tall, craggy mounds.
- ✓ Let the cookies rest on the baking sheet for at least 15 minutes before moving. - ✓ Use "Cake Flour" specifically, not just more All Purpose.
Creative Variations and Dietary Adjustments
For a gluten-free Alternative
You can swap the AP and cake flour for a high-quality 1:1 gluten-free flour blend (like King Arthur or Cup4Cup). Because GF flour lacks the same protein structure, I suggest chilling the dough balls for 30 minutes before baking to help them hold their shape.
The texture will be slightly more "sandy," but the high fat content from the butter and walnuts keeps them incredibly moist and rich.
To Make it Nut Free
If you need to skip the walnuts, don't just leave them out without adjusting. The walnuts provide structural support. To compensate, I recommend adding an extra 1/2 cup of chocolate chips or substituting with 1.5 cups of crushed pretzels or toasted pumpkin seeds.
This maintains the "rebar" effect that keeps the cookie from collapsing into a puddle.
Preservation Methods and Waste Prevention
These cookies are at their absolute peak about 20 minutes after they leave the oven, but you can definitely save them for later. Store them in an airtight container at room temperature for up to 3 days.
If they start to get a bit firm, a 10 second zap in the microwave will revive that molten chocolate center instantly. Whatever you do, don't put them in the fridge; it will dry out the crumb and turn the butter fat waxy.
For long term storage, these freeze beautifully. You can freeze the baked cookies for up to 2 months. However, the gourmet move is to freeze the unbaked dough balls. When a craving hits, you can bake one straight from the freezer just add 2-3 minutes to the total bake time. For zero waste, save any "flour dust" or tiny chocolate bits at the bottom of the bowl and sprinkle them over your Chocolate Cupcakes with recipe later in the week. Even the walnut skins can be saved and tossed into a compost bin to enrich your garden soil.
Presentation Ideas for a Five Star Experience
When you're serving something this substantial, less is often more. I love placing one warm cookie in a shallow bowl and serving it with a single scoop of high-quality vanilla bean ice cream. The heat from the cookie starts to melt the ice cream, creating a sort of "cream sauce" that mingles with the molten chocolate.
It’s a classic move that never fails to impress.
If you're hosting a brunch, try breaking the cookies into large chunks and serving them on a wooden board alongside fresh raspberries and a pot of strong espresso. The tartness of the berries and the bitterness of the coffee cut through the richness of the 70% dark chocolate.
It’s a sophisticated way to share these massive treats without everyone needing their own 6 ounce planet. Honestly, just seeing these piled high on a cooling rack is a visual feast in itself they look like they walked right out of a high end NYC bakery window.

Recipe FAQs
Is chilling the dough required for Levain cookies?
Yes, chilling is highly recommended for best results. While this recipe is designed for a quick bake, chilling the shaped dough for 30 minutes, especially when using GF flour, helps the fat firm up, preventing excessive spreading in the high heat.
How to achieve the signature tall, thick cookie height?
Use cold, cubed butter and do not over cream the sugars. You want minimal air incorporation; the cold fat melts slowly at 400°F, allowing the starches to set the structure before the cookie flattens.
Can I substitute the cake flour with all-purpose flour?
Yes, but you must adjust the stabilizers. Substitute the cake flour with 1 1/4 cups AP flour plus an extra 1/4 cup of cornstarch to mimic the lower protein structure for that soft interior.
Why are my cookies spreading into thin puddles in the oven?
False. Spread is usually caused by warm ingredients or insufficient oven heat. Ensure your butter is cold, and verify your oven temperature with a thermometer; the initial blast at 400°F is necessary to set the exterior quickly.
How long should I mix the butter and sugar for the best texture?
Mix for only 2 to 3 minutes until just combined, not fluffy. Over creaming incorporates too much air, leading to a dry, cakey texture rather than the desired dense, fudgy interior. If you enjoyed mastering this specific low-air mixing technique, see how the same principle applies to achieving stable emulsions in our Peanut Butter Fudge recipe.
What is the correct oven temperature for the authentic experience?
Bake at 400°F (200°C). This high temperature is critical for creating the "flash bake" effect, rapidly setting the outside structure while leaving the massive center molten.
How do I store leftovers to keep the center gooey?
Store at room temperature in an airtight container for up to three days. Do not refrigerate, as this dries them out; if they firm up, microwave them for about 10 seconds to revive the molten core.
Levain Chocolate Chip Cookies Copycat
Ingredients:
Instructions:
Nutrition Facts:
| Calories | 810 kcal |
|---|---|
| Protein | 11.6 g |
| Fat | 51.4 g |
| Carbs | 77.8 g |
| Fiber | 4.1 g |
| Sugar | 34.3 g |
| Sodium | 263 mg |
