Banana Pudding: Silky and Homemade

- Time: Active 35 minutes, Passive 4 hours, Total 4 hours 35 mins
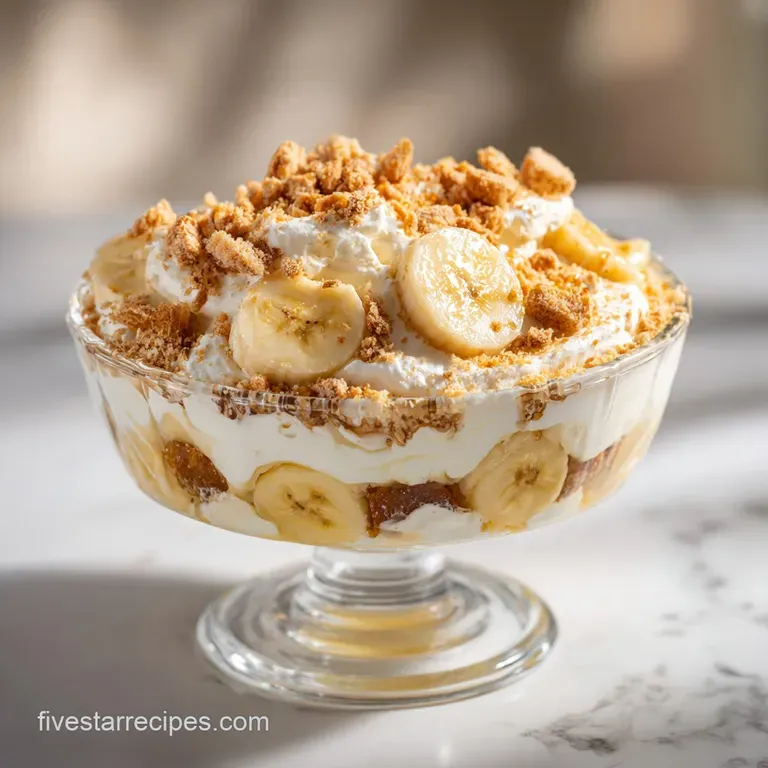
- Flavor/Texture Hook: Silky vanilla custard paired with a cake like wafer texture
- Perfect for: Traditional Sunday gatherings or high end summer potlucks
- Crafting the Ultimate Southern Banana Pudding Recipe From Scratch
- The Molecular Secret to a Thick Custard
- Key Success Metrics for This Pudding Recipe
- Analyzing Our Premium Dessert Component Profile
- Tools Required for Gourmet Pastry Success
- Executing the Layered Assembly with Precision
- Identifying and Correcting Common Pudding Errors
- Smart Ingredient Swaps for Dietary Needs
- Preserving Texture During Fridge and Freezer Storage
- Ideal Accompaniments for This Creamy Dessert
- Recipe FAQs
- 📝 Recipe Card
Crafting the Ultimate Southern Banana Pudding Recipe From Scratch
I remember the first time I stood in my grandmother’s humid kitchen in July, watching her whisk a pale yellow liquid in a heavy copper pot. The air was thick with the scent of simmering milk and ripe fruit, a sensory memory that still triggers a Pavlovian response whenever I peel a banana today.
We weren’t just making a dessert; we were performing a precise culinary ritual. She always insisted that the sound of the whisk against the metal had to change from a sharp "clink" to a muffled "thud" before the custard was ready.
That transition represents the exact moment the starch granules swell and trap the liquid, turning a simple mixture into a velvety masterpiece.
But for a long time, my own attempts were far from five star quality. I struggled with "weeping" puddings that turned into a watery mess by the second day, or custards that tasted more like cornstarch than actual cream.
I realized that the secret wasn't just in the ingredients, but in the thermal precision of the cooking process. When you move away from the instant boxes and commit to a true homemade custard, you’re engaging with the science of protein denaturation and starch gelatinization.
It sounds complex, but once you understand how these molecules interact, you’ll never go back to the artificial yellow dye of the supermarket versions. This banana pudding recipe is the culmination of those scientific tweaks and sensory observations.
The magic of this specific dish lies in the structural transformation that happens during the long chill. Most people think of the wafers as just a crunchy element, but in a proper banana pudding, they act as a sponge.
They draw moisture from the custard and the bananas, softening into a texture that mimics a light, airy sponge cake. It is this marriage of textures the velvety custard, the softened wafers, and the silky bananas that creates a gourmet experience.
We are going to walk through every technical detail to ensure your result is foolproof every single time you step into the kitchen.
The Molecular Secret to a Thick Custard
To understand why this recipe succeeds where others fail, we have to look at the interaction between the cornstarch and the egg yolks. It is a dual stabilization system. The cornstarch provides a rigid structure that prevents the pudding from running, while the egg yolks provide the fat and lecithin needed for a luxurious mouthfeel.
- Starch Gelatinization: Cornstarch granules must be heated to at least 80°C to fully hydrate and swell, creating the necessary thickness.
- Enzymatic Stability: Egg yolks contain amylase, an enzyme that can actually break down starch. Cooking the custard for those final 2 minutes after adding the yolks neutralizes this enzyme, ensuring your pudding doesn't turn back into liquid in the fridge.
- Moisture Sealing: Slicing the bananas directly into the custard or sealing them between layers prevents oxygen from reaching the fruit, which stops the enzymatic browning process.
The Cornstarch Egg Hybrid Stability
The stability of your custard relies on the ratio of starch to liquid. We use 0.33 cup of cornstarch for 3 cups of milk. This specific ratio ensures that the pudding is firm enough to slice but soft enough to melt on the tongue.
If you undercook this stage, the starch stays gritty; if you overcook it, the eggs might scramble. Precision is the difference between a five star dessert and a kitchen disaster.
The 4 Hour Hydration Phase
Time is a literal ingredient here. During the 275 minutes of total time, a process called "moisture migration" occurs. The sugar in the custard draws water out of the bananas, while the wafers absorb liquid from the custard. This creates a unified texture.
Without this 4 hour window, you simply have crunchy cookies floating in cream, which lacks the sophisticated cohesion we are aiming for.
| Thickness | Internal Temp | Rest Time | Visual Cue |
|---|---|---|---|
| Thin Sauce | 70°C | 0 mins | Coats back of spoon lightly |
| Thick Custard | 82°C | 2 mins | Large bubbles "plop" slowly |
| Set Pudding | 4°C (Chilled) | 4 hours | Holds its shape when scooped |
The table above illustrates the thermal checkpoints you need to watch for. If you don't reach 82°C during the cook time, your pudding will never reach the "Set Pudding" stage regardless of how long it sits in the refrigerator. Trust the thermometer, not just your eyes.
Key Success Metrics for This Pudding Recipe
When comparing methods, many cooks wonder if they can simply bake the pudding like a meringue topped version. However, the stovetop method we use here offers much tighter control over the custard's texture.
In an oven, the heat is indirect and can easily lead to overcooked, rubbery eggs at the edges of the dish while the center remains liquid.
| Method | Texture | Time | Best For |
|---|---|---|---|
| Stovetop | Velvety and consistent | 15 mins cook | Precision and smoothness |
| Oven Baked | Firm with toasted top | 30 mins cook | Traditional meringue styles |
| No Cook | Soft and mousse like | 5 mins prep | Quick fixes (lower quality) |
Using the stovetop method allows you to witness the exact moment the cornstarch activates. I’ve found that the stovetop approach also allows for a better incorporation of the 2 tbsp of unsalted butter at the end. Butter added to a hot stovetop custard creates a glossy finish that you just can't achieve in a dry oven environment. If you've ever enjoyed a fluffy banana pancake for breakfast, you know how important that buttery, rich undertone is to the overall banana flavor profile.
For those looking for a gourmet outcome, the stovetop method is the only way to ensure the 4 large egg yolks are tempered correctly. Tempering is the process of slowly raising the temperature of the eggs so they don't curdle.
It’s a foundational technique in professional pastry kitchens, and it’s what separates this from a standard home style "dump and stir" recipe.
Analyzing Our Premium Dessert Component Profile
The quality of your ingredients directly dictates the final flavor. We aren't using "pudding mix" or "imitation vanilla" here. We are using whole milk for its fat content and pure vanilla extract for its complex aromatic profile.
- 0.75 cup granulated sugar: Provides sweetness and helps stabilize the egg proteins.
- 0.33 cup cornstarch: The primary thickening agent. Why this? It provides a cleaner flavor release than flour and a more stable set.
- 3 cups whole milk: The liquid base. Why this? The 3.25% fat content is essential for the velvety mouthfeel of the custard.
- 4 large egg yolks: Adds richness and color. Why this? Yolks provide emulsifiers that create a smoother, more cohesive pudding structure.
- 11 oz Nilla wafers: The structural "cake" layer.
- 5 medium bananas: Use fruit with light spotting for the best sugar to acid balance.
| Component | Science Role | Pro Secret |
|---|---|---|
| Cornstarch | Network builder | Whisk with sugar first to prevent clumping |
| Egg Yolks | Emulsifier | Never skip tempering to avoid "scrambled egg" bits |
| Heavy Cream | Aeration | Chill bowl and whisk for 15 mins for max volume |
| Butter | Gloss & Mouthfeel | Stir in at the very end for a "fat finish" shine |
Whisking the cornstarch with the sugar before adding the milk is a critical step. The sugar granules act as physical barriers, keeping the starch particles separated so they don't clump together the moment they hit the liquid. This ensures a lump free base from the very start.
Tools Required for Gourmet Pastry Success
You don't need a lab, but you do need a few specific items to ensure precision. A heavy bottomed saucepan is non negotiable. Thin pans have "hot spots" that will scorch the milk and ruin the delicate flavor of the vanilla.
If the milk burns, the entire batch will carry a bitter, smoky aftertaste that even the bananas can't hide.
A balloon whisk is also essential. You need to incorporate air and keep the molecules in constant motion as the starch begins to swell. If you use a spoon, you'll likely have "dead zones" in the corners of the pan where the custard will overcook and stick.
Finally, a 9x13 inch glass or ceramic dish is the standard vessel for assembly. Glass is preferable because it allows you to see the beautiful layers of wafers and fruit, which is half the appeal of this classic dessert.
For the topping, a stand mixer or a high-quality hand mixer is needed to whip the 2 cups of heavy whipping cream. You are looking for "stiff peaks," which means when you lift the whisk, the cream stands straight up without drooping. This provides a structural contrast to the soft pudding beneath. If you’re a fan of tropical flavors, you might notice that this assembly method is quite similar to how a Hawaiian banana bread layers its flavors, though here we rely on moisture rather than heat to meld them.
Executing the Layered Assembly with Precision
- Whisk 0.75 cup granulated sugar, 0.33 cup cornstarch, and 0.5 tsp salt in a heavy bottomed saucepan. Note: This prevents starch clumps.
- Gradually whisk in 3 cups whole milk over medium heat. Cook until the mixture is thickened and bubbly.
- Temper 4 large egg yolks by slowly whisking in about 0.5 cup of the hot milk mixture into the yolks. Note: This prevents the eggs from scrambling.
- Pour the tempered yolks back into the saucepan and cook for 2 additional minutes. Stir constantly until velvety and glossy.
- Remove from heat and stir in 2 tbsp unsalted butter and 2 tsp pure vanilla extract.
- Transfer the custard to a bowl and let it cool slightly for about 15 minutes.
- In a 9x13 inch dish, place a layer of 11 oz Nilla wafers followed by 5 sliced bananas.
- Pour half of the custard over the bananas. Ensure every banana slice is covered to prevent browning.
- Repeat the layers with the remaining wafers, bananas, and custard.
- Whip 2 cups heavy cream and 0.25 cup powdered sugar until stiff peaks form, then spread over the top.
- Refrigerate for 4 hours until the wafers have a cake like consistency.
Chef's Tip: If you want an even deeper flavor, toss your banana slices in a tiny bit of lemon juice. The acidity cuts through the richness of the custard and keeps the fruit looking vibrant for days.
Identifying and Correcting Common Pudding Errors
Even with a foolproof recipe, variables like stove heat and humidity can play a role. The most common issue home cooks face is a "weeping" pudding, where a layer of water forms at the bottom.
This is usually caused by "syneresis," where the protein structure of the eggs or the starch network tightens too much and squeezes out the liquid.
Why Your Custard Is Lumpy
Lumps usually occur during the first 5 minutes of cooking. If you add the milk too fast or don't whisk vigorously, the cornstarch forms a "shell" around dry powder. To fix this, you can pass the finished custard through a fine mesh sieve. It’s a quick save that restores the gourmet texture.
Why Your Bananas Turned Brown
This is purely an oxidation issue. Bananas turn brown when exposed to air. The solution is to ensure the custard acts as a vacuum seal. When you pour the custard over the banana slices, use a spatula to push it into the gaps. If air can't touch the fruit, the fruit won't brown.
| Problem | Root Cause | Solution |
|---|---|---|
| Runny Pudding | Undercooked starch | Ensure it reaches a full bubble for 1 min |
| Scrambled Eggs | Failed tempering | Add hot liquid to eggs slower |
| Soupy Topping | Over whipped cream | Fold in a splash of liquid cream to soften |
Common Mistakes Checklist
- ✓ Never use cold eggs; let the yolks sit at room temperature for 15 minutes for better tempering.
- ✓ Do not use "light" or skim milk; the lack of fat will prevent the custard from setting properly.
- ✓ Avoid over ripe bananas that are completely black; they are too soft and will turn to mush.
- ✓ Ensure the heavy cream is ice cold before whipping to achieve maximum volume.
- ✓ Don't skip the 4 hour chill; the wafers need this time to undergo their chemical softening.
Smart Ingredient Swaps for Dietary Needs
While the classic version is hard to beat, sometimes you need to adjust for your audience. Scaling this recipe is quite simple. If you need to feed 20 people instead of 10, double the ingredients but use two separate 9x13 dishes rather than one deep one.
This ensures the custard to wafer ratio remains perfect in every bite.
The dairy-free Alternative
You can substitute the whole milk with full fat coconut milk. It has a similar fat content (around 17-20%) which allows the cornstarch to create a stable gel. However, keep in mind that this will significantly change the flavor profile to something more tropical.
The gluten-free Swap
For a gluten-free version, use gluten-free vanilla wafers. Because these wafers are often denser than the standard version, you may need to increase the chill time by an extra hour to ensure they soften completely.
| Original Ingredient | Substitute | Why It Works |
|---|---|---|
| Whole Milk | Coconut Milk (Full Fat) | Similar fat content. Note: Adds a distinct tropical flavor. |
| Nilla Wafers | Graham Crackers | Provides a sturdier, honey forward base. |
| Granulated Sugar | Honey (0.5 cup) | Adds moisture and a floral sweetness. |
When making substitutions, remember that sugar is not just for sweetness; it's a tenderizer. If you try a version like my sugar-free banana bread, you'll notice the crumb is different. In this pudding, reducing the sugar too much can lead to a rubbery custard because sugar interferes with the coagulation of egg proteins, keeping them soft.
Preserving Texture During Fridge and Freezer Storage
Storing banana pudding is a delicate balance. The refrigerator is your friend for up to 3 days. After day three, the bananas will start to release too much moisture, and the whipped cream will begin to deflate.
To keep it fresh, press a piece of plastic wrap directly onto the surface of the whipped cream to prevent it from absorbing "fridge smells."
Freezing is generally not recommended for the fully assembled pudding. The custard contains cornstarch, which can become "spongy" and weep liquid when thawed. However, if you must freeze it, do so without the whipped cream topping. Thaw it slowly in the refrigerator over 24 hours.
For a zero waste approach, if you have leftover bananas that are getting too soft, don't throw them away. Mash them and freeze them in ice cube trays to use later in smoothies or baking. If you have leftover wafers, crush them into a fine crumb and use them as a crust for a cheesecake or a topping for yogurt.
Ideal Accompaniments for This Creamy Dessert
This dessert is a star on its own, but the right pairing can elevate the entire experience. A cup of dark roast coffee or a bold espresso provides a bitter contrast that cuts through the intense sweetness of the custard and bananas. The tannins in the coffee cleanse the palate between bites.
If you are serving this at a summer gathering, a side of fresh berries specifically raspberries or blackberries adds a necessary tartness. The bright acidity of the berries balances the heavy dairy profile of the pudding.
For a truly decadent presentation, a drizzle of salted caramel over the whipped cream can add a sophisticated salty sweet dimension that rounds out the vanilla notes.
Ultimately, the beauty of this banana pudding recipe is its nostalgic pull combined with gourmet execution. By following the scientific checkpoints and focusing on the precision of the custard, you're creating a dessert that is far more than the sum of its parts.
It’s a testament to the fact that even the most humble ingredients, when treated with care and technical respect, can produce a world class result.

Recipe FAQs
What are the ingredients for banana pudding?
You need a specific set of pantry and dairy staples. Combine granulated sugar, cornstarch, salt, whole milk, egg yolks, unsalted butter, pure vanilla extract, Nilla wafers, sliced bananas, heavy whipping cream, and powdered sugar.
How to make 4 ingredient banana pudding?
Combine sliced bananas, vanilla wafers, a prepared custard base, and whipped cream. While you can simplify the assembly, the foundational custard requires whisking sugar, cornstarch, salt, milk, and yolks over medium heat until thickened.
How to make Paula Deen's banana pudding?
Layer vanilla wafers and sliced bananas in a 9x13 inch dish. Pour the cooked custard over the layers, ensuring the bananas are fully sealed, then top with freshly whipped cream and refrigerate for 4 hours to achieve the signature cake like texture.
What kind of cookies does Paula Deen use in her banana pudding?
She exclusively uses Nilla wafers. These cookies are essential because they absorb the custard moisture perfectly over the required four hour chilling period.
Is it true I can use skim milk to save calories?
No, this is a common misconception. You must use whole milk because the fat content is necessary to ensure the custard sets properly. If you enjoyed the creamy texture we achieve here, see how that same fat-to-liquid ratio principle is vital for maintaining structure in other chilled desserts.
How to keep the banana slices from turning brown?
Pour the custard directly over the sliced bananas immediately. Sealing the fruit completely under the custard layer acts as a barrier against oxygen, which prevents the oxidation that causes browning.
How to ensure the egg yolks do not scramble in the hot milk?
Temper the yolks by slowly whisking in a small amount of the hot milk mixture before adding them back to the saucepan. This gradual heat increase prevents the proteins from curdling and creates a velvety, smooth custard finish.
Homemade Banana Pudding

Ingredients:
Instructions:
Nutrition Facts:
| Calories | 533 kcal |
|---|---|
| Protein | 6.6 g |
| Fat | 28.7 g |
| Carbs | 64.4 g |
| Fiber | 2.5 g |
| Sugar | 43.1 g |
| Sodium | 254 mg |
