Cherry Crisp Recipe: Buttery Oat Topping
- Time: Active 20 minutes, Passive 45 minutes, Total 65 minutes
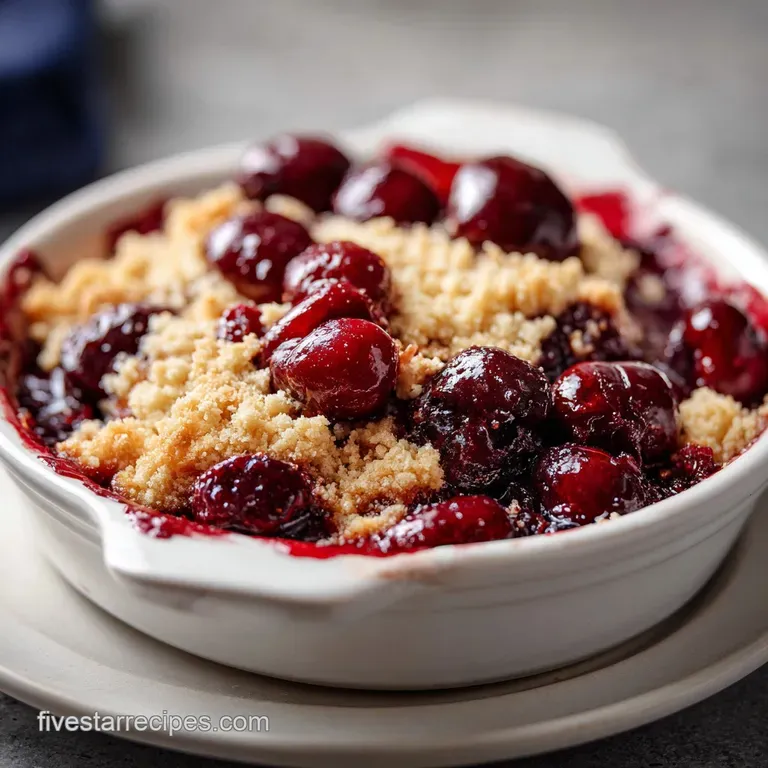
- Flavor/Texture Hook: Tart, jammy cherries nestled under a buttery, shattering oat crumble
- Perfect for: High end summer entertaining or a comforting gourmet weeknight treat
- Master the Chemistry of a Perfectly Balanced Cherry Crisp Recipe
- Vital Specifications for Achieving Gourmet Results Every Time
- The Molecular Components Required for This Gourmet Dessert
- Essential Precision Tools for the Home Pastry Lab
- Systematic Execution for the Ultimate Fruit and Crumble Contrast
- Avoiding Structural Failures and Correcting Common Baking Errors
- Creative Variations for Customizing Your Fruit Filling Profile
- Long-Term Preservation and Reducing Kitchen Waste Efficiently
- Optimal Presentation Strategies for the Ultimate Sensory Experience
- Recipe FAQs
- 📝 Recipe Card
Master the Chemistry of a Perfectly Balanced Cherry Crisp Recipe
There is a specific sound that defines a successful bake: the sharp, musical crack of a spoon breaking through a golden oat crust into a bubbling, ruby red center. I still remember the first time I achieved that perfect contrast.
I had spent years serving what I called "cherry soup with wet oatmeal" before I realized that baking isn't just about following a list it's about managing moisture and heat.
When you pull this dish from the oven, the aroma of toasted cinnamon and almond kissed fruit will fill your entire home, signaling that something truly special is waiting to be shared.
We aren't just making a simple dessert here, we're orchestrating a structural masterpiece. The goal is a filling that flows like lava but holds its shape on a plate, paired with a topping that maintains its integrity even after a scoop of melting vanilla bean ice cream hits it.
Many home cooks struggle with a filling that's too runny or a topping that turns into a leaden disk. We're going to fix those errors before they even happen by looking at the science of how these ingredients interact under heat.
Trust me, once you see how a few precision adjustments transform a basic fruit bake into a gourmet experience, you'll never go back to the "dump and stir" method. We've all made the mistake of using warm butter or skipping the lemon juice, but today we're focusing on the foolproof techniques that ensure a five star finish.
Let's get into the details of why this specific cherry crisp recipe stands out from the rest.
Vital Specifications for Achieving Gourmet Results Every Time
To get that restaurant quality finish, we need to understand the thermal dynamics at play. The filling needs to reach a specific temperature for the cornstarch to hydrate and thicken, while the topping needs dry, circulating heat to achieve a mahogany brown color without burning the bottom of the fruit.
This balance is what separates a soggy mess from a crisp that actually earns its name.
The Physics of the Shatter: Cold butter creates localized pockets of steam during baking, which lifts the flour and oats into a light, flaky structure rather than a dense paste. This "micro lamination" ensures the topping stays crisp for hours rather than turning soft immediately upon cooling.
Chef Tip: For an unconventional level of crunch, freeze your butter for 10 minutes and then use a cheese grater to shred it directly into the dry ingredients. This ensures the fat particles are perfectly uniform and stay cold until the moment they hit the oven.
| Method | Time | Texture | Best For |
|---|---|---|---|
| Traditional Oven | 45 minutes | Shattering, golden crust with deeply jammy fruit | The classic gourmet experience |
| Stovetop Simmer | 15 minutes | Soft, stewed fruit with a chewy, granola like finish | Quick toppings for yogurt or oats |
| Convection Bake | 35 minutes | Extremely even browning and faster fruit breakdown | When you're in a time crunch |
If you're looking for more stone fruit inspiration to round out your seasonal baking, you might enjoy my Citrus Cherry 2025 recipe. It uses similar flavor profiles but in a completely different, refreshing format.
The Molecular Components Required for This Gourmet Dessert
Understanding the "why" behind your ingredients is the first step toward becoming a more confident baker. We aren't just adding things for flavor, each component has a structural job to do.
For instance, the acidity in the lemon juice isn't just for a tangy kick, it actually helps to stabilize the pectin in the cherries, keeping them from turning into complete mush.
| Ingredient | Science Role | Pro Secret |
|---|---|---|
| Cornstarch | Thickening agent | Whisk into the sugar first to prevent "clumping" in the hot juice |
| old-fashioned Oats | Structural integrity | Avoid "quick oats" which absorb too much moisture and turn gummy |
| Almond Extract | Flavor bridge | It chemically mimics the "benzaldehyde" found naturally in cherry pits |
| Cold Butter | Leavening/Texture | Keep it below 60°F (15°C) to ensure the topping remains flaky |
For this cherry crisp recipe, we are using a specific blend of textures. The granulated sugar in the filling helps draw out the juices (osmosis!), while the brown sugar in the topping provides a deep caramelization thanks to its molasses content.
- 6 cups fresh pitted cherries: Use a variety if possible for flavor depth. Why this? Fresh fruit provides the best structural "pop" compared to canned filling.
- 3/4 cup granulated sugar: Adjust slightly if your cherries are exceptionally sweet. Why this? Draws out juices to create the "sauce."
- 2 tbsp cornstarch: Our primary thickener. Why this? Provides a clear, glossy sheen unlike flour.
- 1 tbsp fresh lemon juice: Essential for pH balance.
- 1 tsp lemon zest: Contains essential oils that brighten the heavy fruit notes.
- 1/2 tsp pure almond extract: The secret weapon of professional pastry chefs.
- 1 cup old-fashioned rolled oats: Provides the "hearth" texture we want.
- 1 cup all purpose flour: The glue that holds the crumble together.
- 1 cup packed light brown sugar: Adds moisture and a hint of toffee flavor.
- 1/2 cup unsalted butter, cold and cubed: The engine of the "crisp" texture.
- 1 tsp ground cinnamon: A warming aromatic that pairs perfectly with stone fruit.
- 1/2 tsp sea salt: Crucial for balancing the high sugar content.
| Original Ingredient | Substitute | Why It Works |
|---|---|---|
| Cornstarch | Arrowroot Powder | Similar thickening power. Note: Filling may become slightly more translucent |
| All Purpose Flour | 1:1 gluten-free Blend | Rice based blends work well here as gluten development isn't desired |
| Light Brown Sugar | Dark Brown Sugar | Adds more molasses depth. Note: Will result in a darker, softer topping |
| Unsalted Butter | Refined Coconut Oil (Solid) | High fat content. Note: Topping will be crispier but lack the dairy richness |
Essential Precision Tools for the Home Pastry Lab
You don't need a professional kitchen, but having the right tools makes the difference between a stressful bake and a seamless one. For this dish, I highly recommend a high-quality cherry pitter.
I once tried pitting six cups of cherries with a straw and a wine bottle it took over an hour and my kitchen looked like a crime scene. A dedicated pitter (like those from OXO) will save your sanity.
A 9x13 inch ceramic or glass baking dish is the standard here. Glass is actually quite helpful because it allows you to see the bubbles at the bottom, which is your primary indicator that the cornstarch has reached its "gel point." If the filling isn't bubbling aggressively, the starch hasn't fully activated, and your crisp will be runny once it cools.
Finally,, a pastry cutter or a simple fork is better than a food processor for the topping. A food processor can easily over work the butter, turning the topping into a dough rather than a crumble. We want distinct pebbles of fat and flour for that shattering effect.
Systematic Execution for the Ultimate Fruit and Crumble Contrast

1. The Fruit Base Preparation
In a large mixing bowl, combine your 6 cups fresh pitted cherries, 3/4 cup granulated sugar, 2 tbsp cornstarch, 1 tbsp fresh lemon juice, 1 tsp lemon zest, and 1/2 tsp pure almond extract.
Toss them gently until the cherries are evenly coated in a hazy, white film. Note: This ensures the starch is distributed before the juices start flowing.
2. The Maceration Phase
Let the fruit mixture sit for about 10 minutes while you prep the topping. This allows the sugar to draw out enough juice to dissolve the cornstarch. You'll see a syrup starting to form at the bottom of the bowl this is exactly what we want.
3. Crafting the Dry Topping
In a separate bowl, whisk together the 1 cup old-fashioned rolled oats, 1 cup all purpose flour, 1 cup packed light brown sugar, 1 tsp ground cinnamon, and 1/2 tsp sea salt.
Ensure there are no large clumps of brown sugar before moving to the next step.
4. Integrating the Cold Fat
Add the 1/2 cup unsalted butter, cold and cubed to the dry mix. Using a pastry cutter or your fingertips, rub the butter into the flour until the mixture resembles coarse meal with some pea sized lumps. Note: Those pea sized lumps are the secret to the "shatter" effect.
5. Assembling the Layers
Transfer the cherry mixture (and all the accumulated juices) into a 9x13 inch baking dish. Spread them into an even layer, then sprinkle the topping over the fruit. Don't press the topping down; keep it light and airy to allow heat to circulate.
6. The Golden Bake
Place the dish in a preheated oven at 350°F (180°C). Bake for 45 minutes until the fruit juices are thick and bubbling vigorously at the edges. Note: If it's not bubbling, the starch won't set!
7. Assessing the Color
During the last 10 minutes, keep a close eye on the topping. You are looking for a deep mahogany brown. If it seems to be browning too quickly, tent it loosely with foil, but usually, 45 minutes is the sweet spot for the oats to toast perfectly.
8. The Critical Cooling Period
Remove the dish from the oven and place it on a wire rack. Wait at least 20 minutes before serving. This is the hardest part, but it's vital. The cornstarch continues to set as the temperature drops. If you cut into it immediately, the juices will run everywhere.
For a fall themed twist on this technique, you can apply these same principles to my Warm Homemade Apple recipe. It uses a very similar oat to butter ratio that yields that same signature crunch.
Avoiding Structural Failures and Correcting Common Baking Errors
Even the best home cooks run into issues with fruit bakes. The most common "failure mode" for a cherry crisp is the "Soggy Topping Syndrome." This usually happens when the fruit isn't thickened properly, and the excess steam migrates upward, hydrating the oats until they become mushy.
Why Your Filling Is Runny
If you cut into your crisp and the fruit looks like thin juice, the cornstarch likely didn't reach a high enough temperature. Cornstarch requires a temperature of about 175°F (80°C) to fully gelatinize.
If your oven is running cold, or if you pulled the dish out the moment the top looked brown without checking for bubbles, the starch couldn't do its job.
| Problem | Root Cause | Solution |
|---|---|---|
| Soggy Topping | Too much moisture in fruit or warm butter | Chill butter before mixing; increase cornstarch by 1 tsp next time |
| Rubbery Oats | Used "Quick Oats" instead of "Old Fashioned" | Stick to rolled oats for better moisture resistance |
| Burnt Top/Raw Fruit | Oven temperature too high | Lower heat to 325°F (165°C) and extend time; tent with foil |
Why Your Topping Is Leaden
A "leaden" or "brick like" topping occurs when the butter is too soft during the mixing phase. Instead of creating flaky layers, the soft butter emulsifies with the flour and sugar to create a solid dough. This dough then bakes into a hard sheet rather than a crumbly topping.
Common Mistakes Checklist:
- ✓ Always use cold butter (straight from the fridge is best).
- ✓ Don't over mix the topping; stop when you see pea sized crumbs.
- ✓ Ensure the fruit is bubbling at the center, not just the edges, before removing.
- ✓ Measure your flour by spooning it into the cup rather than scooping (which packs it down).
- ✓ Use fresh lemon juice; the bottled stuff lacks the enzymatic punch needed for fruit structure.
Creative Variations for Customizing Your Fruit Filling Profile
Once you have the base "cherry crisp recipe" down, you can start experimenting with the flavor profile. The "Black Forest" variation is a personal favorite in our house. Simply add 1/4 cup of high-quality cocoa powder to the topping and toss a handful of dark chocolate chunks in with the cherries.
The bitterness of the chocolate balances the sugar beautifully.
If you are dealing with out of-season fruit, you can absolutely use frozen cherries. However, frozen fruit releases significantly more water as it thaws. To compensate, I recommend increasing the cornstarch from 2 tbsp to 3 tbsp.
There is no need to thaw the cherries first; just toss them with the sugar and starch while frozen and add about 10-15 minutes to the total bake time.
- For a nuttier flavor
- Replace 1/4 cup of the flour with finely chopped pecans or walnuts.
- For a gluten-free version
- Use a certified gluten-free oat brand and swap the AP flour for almond flour.
- For a lower sugar option
- Reduce the sugar in the filling to 1/2 cup and use tart "Montmorency" cherries.
Long Term Preservation and Reducing Kitchen Waste Efficiently
Leftover cherry crisp is arguably better the next day, provided you reheat it correctly. In the fridge, the topping will inevitably absorb some moisture from the fruit. To restore the "shatter," skip the microwave.
Instead, place a portion in a small oven safe dish and pop it into a 350°F (180°C) toaster oven for 8-10 minutes. This re crisps the butter and oats while warming the center.
- Fridge
- Store in an airtight container for up to 4 days.
- Freezer
- You can freeze the baked crisp for up to 3 months. Thaw in the fridge overnight before reheating in the oven.
- Zero Waste Tip
- Don't throw away your cherry pits! You can simmer them with a bit of sugar and water to create a "cherry pit syrup" that tastes like marzipan. Strain it and use it in cocktails or over pancakes. It's a gourmet trick that utilizes every part of the fruit.
If you have leftover oats and butter but no cherries, you might consider making a quick batch of this Peanut Butter Fudge recipe. It uses similar pantry staples and satisfies that sweet tooth in a fraction of the time.
Optimal Presentation Strategies for the Ultimate Sensory Experience
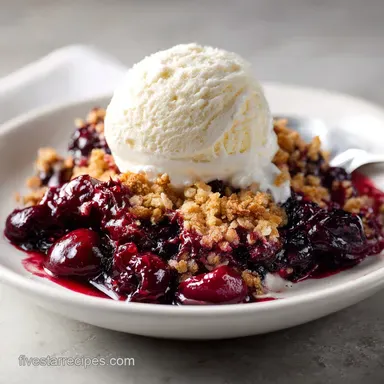
A gourmet dessert deserves a gourmet presentation. While it's tempting to scoop this straight out of the pan while standing in the kitchen (we've all been there), taking a moment to plate it makes a world of difference. Serve the crisp warm, but not scalding, in a shallow bowl.
The contrast of the hot fruit and cold cream is the hallmark of this dish.
The Perfect Pairing
While vanilla bean ice cream is the standard, I highly recommend trying a dollop of cold crème fraîche or Greek yogurt sweetened with a touch of honey. The slight tang of the fermented dairy cuts through the richness of the buttery crumble and highlights the natural acidity of the cherries.
Debunking Kitchen Myths
One common misconception is that you must use sour cherries for a "real" crisp. While sour cherries are traditional, sweet Bing or Rainier cherries work perfectly as long as you provide enough lemon juice to balance the pH. Another myth is that you can't over mix the topping. You absolutely can!
If you mix until it's uniform, you lose the texture. You want those "imperfections" the little nuggets of butter that create the varying levels of crunch.
Precision Checkpoints
- 1. Internal Temp
- The filling should be at least 175°F (80°C).
- 2. Color
- The topping should be the color of an old penny.
- 3. Resistance
- When you tap the topping with a spoon, it should sound hollow and firm, not soft or doughy.
Now that you're armed with the science of starch gelatinization and the mechanics of cold fat integration, you're ready to create the best cherry crisp of your life. It’s a dish that feels like a warm hug but tastes like a five star finale. Happy baking!

Recipe FAQs
What is the difference between a cherry cobbler and a crisp?
A crisp has an oat-based streusel topping. A cobbler typically features a biscuit or batter topping dropped over the fruit, resulting in a softer, cake like crust rather than the crunchy oat layer found in a crisp.
How many cups of cherries for a crisp?
Use 6 cups of fresh pitted cherries for a standard 9x13 inch dish. This amount provides the ideal fruit-to-topping ratio for excellent texture contrast and enough juice to activate the thickener.
How to make fresh cherry crumble?
Combine cherries with sugar and cornstarch, then top with a butter/oat/flour mixture. Toss the fruit base and let it sit for 10 minutes while you prepare the topping by rubbing cold butter into the dry ingredients until pea-sized clumps form.
What are the two ingredients in cherry cobbler recipe?
The two primary components are the fruit filling and the biscuit/batter topping. While the filling needs sugar and starch, the topping is generally flour, fat, and a leavener, unlike a crisp which requires oats.
Is it true I must use cold butter for the topping?
Yes, cold butter is non-negotiable for a truly crisp topping. Cold fat melts slowly in the oven, creating steam pockets that lift the oat mixture into a flaky, shattering texture rather than turning it into a dense dough.
Can I substitute the cornstarch in the filling?
Yes, you can substitute cornstarch with arrowroot powder at a 1:1 ratio. Arrowroot works similarly to thicken the fruit juices, but you should expect the final filling to have a slightly glossier appearance.
What is the key to preventing a soggy bottom crust?
Bake until the fruit filling is vigorously bubbling at the edges and center. This ensures the starch thickener has reached its full activation temperature, preventing excess liquid from rising into the topping later.
Gourmet Cherry Crisp Recipe
Ingredients:
Instructions:
Nutrition Facts:
| Calories | 432 kcal |
|---|---|
| Protein | 3.3 g |
| Fat | 12.4 g |
| Carbs | 77.9 g |
| Fiber | 3.3 g |
| Sugar | 54.2 g |
| Sodium | 152 mg |
