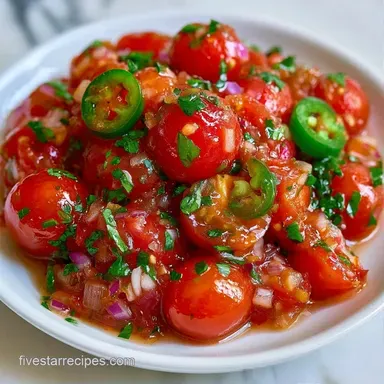
Roasted Canned Cherry Tomato Salsa
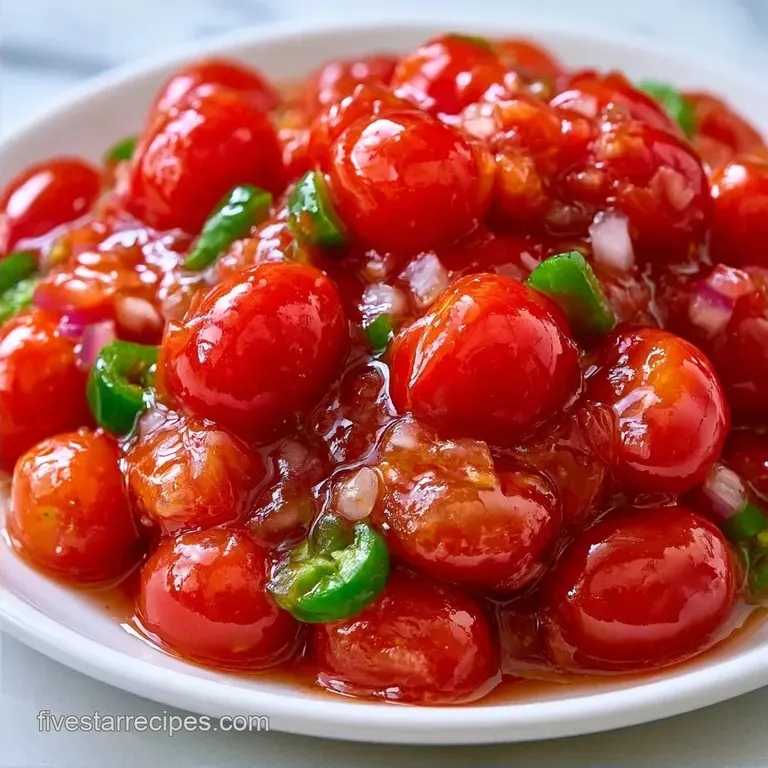
- Time: 30 min active + 24 hours 20 mins processing/sealing
- Flavor/Texture Hook: Charred, chunky, and zesty
- Perfect for: Stunning starters or winter pantry stocking
The smell of blistering tomatoes hitting a hot sheet pan is something else. It's that sharp, sweet scent that fills the kitchen right before the skins pop and the juices caramelize. I used to buy those bland, watery jars from the store, but they always tasted like tin and vinegar.
I wanted something with more punch, a starter that actually wakes up the palate.
That's how I landed on this method. By roasting the base, you get a massive contrast between the rich, smoky depth of the charred tomatoes and the bright, acidic snap of fresh lime. It turns a simple condiment into something stunning.
This Cherry Tomato Salsa doesn't rely on hours of simmering to get flavor. We use high heat to do the heavy lifting in minutes. You'll end up with a chunky, bold preserve that tastes like a summer garden, even in the middle of January.
Cherry Tomato Salsa
This version focuses on the contrast between the oven's heat and the raw zing of the finish. It’s designed for those who love bold, international flavors in their appetizers.
Precision Checkpoints:
- Roast until skins turn mahogany (approx 7 minutes).
- Simmer for exactly 10 minutes for the right thickness.
- Process in water bath for 15 minutes.
What Makes This Pop
- over High heat Roasting: Broiling the tomatoes creates a charred sweetness that balances the vinegar.
- Acid Balance: The mix of apple cider vinegar and lime juice keeps the flavor bright and ensures safe canning.
The Ingredient Breakdown
| Ingredient | What It Does | Best Swap |
|---|---|---|
| Cherry Tomatoes (1.2 kg) | Provides a concentrated, sweet base | globe tomatoes (need to be seeded) |
| Apple Cider Vinegar (120ml) | Adds tang and preserves the batch | White distilled vinegar (sharper taste) |
| Canning Salt (18g) | Enhances flavor without clouding the jars | Sea salt (avoid iodized salt) |
| Fresh Cilantro (20g) | Adds a bright, herbal finish | Flat leaf parsley (milder) |
The Full List
- 7 cups (1.2 kg) cherry tomatoes, whole Why this? Higher sugar content and less water than large tomatoes
- 1 cup (150g) white onion, finely diced Why this? Provides a crisp, sharp contrast to the roasted fruit
- 4 cloves (20g) garlic, minced
- 2 tbsp (30ml) olive oil
- 3 medium (120g) jalapeño peppers, seeded and minced Why this? Balanced heat that doesn't mask the tomato
- 1/2 cup (120ml) apple cider vinegar
- 1/4 cup (60ml) fresh lime juice
- 1 tsp (6g) sugar
- 1 tbsp (18g) canning salt
- 1/2 cup (20g) fresh cilantro, chopped
Necessary Kitchen Gear
You'll need a few specific things to make this safely. I use a standard stainless steel pot and a large rimmed baking sheet. For the canning part, a water bath canner is a must. If you don't have a dedicated canner, a very deep stockpot that can cover your jars by an inch of water works too.
Don't forget a jar lifter; reaching into boiling water is a mistake you only make once.
Bringing It Together
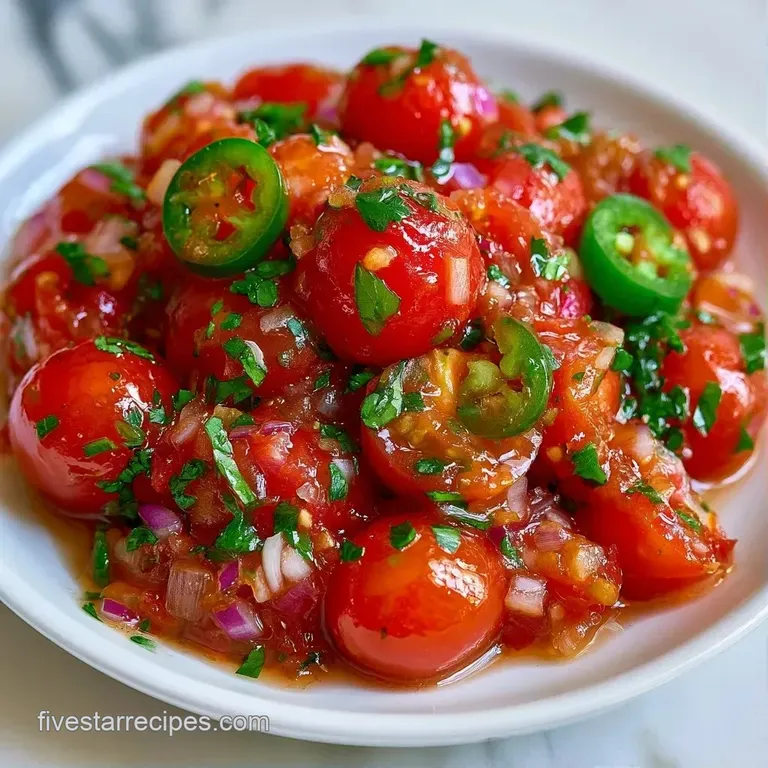
Phase 1: Rapid Roasting
Toss the cherry tomatoes, diced onion, and garlic in olive oil on a sheet pan. Broil on high for 5-8 minutes until the skins blister and turn mahogany colored. Note: Watch them closely so they don't turn to ash.
Phase 2: The Simmer
Transfer the roasted vegetables, including all the juices from the pan, into a stainless steel pot. Stir in the minced jalapeños, apple cider vinegar, lime juice, sugar, and canning salt.
Simmer on medium low for 10 minutes until the mixture reaches a chunky, cohesive consistency.
Phase 3: The Finish
Fold in the fresh cilantro during the final 60 seconds of simmering. This keeps the green color vivid and the taste fresh.
Phase 4: Safe Processing
Pack the hot Cherry Tomato Salsa into sterilized pint jars. Leave 1/2 inch of headspace at the top. Wipe the rims clean with a damp cloth and apply new lids and bands.
Phase 5: The Water Bath
Lower jars into a water bath canner. Ensure they are covered by at least 1 inch of water. Process for 15 minutes.
Phase 6: The Seal
Remove jars carefully and let them sit undisturbed for 24 hours. You'll know it worked when you hear that satisfying pop of the lid.
Fixing Common Issues
If your salsa looks a bit too liquid, don't panic. It usually happens if the tomatoes were exceptionally juicy or didn't roast long enough. You can simmer the mixture for an extra 5 minutes before jarring, but be careful not to overcook the jalapeños or they'll lose their bite.
When it comes to the seal, the rim is the danger zone. A single seed or a drop of oil on the glass can prevent the lid from seating. Always do a final wipe with a clean, damp paper towel.
Seal Failures
If a lid doesn't pop, you can either re process the jar with a new lid or just keep it in the fridge and eat it within a week.
Watery Consistency
Over stirring the tomatoes during the simmer can break them down too much, turning your chunky salsa into a sauce.
Muted Flavors
This often happens if the vinegar is old. Fresh acidity is what makes the roast flavor stand out.
| Problem | Root Cause | Solution |
|---|---|---|
| Lid won't seal | Debris on jar rim | Wipe rims with vinegar water before capping |
| Too acidic | Low tomato sugar | Add a pinch more sugar before simmering |
| Dull color | Overcooked cilantro | Add herbs in the last 60 seconds only |
Make It Your Own
For a smoky twist, replace the olive oil with a teaspoon of smoked paprika or use chipotle peppers instead of jalapeños. If you want a heartier texture, you can stir in roasted corn kernels during the simmer phase.
For those who prefer a milder version, remove all the seeds and the white pith from the jalapeños entirely. This keeps the flavor of the pepper but removes the burn. If you love this flavor profile, you might also enjoy my Tomato Salad for 4 recipe for a fresh, non cooked alternative.
Decision Shortcuts:
- For more heat: Leave seeds in 2 of the jalapeños.
- For a sweeter profile: Increase sugar to 2 tsp.
- For a thicker jam: Simmer for 15 minutes instead of 10.
Since we are talking about roasting, I've found that a stovetop simmer is great for thickening, but the oven is where the flavor lives.
| Feature | Stovetop Only | Roasted Base |
|---|---|---|
| Flavor Profile | Bright, fresh, acidic | Deep, smoky, rich |
| Prep Time | Faster initial start | Slower (includes broiling) |
| Texture | More uniform | Chunky and varied |
Storage and Zero Waste
Keep these jars of Cherry Tomato Salsa in a cool, dark pantry for up to a year. Once opened, transfer the jar to the refrigerator, where it will stay fresh for about 2 weeks.
Save the flavorful oil left in the roasting pan; infused with garlic and tomato, it's great for sautéing spinach or tossing with pasta. Any stray tomatoes that didn't roast can be chopped and stirred into a morning omelet.
For the gold standard in safe home preserving guidelines, visit the National Center for Home Food Preservation.
Pairing Ideas
This salsa is a powerhouse for starters. I love serving it with thick, salted corn chips or toasted sourdough points. It also works as a bold topping for grilled fish or shrimp.
If you're planning a full spread, this pairs beautifully with a creamy avocado dip to balance the acidity. For a more substantial meal, you can use a few spoons of this as a base for a quick dinner, similar to how I make my Shrimp Cherry Tomato Pasta.
Why Most Recipes Get This Wrong
Most people treat salsa like a soup, simmering everything together from the start. This results in a muted, one dimensional flavor where the onion tastes boiled and the tomatoes lose their punch. By roasting the vegetables first, we create a flavor contrast that doesn't happen in a pot.
The other big mistake is using standard tomatoes. Large tomatoes have a huge amount of water in the center. Cherry tomatoes have a better skin to flesh ratio, which means they hold their shape during the water bath process. They give you a "pop" of flavor rather than a mushy puree.
A couple of myths to ignore: Searing the vegetables doesn't "lock in" nutrients, but it does create complex sugars through caramelization. Also, you don't need to peel the tomatoes. The skins blister and soften in the oven, adding a great rustic texture to the final Cherry Tomato Salsa.
Recipe FAQs
How to roast cherry tomatoes?
Toss them with diced onion, garlic, and olive oil on a sheet pan. Broil on high for 5-8 minutes until the skins blister and turn mahogany.
What's the total oven time for tomatoes?
Cook them under the broiler for 5 to 8 minutes. This quick high-heat blast creates charred flavor without turning the fruit into mush.
How do you bottle the salsa?
Pack the hot mixture into sterilized pint jars leaving a half-inch of headspace. Process the jars in a water bath canner for 15 minutes.
Can skins remain on tomatoes during canning?
Yes, the skins stay on for this specific recipe. They provide necessary structure and texture to the final chunky consistency.
Where should I use fire-roasted tomatoes?
Use them as a base for pasta or a topping for grilled fish. If you enjoy these roasted flavors, try making a tomato confit for a richer result.
Is it true you must peel cherry tomatoes before roasting?
Actually, no. Roasting the skins intact allows them to blister and add a deep, smoky flavor to the salsa.
Which sauce works best with cherry tomatoes?
A combination of apple cider vinegar and fresh lime juice creates the ideal tangy sauce. This acidity balances the concentrated sweetness of the roasted fruit.
How long do fresh tomatoes stay in the freezer?
Keep them for about 6 to 12 months. Wash and dry them thoroughly before freezing to prevent large ice crystals from forming.
Roasted Cherry Tomato Salsa for 6 Jars