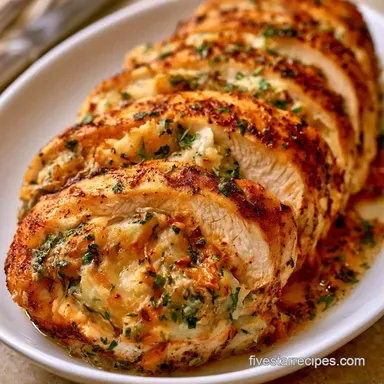
Healthy Loaded Potato Stuffed Chicken Breast
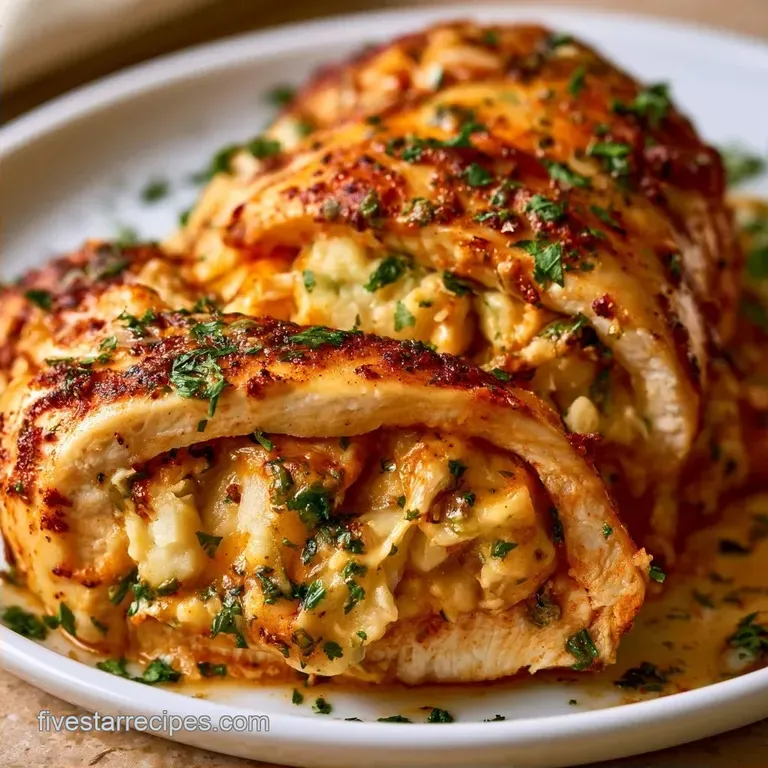
- Time: 20 min active + 35 min cooking
- Flavor/Texture Hook: Crispy seared crust with a creamy, cheesy center
- Perfect for: Weeknight dinner or a simple date night meal
That first hiss when the chicken hits the cast iron tells you everything. It is that sound of the crust forming, the kind of sear that locks in moisture and gives you those deep, savory notes. I remember one time I didn't pat the meat dry enough, and instead of searing, the chicken just steamed in the pan.
It looked gray and tasted flat. Now, I treat that paper towel step like it is the most important part of the night.
This Loaded Potato Stuffed Chicken is basically a cheat code for dinner. You get the indulgence of a loaded baked potato but the protein punch of a chicken breast. It is designed for those nights when you want something that feels fancy but doesn't keep you in the kitchen for hours.
The payoff here is the contrast. You have the crunch of the smoked paprika crust and the richness of the cheese and bacon inside. It is hearty, satisfying, and surprisingly lean because we swap out the heavy creams for Greek yogurt.
Loaded Potato Stuffed Chicken
The trick is getting the filling stable so it doesn't run out like soup when the heat hits. Most people use sour cream, but Greek yogurt is a better bet. It holds its structure under high heat and keeps that tangy zip.
The Initial Sear: Browning the meat first creates a flavorful crust that keeps the chicken juicy during the bake.
Filling Density: Using thick mashed potatoes instead of a runny mix ensures the stuffing stays put.
Pocket Placement: Slicing into the thickest part of the breast protects the filling from direct heat, preventing the cheese from oiling out.
Why the Textures Work
The way these ingredients interact is what keeps the dish from becoming a soggy mess. The Greek yogurt acts as a binder, while the sharp cheddar provides a structural melt.
| Component | Purpose | Substitute Notes |
|---|---|---|
| Greek Yogurt | Stabilizes the filling | Sour cream: Heavier and more fat, but less protein |
| Smoked Paprika | Adds color and depth | Cumin: Earthier tone, less smoky |
| Sharp Cheddar | Adds richness and bind | Gruyère: Nuttier flavor, melts very smoothly |
| Cast Iron Skillet | Ensures a deep sear | Stainless steel: Works, but stickier for the meat |
The choice of a cast iron skillet is a huge win here. It holds heat much better than a thin non stick pan, which means you get that mahogany crust in about 4 minutes per side.
The Recipe Specs
Before you start, get your measurements ready. I have converted everything to metric for precision.
- 4 chicken breasts (170g each), boneless and skinless
- 30g olive oil
- 5g smoked paprika
- 5g garlic powder
- 3g sea salt
- 1g cracked black pepper
- 300g mashed potatoes
- 120g plain Greek yogurt
- 50g sharp cheddar cheese, shredded
- 60g bacon, cooked crispy and crumbled
- 15g fresh chives, finely chopped
- 1g onion powder
| Fresh Version | Shortcut Version | The Trade off |
|---|---|---|
| Homemade Mashed Potatoes | Instant Potato Flakes | Fresh has more flavor; flakes are faster |
| Freshly Grated Cheese | Pre shredded Bag | Pre shredded has starch and doesn't melt as well |
| Fresh Chives | Dried Chives | Fresh adds a bright pop of color and zest |
If you are using a shortcut like pre shredded cheese, just know it might be a bit grainier. For a better melt, grate your own from a block.
The Tool List
While basic equipment will work, a few specific tools simplify the process. A sharp paring knife is essential; using a dull blade may cause you to slice through the chicken breast, allowing the filling to leak out.
- Cast iron skillet (oven safe)
- Paring knife
- Medium mixing bowl
- Meat thermometer (digital)
- Paper towels
Step by step Method
Phase 1: Crafting the Filling
Combine the warm mashed potatoes, Greek yogurt, shredded cheddar, crumbled bacon, and onion powder in a bowl. Stir until the cheese is melted and the mixture is smooth and creamy. Fold in the chives last.
Phase 2: Preparing the Pockets
Thoroughly dry the chicken breasts with paper towels. Create an opening in the thickest area of each breast. Ensure you do not pierce through to the opposite side.
Phase 3: Seasoning and Stuffing
Coat the exterior of the chicken with smoked paprika, garlic powder, sea salt, and black pepper. Spoon the potato filling into the openings and press firmly to eliminate air gaps.
Phase 4: Searing for Flavor
Warm olive oil in the pan over medium high heat. Brown the meat for 4 minutes on each side to achieve a rich, golden sear.
Phase 5: The Final Bake
Transfer the pan to the oven at 200°C. Bake until the internal temperature reaches 74°C. The USDA suggests a safe internal temperature of 74°C.
Phase 6: The Rest
Allow the chicken to rest on a cutting board for 5 minutes. This helps the juices redistribute so they don't escape when you carve.
The Troubleshooting Guide
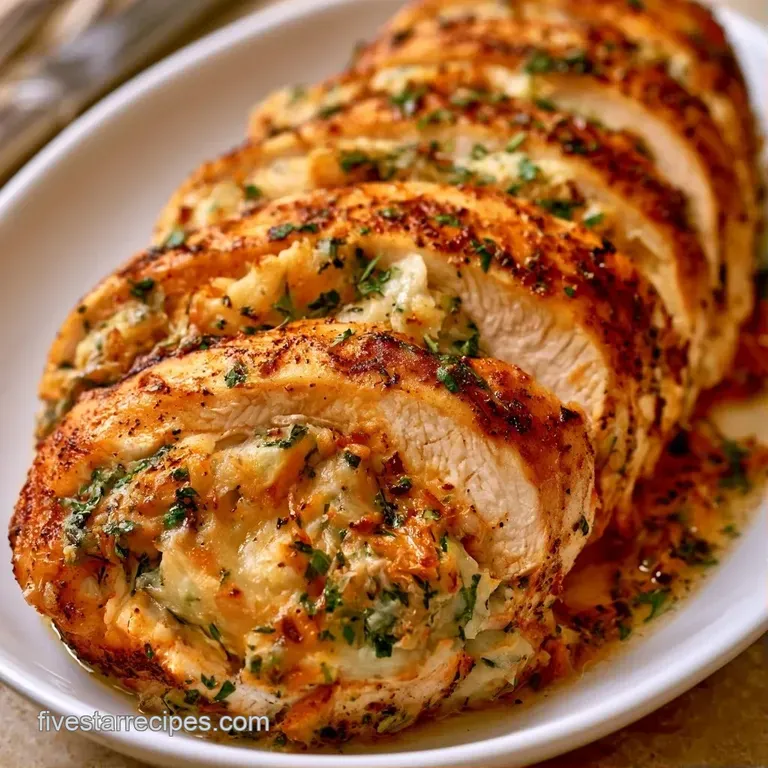
The most common issue is the "blowout," where the filling escapes during the sear. This happens if you overfill the pocket or if the chicken wasn't patted dry, causing the meat to slide in the pan.
Fixing Filling Leaks
If you see filling escaping, don't panic. Use a toothpick to pin the opening shut. Next time, ensure your mash is slightly cooled before stuffing to make it thicker.
Preventing Dry Meat
Dry chicken usually comes from overcooking. Use a thermometer and pull the meat out 2 degrees before it hits the target, as carryover cooking will finish the job.
Fixing a Bland Crust
If the flavor feels muted, you probably didn't use enough salt. The paprika provides the color, but the salt is what wakes up the savory notes.
| Problem | Fix |
|---|---|
| Stuffing leaks out | Use toothpicks or cool the mash first |
| Chicken is dry | Pull from oven at 72°C and let rest |
| No brown crust | Pat chicken drier and increase pan heat |
Storage and Waste Tips
Store any remaining portions in a closed glass container, refrigerated for 72 hours. When reheating, try to avoid the microwave. An air fryer at 180°C for 5-8 minutes restores the crust's crispness and warms the middle without turning the meat rubbery.
To avoid waste, keep the bacon fat from your preparations. It's excellent for sautéing greens or adding depth to a morning egg scramble. Any extra mash can be fried into small potato cakes the next morning.
Best Side Pairings
Because Loaded Potato Stuffed Chicken is such a hearty dish, keep your side options light. A peppery arugula salad with a zesty lemon dressing helps balance the richness of the bacon and cheese.
Steamed asparagus or roasted broccolini are also excellent choices. The slight bitterness of these greens offsets the creamy stuffing. For those feeding a crowd, a simple tray of sliced cucumbers with a drizzle of rice vinegar provides a refreshing contrast.
Customizing Your Meal
You can tweak this to fit your mood. For a spicier version, swap the cheddar for Pepper Jack and add a pinch of cayenne to the rub. For a more refined taste, use Gruyère and swap the bacon for sautéed leeks.
If you want something similar but without the potato, try a Stuffed Chicken for 4 recipe. , if you prefer the mash but want a different protein, my Mashed Potato Stuffed Chicken offers a different take on the classic.
Decision Shortcut:
- For a firmer set: cool mash 10 mins before stuffing.
- For extra crisp skin: pat chicken dry twice.
- For a spicier kick: swap cheddar for Pepper Jack.
Common Kitchen Myths
Searing doesn't "seal in the juices"; that's a complete myth. Searing is for color and flavor, whereas water is lost at every stage of cooking. The real secrets to juicy meat are the internal temperature and the resting time.
It's also a misconception that chicken must be floured before searing. While it creates a crust, flour often burns in a high heat cast iron skillet. A dry, well seasoned breast provides a cleaner and more professional result.
Final Thoughts on this Dish
Perfecting Loaded Potato Stuffed Chicken depends on the finer points. If you slow down your preparation and focus on achieving a deep sear, you'll see a massive difference. It is an effortless upgrade that makes a standard Tuesday feel like a feast.
Trust your meat thermometer, keep the surface dry, and embrace the heat of the pan.
Recipe FAQs
What ingredients go into the filling?
Combine mashed potatoes, Greek yogurt, shredded cheddar, crumbled bacon, onion powder, and chives.
Tip: Stir the mixture while the potatoes are warm to help the cheese melt.
Can you stuff chicken breasts with mashed potatoes?
You can create a pocket in the thickest part of the breast to hold the filling.
Tip: Use a sharp paring knife to avoid cutting completely through the meat.
How do I prevent the filling from leaking?
Spoon the mixture firmly into the pocket to eliminate air gaps.
Tip: Pat the chicken breasts completely dry before searing to ensure a tight seal.
Is it true that only chicken breasts work for this?
False. Boneless, skinless thighs work well and stay juicy during the baking process.
Tip: Adjust the baking time slightly as thighs may require more time than breasts.
Which method ensures a golden brown crust?
Sear the chicken in a preheated cast iron skillet with olive oil over medium high heat.
Tip: Don't overcrowd the pan to maintain a high searing temperature.
Could a dessert balance the richness of this meal?
A light vanilla bean panna cotta provides a refreshing contrast to the savory chicken.
Tip: Serve the chicken with steamed broccoli to cut through the richness of the cheese.
Loaded Potato Stuffed Chicken for 4