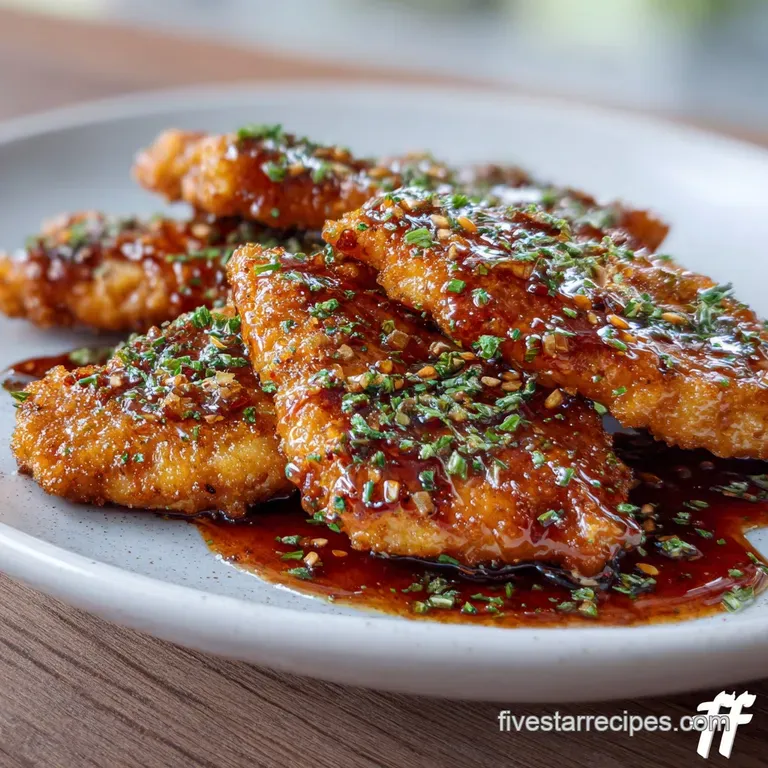
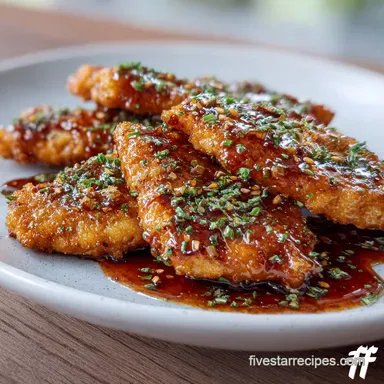
Easy Honey Garlic Glazed Chicken Breast

- Time: Active 5 mins, Passive 10 mins, Total 15 mins
- Flavor/Texture Hook: Sticky, garlic infused glaze with a velvety finish
- Perfect for: Occasion ready weeknight dinner or elegant meal prep
- Perfecting Easy Honey Garlic Glazed Chicken Breast
- Scientific Principles Behind the Sticky Glaze
- Component Analysis and Ingredient Roles
- The Curated Elements for Success
- Professional Tools for Superior Results
- Step-by-Step Guidance for Your Dinner
- Mastering the Technique and Troubleshooting
- Refining Flavors and Adapting Ingredients
- Myths Regarding Chicken Preparation
- Preserving Quality and Reheating Tips
- Artful Presentation for Your Main Course
- Recipe FAQs
- 📝 Recipe Card
Perfecting Easy Honey Garlic Glazed Chicken Breast
Picture this: the kitchen is filled with that intoxicating, sharp aroma of garlic hitting hot oil, quickly followed by the mellow, floral scent of raw honey. I remember the first time I attempted a version of this; I was hosting a last minute dinner for a friend who truly appreciates a masterfully cooked protein.
I rushed the process, burned the garlic, and the sauce was a watery mess. It was a lesson in patience and heat management that I’ll never forget, but it led me to the refined method I’m sharing with you today.
This recipe delivers an easy honey garlic glazed chicken breast perfect for dinner. We are moving beyond basic sautéing and entering the realm of pan sauce mastery. By focusing on the temperature of the skillet and the timing of the aromatics, you can create a dish that feels like it belongs in a high end bistro rather than a standard home kitchen.
It is about the subtle transformation of simple ingredients into something truly special.
The beauty of this dish lies in its speed without sacrificing sophistication. We often think "fast" means "compromised," but when you understand how these ingredients interact, you can achieve a superior result in fifteen minutes.
This isn't just about feeding the family; it's about mastering a technique that you can pull out of your sleeve whenever you need to impress. Trust me, once you see that glaze start to bubble and thicken, you'll know exactly what I mean.
Scientific Principles Behind the Sticky Glaze
Understanding the "why" is what separates a cook from a chef. When we work with honey and soy, we are playing with high stakes chemistry.
- Maillard Reactivity: The sugars in the raw honey interact with the amino acids in the chicken, creating hundreds of new flavor compounds that produce a deep, savory crust.
- Emulsification Stability: Adding the cold unsalted butter at the final stage allows the fat to bind the water based soy sauce and vinegar into a silky, cohesive glaze.
- Hygroscopic Nature: Honey is naturally hygroscopic, meaning it attracts moisture, which helps keep the chicken breast succulent even as it cooks over high heat.
| Thickness | Internal Temp | Rest Time | Visual Cue |
|---|---|---|---|
| 1/2 inch | 165°F | 3 mins | Opaque center with clear juices |
| 3/4 inch | 165°F | 5 mins | Firm to the touch with golden edges |
| 1 inch | 165°F | 5 mins | Deeply bronzed with a slight spring |
The table above is your primary guide for ensuring you never serve a dry piece of poultry again. While time is a factor, the internal temperature is the only truth in a kitchen. Using an instant read thermometer is a non negotiable step for the serious home cook.
Component Analysis and Ingredient Roles
The selection of ingredients for our glazed chicken breast for dinner is deliberate, focusing on the interplay of acidity, sweetness, and salt.
| Ingredient | Science Role | Pro Secret |
|---|---|---|
| Raw Honey | Carries flavor and creates stickiness | Use high-quality wildflower honey for floral notes |
| Apple Cider Vinegar | Cuts through the sugar to balance the palate | Swirl it in just before the garlic to deglaze |
| All Purpose Flour | Provides a surface for the glaze to cling | Season the flour heavily with salt and pepper |
Every element has a purpose. The flour isn't just for a crust; it acts as a thickening agent for the sauce as the chicken rests in the pan. Without it, the glaze would simply slide off the meat and pool at the bottom of the dish.
The Curated Elements for Success
When preparing your easy honey garlic glazed chicken breast, the quality of your staples matters. I prefer using a high-quality extra virgin olive oil for its smoke point and flavor profile.
- 2 large boneless skinless chicken breasts: Aim for approximately 1 lb. Why this? Larger breasts are easier to slice into uniform, quick cooking cutlets.
- 3 tbsp all purpose flour: Used for dredging. Why this? Creates a "shatter" texture once seared in the oil.
- 1/3 cup raw honey: The base of our glaze. Why this? Provides the necessary viscosity for a thick coating.
- 2 tbsp low sodium soy sauce: Adds the essential umami. Why this? Allows us to control the salinity without overwhelming the dish.
- 4 cloves garlic, minced: The soul of the recipe. Why this? Freshly minced garlic provides a sharper, more vibrant punch than jarred.
- 1 tbsp apple cider vinegar: For that necessary acidic brightness.
- 1 tbsp unsalted butter: The secret to a velvety finish.
- 1/2 tsp each: sea salt, cracked black pepper, red pepper flakes: For seasoning and a subtle heat.
- 2 tbsp extra virgin olive oil: For the initial over high heat sear.
| Original Ingredient | Substitute | Why It Works |
|---|---|---|
| Raw Honey | Maple Syrup (Grade A) | Similar sugar content. Note: Adds a woodsy, autumnal flavor profile. |
| Apple Cider Vinegar | Rice Vinegar (unseasoned) | Maintains acidity but offers a milder, sweeter finish. |
| Soy Sauce | Tamari | Keeps the dish gluten-free while providing identical umami depth. |
If you decide to swap the honey for maple syrup, keep an eye on the pan. Maple syrup has a slightly lower burning point and may darken quicker than honey.
Professional Tools for Superior Results
To achieve that master level sear, your choice of equipment is just as vital as your ingredients. I recommend a heavy bottomed skillet, such as a cast iron pan from Lodge, which retains heat much more effectively than thin aluminum.
- Cast Iron Skillet or Stainless Steel Pan: This ensures the chicken sears rather than steams.
- Meat Mallet: Crucial for even thickness, ensuring every piece cooks at the same rate.
- Tongs: To flip the chicken gently without piercing the meat and losing juices.
- Whisk: For emulsifying the honey and soy sauce mixture.
- Instant Read Thermometer: To verify the 165°F internal temperature precisely.
Right then, once you have your tools assembled, you're ready to create something spectacular. The heavy pan is your best friend here; it provides the consistent thermal mass needed to get that beautiful golden brown color on the chicken breast.
step-by-step Guidance for Your Dinner
Follow these steps closely. The transition from a sear to a glaze happens quickly, so having everything prepped (mise en place) is essential.
Prep for maximum speed
Slice the chicken breasts into even cutlets, about 1/2 inch thick. Note: This ensures the meat cooks through before the garlic in the sauce has a chance to burn.
Season and dredge
Mix the flour, sea salt, and black pepper in a shallow bowl. Press each chicken piece into the flour, shaking off the excess until only a light, translucent coating remains.
Secret to perfect sear
Heat the olive oil in your skillet over medium high heat. Place the chicken in the pan and cook for 3-4 minutes per side until a golden brown crust forms.
Prepare the base
While the chicken sears, whisk the honey, soy sauce, apple cider vinegar, and red pepper flakes in a small ramekin.
Finish without burning garlic
Lower the heat to medium and move the chicken to one side of the pan. Add the minced garlic to the empty space and sauté for 30 seconds until the aroma is fragrant but not browned.
Glaze the protein
Pour the honey mixture over the chicken. Simmer for 2 minutes until the sauce begins to bubble and thicken into a sticky syrup.
The velvety finish
Add the unsalted butter to the pan. Use a spoon to baste the chicken with the melting butter and glaze until the sauce is glossy and coats the meat completely.
Rest and serve
Remove from heat and let the chicken rest in the pan for 3 minutes. This allows the juices to redistribute and the glaze to set.
| Feature | Fast Method (This Recipe) | Classic Method (Marinated) |
|---|---|---|
| Preparation Time | 5 minutes | 2 - 4 hours |
| Texture | Crispy/Velvety | Soft/Tender |
| Flavor Profile | Bright, forward garlic | Deep, infused soy |
The fast method is my go to for a reason. By dredging the chicken, we create a barrier that keeps the meat juicy while providing a "hook" for the honey garlic sauce to grab onto.
Mastering the Technique and Troubleshooting
Even the most seasoned home cooks face challenges. The key is knowing how to pivot when things don't go according to plan.
Why is my garlic bitter?
If the heat is too high when you add the garlic, it will brown too quickly. Brown garlic is toasted; black garlic is bitter. If you see it turning dark brown, immediately add the liquid honey mixture to drop the temperature of the pan and stop the cooking process.
Prevent rubbery chicken
Rubbery chicken is almost always a result of overcooking. Because we are using cutlets, they cook incredibly fast. Once they hit 160°F, pull them off the heat; the carryover cooking will bring them to the safe 165°F mark while they rest in the warm glaze.
| Problem | Root Cause | Solution |
|---|---|---|
| Glaze is too thin | Not enough reduction time | Simmer for an extra 60 seconds on low heat. |
| Coating is soggy | Pan was not hot enough | Ensure oil is shimmering before adding chicken. |
| Glaze is too salty | Used full sodium soy sauce | Add a squeeze of lemon juice or a teaspoon of water. |
Common Mistakes Checklist
- ✓ Pat the chicken completely dry before dredging (moisture creates steam, not crunch).
- ✓ Do not overcrowd the skillet; cook in batches if necessary to maintain pan temperature.
- ✓ Use raw honey rather than processed "clover" honey for better viscosity and flavor.
- ✓ Ensure the butter is cold when added at the end for the best emulsification.
- ✓ Never skip the resting period, or the glaze will run right off the meat.
Refining Flavors and Adapting Ingredients
You can easily adapt this easy honey garlic glazed chicken breast for dinner to suit various dietary needs or flavor preferences.
Adjusting the portion size
If you are cooking for a larger crowd, do not simply double everything in one pan. Work in batches to ensure the chicken sears properly. For 8 servings, use two skillets or cook the chicken in two rounds, keeping the first batch warm in a low oven (200°F) while you finish the second.
Refined dietary adaptations
To make this gluten-free, substitute the all purpose flour with a high-quality almond flour or cornstarch. Note that cornstarch will yield a much crispier, "shatter like" crust, which is actually quite delightful with the sticky sauce.
For a Paleo friendly version, swap the soy sauce for coconut aminos and the butter for ghee.
Balancing acid and sweetness
If you find the glaze too sweet for your palate, increase the apple cider vinegar by a teaspoon. Conversely, if you want it stickier and more decadent, add an extra tablespoon of honey and a pinch more red pepper flakes for balance.
| Goal | Adaptation | Impact |
|---|---|---|
| Extra Crunch | Use Cornstarch | Creates a glass like, crispy exterior. |
| Deeper Umami | Add 1 tsp Miso | Adds a fermented, savory complexity. |
| Citrus Note | Add Orange Zest | Brightens the honey with a fresh, fruity aroma. |
Chef's Note: If you want an "Oven Baked" feel but the speed of the stovetop, sear the chicken for only 2 minutes per side, then transfer the whole skillet to a 400°F oven for 5 minutes after adding the glaze.
Myths Regarding Chicken Preparation
We’ve all heard the old wives' tales about cooking poultry. Let's clear the air so you can cook with confidence.
One of the most persistent myths is that "searing meat seals in the juices." Science tells us this is simply not true. Searing is about the Maillard reaction creating flavor through browning. The juices stay in because of proper internal temperature and resting, not because of a "seal" on the outside.
Another common misconception is that you must wash your chicken before cooking. Please, don't do this. Washing chicken splashes bacteria around your sink and counters. The heat of the pan is what makes the meat safe to eat, not a rinse in the tap.
Finally, some believe that honey loses all its benefits when heated. While some enzymes are heat sensitive, the complex sugars and flavor compounds that make honey unique are actually enhanced by the caramelization process in this recipe.
Preserving Quality and Reheating Tips
This dish is best served immediately, but we all have leftovers. Handling them correctly ensures the chicken stays succulent rather than turning into leather.
Storage Guidelines: Store any leftover chicken in an airtight container in the refrigerator for up to 4 days. If you wish to freeze it, place the chicken and sauce in a freezer safe bag for up to 3 months. To serve from frozen, thaw overnight in the fridge before reheating.
Reheating for Success: Avoid the microwave if possible; it will make the chicken rubbery and the glaze watery. Instead, place the chicken in a small skillet over low heat. Add a splash of water or chicken broth to loosen the glaze and cover the pan.
Heat for 4-5 minutes until warmed through.
Zero Waste Tip: If you have extra glaze left in the pan, don't toss it! Toss some steamed broccoli or snap peas directly into the warm skillet. The leftover honey garlic sauce is a world class dressing for greens.
You can also shred any leftover chicken and use it as a sophisticated topper for a grain bowl the next day.
Artful Presentation for Your Main Course
When you're serving an easy honey garlic glazed chicken breast for dinner, presentation is what makes it feel like a special occasion. I love to serve this over a bed of jasmine rice or quinoa, which acts as a sponge for that glorious extra sauce.
For a pop of color and texture, garnish with thinly sliced green onions and a sprinkle of toasted sesame seeds. If you're feeling particularly gourmet, a few sprigs of fresh cilantro or a side of quick pickled cucumbers provides a refreshing contrast to the rich, sticky glaze.
Don't forget the "glaze cling" technique. Just before plates hit the table, give the chicken one last baste with the sauce from the pan. This ensures that the meat looks glossy and inviting under the dining room lights.
It's these small, master level touches that turn a simple fifteen minute meal into a dinner your guests will be talking about for weeks. Enjoy the sizzle, the aroma, and most importantly, the triumph of a perfectly executed glaze.

Recipe FAQs
Can I use frozen chicken breasts instead of fresh ones?
No, defrost completely first. Thawing in the pan will lead to uneven cooking and a soggy crust.
How to ensure the honey garlic glaze is sticky and not runny?
Simmer the sauce until it coats the back of a spoon. The flour dredge on the chicken helps thicken the sauce as it reduces in the pan.
What internal temperature must the chicken reach for safety and texture?
165°F is the final safe internal temperature. Pull the chicken slightly before this (around 160°F) to account for carryover cooking.
Is it true that searing chicken breast "seals in the juices"?
No, this is a common misconception. Searing is strictly for developing flavor and color through the Maillard reaction, not for sealing moisture.
How to prevent the garlic from burning when making the sauce?
Add the minced garlic just after the chicken sears and lower the heat. Sauté it for only 30 seconds until fragrant before pouring in the honey mixture.
What can I substitute for soy sauce if I need a gluten-free option?
Use Tamari or coconut aminos. Both provide the necessary salty umami depth without introducing gluten.
How long should I rest the finished chicken before slicing?
Rest the chicken in the pan for 3 minutes before serving. This resting period allows the juices to redistribute, ensuring the meat stays moist after slicing.
Easy Honey Garlic Chicken Breast
Ingredients:
Instructions:
Nutrition Facts:
| Calories | 387 kcal |
|---|---|
| Protein | 35 g |
| Fat | 14 g |
| Carbs | 29 g |
| Fiber | 1 g |
| Sugar | 23 g |
| Sodium | 580 mg |
