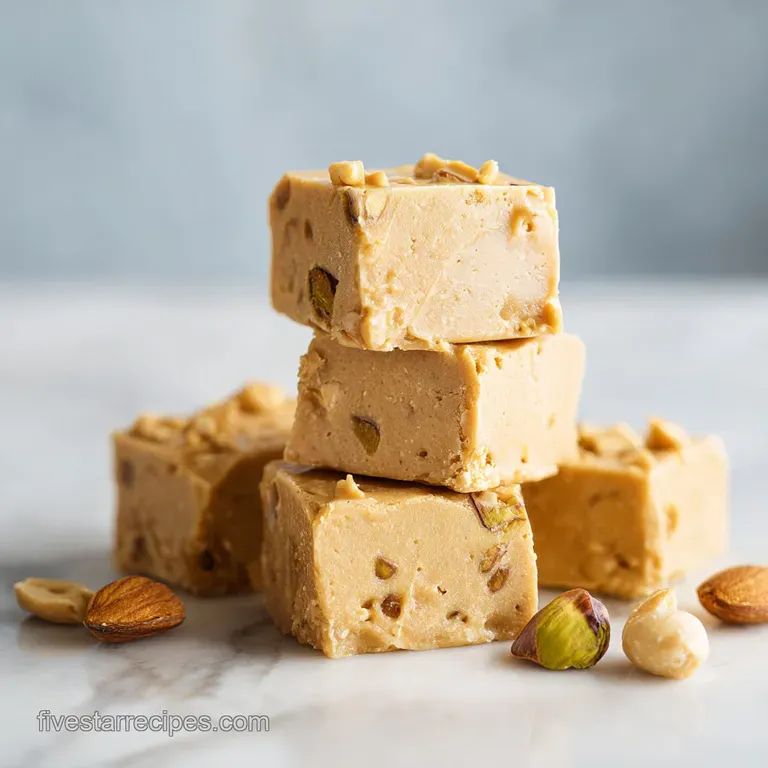
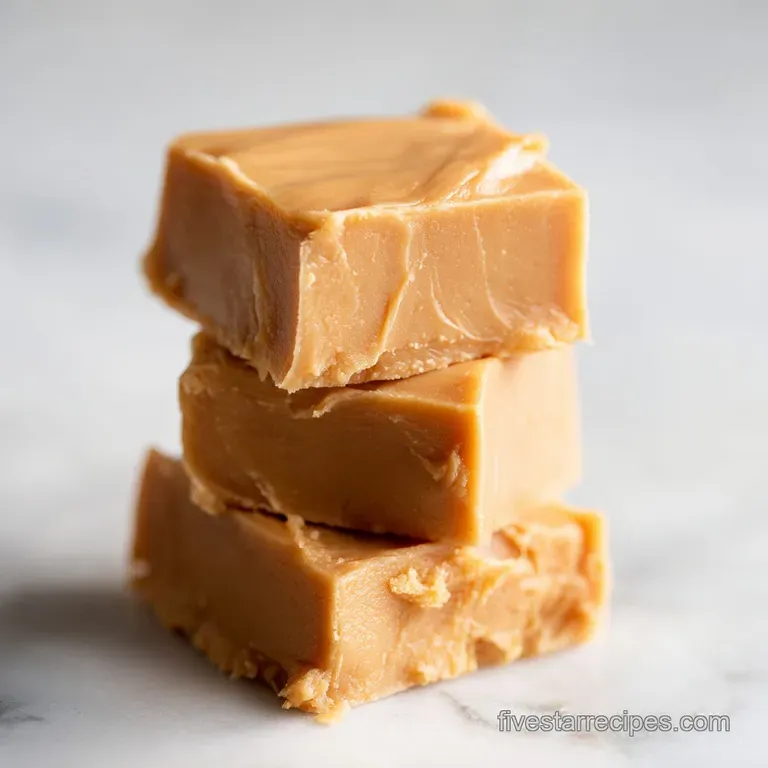
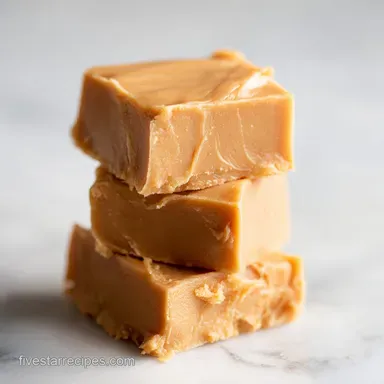
Creamy Peanut Butter Fudge: Velvety and Foolproof
- Time: Active 10 minutes, Passive 5 minutes, Total 15 minutes
- Flavor/Texture Hook: Intensely nutty with a melt on-the tongue velvety finish
- Perfect for: Holiday gifting, last minute dessert cravings, or beginner confectioners
- Achieve Peanut Butter Fudge Recipe Creamy Easy
- What Actually Makes It Silky
- Component Analysis and Pro Secrets
- Selecting Your Five Star Elements
- Tools for Professional Results
- Executing the Perfect Set
- Solving Texture and Set Issues
- Adjusting for Yield and Batch Size
- Truths and Kitchen Wisdom
- Keeping Your Fudge Fresh
- Presentation and Serving Ideas
- Decision Shortcuts
- Recipe FAQs
- 📝 Recipe Card
Achieve Peanut Butter Fudge Recipe Creamy Easy
The moment that heavy bottomed saucepan hits the burner, the air in the kitchen shifts. It starts with the mellow, toasted scent of melting butter not just any butter, but the kind that starts to foam slightly before it meets the thick, ivory stream of sweetened condensed milk.
As you whisk them together, the aroma deepens into something reminiscent of a high end candy shop. It is warm, comforting, and undeniably nostalgic.
When the creamy peanut butter finally joins the party, the transformation is instant. The mixture goes from a thin liquid to a glossy, heavy ribbon that clings to the whisk. You can see the sheen reflecting the kitchen lights, a sign that the fats are bonding perfectly.
There is no aggressive bubbling here, just a gentle steaming that promises a texture far superior to the grainy, crumbly fudge of the past. It feels like a secret, even though it’s sitting right there on your stovetop.
We have all been there staring at a tray of fudge that’s either oily on top or so hard it threatens your dental work. This recipe is designed to eliminate those variables. We are skipping the traditional "soft ball stage" guesswork and leaning into the science of stable fats and powdered sugar.
The result is a consistent, five star treat that actually behaves itself when you try to slice it.
What Actually Makes It Silky
Understanding the "why" behind your candy making is the quickest way to move from a recipe follower to a confident home cook. Fudge is essentially a battle against sugar crystallization. In old-fashioned recipes, you spend twenty minutes praying the sugar doesn't turn into sand. Here, we use a different approach.
- Fat Stabilization: The sweetened condensed milk acts as a pre emulsified base, which means the sugar is already dissolved and the milk solids are stabilized by fat. This prevents the "grainy" mouthfeel that ruins most homemade batches.
- Cold Fat Integration: Using cubed, unsalted butter allows us to control the rate of melting. By melting it slowly into the milk, we create a uniform liquid that can easily hold the heavy weight of the peanut butter without breaking.
- Starch Controlled Setting: The powdered sugar in this recipe isn't just for sweetness. It contains a small amount of cornstarch, which absorbs any excess moisture and provides a structural "skeleton" for the fudge to set firmly at room temperature.
- Protein Bond: Peanut butter is high in protein and healthy fats. When we stir it into the warm milk base, the proteins slightly denature and then re bond as they cool, creating that signature dense, fudgy bite.
| Cook Method | Time | Texture | Best For |
|---|---|---|---|
| Stovetop (Pan) | 15 mins | Superior Gloss | Maximum control and smooth finish |
| Microwave | 8 mins | Slightly Softer | Absolute speed and minimal cleanup |
| Slow Cooker | 45 mins | Very Dense | Large batches for holiday gifting |
Choosing the stovetop method is the gourmet choice because it allows you to see the exact moment the fats incorporate. You aren't just heating ingredients; you are watching for that specific "glossy" stage where the mixture looks like liquid gold.
This visual cue is your insurance policy against a dry or separated batch.
Component Analysis and Pro Secrets
Every ingredient in this recipe serves a technical purpose. We aren't just tossing things in a pot; we are building a structural masterpiece. Choosing high-quality components ensures the final flavor is deep and complex rather than just cloyingly sweet.
| Ingredient | Science Role | Pro Secret |
|---|---|---|
| Creamy Peanut Butter | Primary Fat/Protein | Use a stabilized brand (like Jif) for a smoother set than "natural" oily versions |
| Condensed Milk | Liquid Sugar Base | Don't confuse this with evaporated milk; the sugar content here is vital for the set |
| Powdered Sugar | Structural Reinforcement | Always sift your sugar to avoid "white pockets" that can cause crumbling later |
When selecting your peanut butter, the "no stir" varieties work best for this specific application. The palm oil or stabilized fats in those jars help maintain the emulsion at room temperature. If you use the natural stuff where the oil separates at the top, you risk a fudge that feels greasy to the touch.
Selecting Your Five Star Elements
Precision starts with your mise en place. Having every ingredient measured and ready to go is the difference between a relaxing cook and a frantic scramble.
- 16 oz creamy peanut butter: This is the heart of the recipe. Ensure it is at room temperature before you start so it incorporates without cooling the base too quickly. Why this? Provides the foundational flavor and the necessary fats for a velvety mouthfeel.
- 1/2 cup unsalted butter, cubed: Unsalted gives you total control over the seasoning. Cubing it ensures even melting. Why this? Adds richness and helps create a smooth, emulsified liquid base.
- 14 oz sweetened condensed milk: This is our sugar and dairy all in-one. Ensure the can is fully scraped out. Why this? The high sugar concentration creates a stable, chewy texture without boiling sugar.
- 1 tsp pure vanilla extract: Use the real stuff, not imitation, to avoid a chemical aftertaste. Why this? Enhances the roasted notes of the peanuts and adds aromatic depth.
- 1/2 cup sea salt: A fine grain is better here than flakes so it dissolves evenly. Why this? Essential for cutting through the heavy sweetness and brightening the flavor.
- 3 cups powdered sugar, sifted: Measuring by weight is even better if you have a scale. Why this? Provides the final structure and ensures the fudge stays firm at room temp.
If you find yourself running low on the main sweetener, you might be tempted to swap. However, the chemistry of condensed milk is unique. If you're looking for other ways to use up that extra peanut butter in your pantry, you could always pivot and make a Peanut Butter Icing Recipe for a cake later in the week.
| Original Ingredient | Substitute | Why It Works |
|---|---|---|
| Unsalted Butter | Salted Butter | Works fine; just omit the extra sea salt to prevent over seasoning |
| Powdered Sugar | Coconut Sugar (Ground) | Adds a caramel note. Note: Will result in a much darker, grainier fudge |
| Creamy PB | Almond Butter | Similar fat content. Note: Flavor is more subtle and the set is softer |
The beauty of this peanut butter fudge recipe creamy easy is its flexibility, but remember that substitutions change the "snap" of the fudge. Almond butter, for instance, has a different protein structure and might require an extra 1/4 cup of powdered sugar to achieve the same firmness as the peanut version.
Tools for Professional Results
You don't need a lab, but you do need the right gear. A thin bottomed pot is the enemy of fudge because it creates "hot spots" that can scorch the dairy.
- 8x8 inch square baking pan: Metal is preferred for sharp corners, but glass works too.
- Parchment paper: This is non negotiable for easy removal.
- Heavy bottomed saucepan: Stainless steel or enameled cast iron is best for even heat distribution.
- Silicone spatula: This allows you to scrape every bit of the mixture from the sides of the pan.
- Fine mesh sifter: For the powdered sugar to ensure zero lumps.
Using a heavy bottomed pot prevents the condensed milk from caramelizing too quickly on the bottom. If the milk browns, the flavor of your fudge will shift from "creamy peanut" to "burnt sugar," which is a whole different (and usually unwanted) dessert.
Executing the Perfect Set
This is where the magic happens. Follow these steps with precision, paying close attention to the visual cues described.
- Line an 8x8 inch square baking pan with parchment paper, leaving an overhang on two sides to act as a sling for easy removal.
- In a medium heavy bottomed saucepan over medium low heat, combine the cubed butter and sweetened condensed milk.
- Stir constantly until the butter is fully melted and the mixture is steaming. Note: Do not allow it to reach a boil, as this can cause the dairy to curdle.
- Remove the saucepan from the heat immediately.
- Whisk in the creamy peanut butter, vanilla extract, and sea salt until the mixture is completely uniform and glossy.
- Gradually fold in the sifted powdered sugar. Note: Work quickly here as the mixture will begin to thicken as it cools.
- Continue folding until no white streaks remain and the dough is heavy.
- Pour the mixture into the prepared pan and smooth the top with a silicone spatula.
- Allow to cool at room temperature for 30 minutes, then refrigerate for at least 2 hours.
- Lift the fudge out using the parchment sling and slice into 36 even squares once it feels firm and cold to the touch.
Chef's Tip: For perfectly clean slices, dip your knife in hot water and wipe it dry between every single cut. The heat from the blade will glide through the fats like a hot wire through wax, giving you those professional, sharp edges.
Solving Texture and Set Issues
Even with a foolproof recipe, the environment in your kitchen (like humidity) can play a role. If things don't look right, don't panic most fudge issues are reversible.
Rescuing an Oily Surface
If you notice beads of oil sitting on top of your fudge as it cools, the emulsion has "broken." This usually happens if the heat was too high or the peanut butter was stirred in too vigorously.
You can often fix this by gently blotting the top with a paper towel and then sifting a tiny bit of extra powdered sugar over the top before it fully sets.
Softening a Rock Hard Batch
If you accidentally added too much powdered sugar or let the mixture sit too long before pan pressing, the fudge might be crumbly. If it’s already set and you hate the texture, you can actually put it back into the saucepan over very low heat with a tablespoon of milk, stir until melted, and re pour it.
| Problem | Root Cause | Solution |
|---|---|---|
| Gritty Texture | Sugar not sifted | Melt the mixture back down over low heat and stir thoroughly |
| Won't Set | Too much moisture | Add 1/4 cup more powdered sugar and stir until very thick |
| Oily Separation | Heat was too high | Blot with paper towels and chill immediately to stabilize fats |
If you're having consistent trouble with the texture of your bakes, you might want to try something with a different structure. For example, my Best Peanut Butter Cookies rely on flour and eggs for structure rather than just sugar and fat, making them a bit more forgiving for beginners.
Common Mistakes Checklist:
- ✓ Using "Natural" peanut butter with a layer of oil (leads to separation).
- ✓ Letting the mixture boil (causes a grainy, crystalline texture).
- ✓ Skipping the parchment paper (makes it nearly impossible to remove the fudge cleanly).
- ✓ Not sifting the powdered sugar (results in unappetizing white lumps).
- ✓ Slicing while still warm (results in messy, distorted squares).
Adjusting for Yield and Batch Size
Scaling fudge is generally straightforward, but because we are dealing with a delicate fat to sugar ratio, you need to be careful with heat exposure when making larger batches.
- Down (1/2 Batch): Use a loaf pan instead of an 8x8 square. Reduce the cooking time by about 30%, as the smaller volume of milk will heat up much faster.
- Up (2x Batch): Use a 9x13 inch pan. Be aware that stirring 6 cups of powdered sugar by hand is a workout! You may need to keep the heat on "low" for an extra minute to keep the mixture pliable enough to incorporate everything.
- Baking Changes: If you decide to double the recipe, avoid using two separate small pans unless you have two people stirring. The fudge sets fast once it leaves the heat.
When scaling up, the salt and vanilla should not be strictly doubled. For a double batch, I recommend 1.5x the salt and vanilla to avoid overpowering the delicate dairy notes. The peanut butter and sugar, however, must be doubled exactly to maintain the structural integrity.
Truths and Kitchen Wisdom
There are a lot of old wives' tales when it comes to candy making. Let's clear the air on a few things that might be holding you back.
"You must stir in only one direction to prevent crystals." This is a myth. While you want to stir consistently to prevent burning, the direction of your spoon has no impact on the molecular structure of the sugar. What matters more is the temperature and the presence of interfering agents like the fats in the butter.
"Homemade fudge needs to be kept in the fridge or it will melt." Actually, a well made fudge with the correct sugar to fat ratio should be perfectly stable at room temperature. We refrigerate it initially to speed up the setting process, but once it's firm, it can sit on a dessert table for hours without losing its shape.
Keeping Your Fudge Fresh
Proper storage is the difference between a treat that lasts all week and one that turns into a brick by Tuesday.
Storage: Keep the fudge in an airtight container. If you are stacking layers, place parchment paper between them to prevent sticking. In the fridge, it will stay fresh for up to 3 weeks. At room temperature, it’s best consumed within 7 to 10 days for the peak creamy texture.
Freezing: This fudge freezes beautifully. Wrap the entire block (or individual squares) tightly in plastic wrap, then place in a freezer safe bag. It will last for 3 months. To serve, thaw it in the refrigerator overnight.
Thawing it on the counter can sometimes cause condensation, which makes the surface sticky.
Zero Waste Tip: If you end up with "fudge crumbs" from slicing the edges, don't throw them away. Store them in a jar in the fridge. They are incredible when folded into vanilla bean ice cream or sprinkled over a warm batch of brownies.
You can even melt them down with a splash of milk to create a quick peanut butter ganache for dipping fruit.
Presentation and Serving Ideas
Fudge is rich very rich. When serving, think about contrast. A tiny sprinkle of flaky Maldon salt on top right before the final set can transform this from a simple sweet to a gourmet experience.
- The Platter: Arrange the squares in a checkerboard pattern with dark chocolate truffles for a high contrast look.
- Gift Jars: Stack 4-5 squares in a small mason jar tied with a twine ribbon for an easy, thoughtful gift.
- Pairing: Serve these alongside a bitter espresso or a dark roast coffee. The acidity of the coffee cuts right through the dense fats of the peanut butter.
If you find yourself with leftover ingredients, remember that you can always use the remaining peanut butter and vanilla in other treats. For a more "cookie like" experience, you could try making Peanut Butter Cup Cookies which use similar flavors but in a baked, portable format. Whether you're making this for a holiday tray or just a Tuesday night craving, the precision you put into the melting and folding will pay off in every velvety bite.
Decision Shortcuts
- For a firmer, "snap" texture: Increase the powdered sugar by 1/2 cup and chill for a full 4 hours.
- For a "melt in-your mouth" soft fudge: Reduce the powdered sugar to 2.5 cups and serve at room temperature.
- For a "Reese's" style flavor: Melt 1 cup of semi sweet chocolate chips with 1 tbsp of butter and spread a thin layer over the set fudge.

Recipe FAQs
How to ensure the fudge sets with a smooth, velvety texture?
Whisk the peanut butter, vanilla, and salt until completely uniform and glossy. This ensures a stable emulsion that prevents the fats from separating as the fudge cools.
Is a candy thermometer required for this recipe?
No, this is a common misconception. This method relies on the precise ratio of fats and powdered sugar to achieve a perfect set without needing to monitor temperature stages.
How to prepare the pan for easy removal?
Line an 8x8 inch square baking pan with parchment paper, leaving an overhang on two sides. Use these extra flaps as handles to lift the chilled fudge out of the pan cleanly before slicing into 36 squares.
How to store the fudge for the best flavor?
Keep the fudge in the refrigerator for up to one week. Since this recipe creates a rich, creamy texture, it stays fresh and firm when stored in an airtight container.
Can I use a different type of butter?
No, stick with the unsalted butter specified in the recipe. Using salted butter would make the final squares too salty, as we already include 1/2 teaspoon of sea salt for balance. If you enjoyed mastering the silkiness here, notice how the same fat control principles create smooth results in other starch based dishes.
Why is it necessary to sift the powdered sugar?
Sifting removes lumps, ensuring the sugar incorporates smoothly into the peanut butter mixture. This step guarantees a consistent, grit free finish throughout the entire batch.
How to fix the mixture if it looks too thin?
Gradually fold in additional sifted powdered sugar until you reach the desired consistency. Because peanut butter brands vary in oil content, you may occasionally need a little extra sugar to reach the perfect firm texture.
Creamy Peanut Butter Fudge
Ingredients:
Instructions:
Nutrition Facts:
| Calories | 173 kcal |
|---|---|
| Protein | 4.0g |
| Fat | 9.8g |
| Carbs | 18.9g |
| Fiber | 0.8g |
| Sugar | 16.3g |
| Sodium | 94mg |
