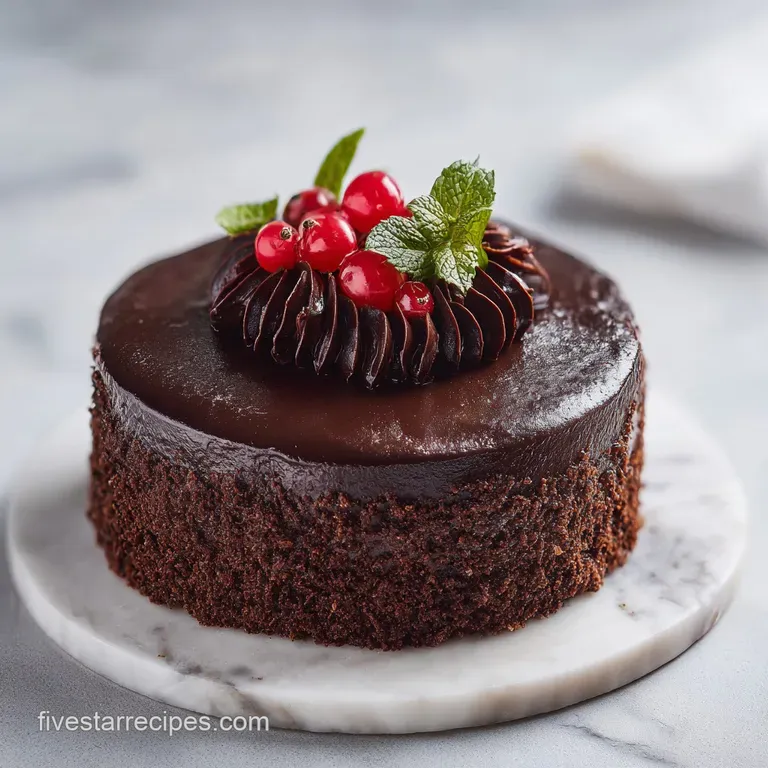
Better Than Sex Cake: Rich and Decadent
- Time:15 minutes active + 30 minutes cook + 4 hours chilling = 4 hours 45 mins total
- Flavor/Texture Hook: Velvety crumb with a buttery toffee shatter
- Perfect for: High impact potlucks or stress free entertaining
- Mastering the Indulgent Better Than Sex Cake
- Understanding the Precise Recipe Specifications
- The Science of Saturation and Structure
- Fresh Scratch vs. Box Shortcut
- Component Analysis and Pro Secrets
- Selecting High Quality Components for Your Infusion
- Necessary Tools for a Seamless Baking Experience
- Executing the Critical Infusion and Layering Stages
- Solving Common Texture and Moisture Balance Issues
- Scaling and Volume Adjustments
- Adapting the Components for Different Dietary Needs
- Debunking Common Preparation Misconceptions
- Ensuring Longevity and Freshness in Cold Storage
- Selecting the Ideal Accompaniments for This Dessert
- Recipe FAQs
- 📝 Recipe Card
Mastering the Indulgent Better Than Sex Cake
The aroma hitting your kitchen when that chocolate base comes out of the oven is enough to make anyone lose their focus. I remember the first time I pulled this off for a neighborhood block party.
I was worried the center would be soggy, but as I watched the caramel and sweetened condensed milk disappear into those hand poked holes, I knew I was onto something special. The sound of the wooden spoon handle clicking against the bottom of the pan is your signal that you've created enough "flavor reservoirs" to transform a simple box mix into something that tastes like it came from a high end bistro.
We've all had those desserts that look great but taste dry or overly sugary. This isn't that. We're looking for a specific structural integrity where the cake holds its shape despite being soaked in nearly two pounds of liquid gold.
It's about finding that balance between the deep cocoa notes of the cake and the salty sweet crunch of the toffee bits on top. By the time you finish this, you'll understand why the cooling time is non negotiable and why the order of operations determines whether you get a velvety masterpiece or a soupy mess.
I've made the mistake of rushing the chilling process before. Trust me, if you try to spread that whipped topping while the cake is still lukewarm, you'll end up with a weeping, flat layer that ruins the visual contrast. We're going for height, texture, and a crumb that feels almost like silk on the tongue.
Let's get into the mechanics of why this works so we can ensure your first attempt is nothing short of five star quality.
Understanding the Precise Recipe Specifications
Baking is a game of thermal dynamics and ratios, even when we're using a shortcut like a boxed mix. For this Better Than Sex Cake, we need to respect the clock. We are looking at a strict 15 minutes of prep time to get the batter homogenized and the oven calibrated.
The 30 minutes of cook time is your window to prepare the "infusion," which is the heart of the dish.
| Metric | Value | Significance |
|---|---|---|
| Bake Temperature | 350°F (175°C) | Ensures even rise without scorching the cocoa solids |
| Infusion Temp | 100°F (approx.) | The "Goldilocks" zone for maximum capillary absorption |
| Chill Duration | 4 hours | Allows protein structures to reset after liquid saturation |
The Science of Saturation and Structure
To get that signature texture, we have to manipulate the physics of the cake crumb. It isn't just about pouring liquid on top; it's about creating a sponge that can hold its own weight.
- Capillary Action: By poking holes while the cake is at roughly 100°F, we utilize the cooling air pockets to "pull" the viscous caramel mixture deep into the center.
- Viscosity Matching: Whisking the condensed milk with the caramel sauce lowers the overall surface tension, allowing the liquid to flow into the crumb rather than sitting on top.
- Protein Set: The 4 hour refrigeration period is critical because it allows the starches in the cake mix to gelatinize with the added fats, preventing the cake from falling apart when sliced.
- Thermal Barrier: Applying the whipped topping only after the cake is fully chilled prevents the air bubbles in the cream from collapsing, which maintains that airy, velvety mouthfeel.
Fresh Scratch vs. Box Shortcut
| Element | Fresh Scratch Base | Box Mix Shortcut | Resulting Texture |
|---|---|---|---|
| Structure | Denser, more buttery | Lighter, more aerated | The box mix actually absorbs the liquid more evenly |
| Prep Time | 25 minutes | 5 minutes | Shortcut allows for more focus on the infusion quality |
| Consistency | High variability | Foolproof and stable | Box mix provides a predictable crumb for saturation |
If you really want to dive into high level baking textures, you might notice similar principles in a Sour Cream Coffee Cake, where moisture is regulated by fat content rather than an external soak.
Component Analysis and Pro Secrets
| Ingredient | Science Role | Pro Secret |
|---|---|---|
| Sweetened Condensed Milk | Humectant | Use full fat for a richer, more stable "fudge" texture |
| Caramel Sauce | Flavor/Viscosity | Choose a salted version to cut through the heavy sugar profile |
| Chocolate Cake Mix | Structural Base | Sift the dry mix first to eliminate clumps for a silkier crumb |
| Toffee Bars | Texture Contrast | Freeze the bars for 10 minutes before crushing to get a cleaner "shatter" |
Selecting high-quality Components for Your Infusion
While this recipe is famously easy, the quality of your ingredients will dictate the final sophistication of the palate. For the chocolate cake mix, a "Devil's Food" or "Dark Chocolate" variety provides the necessary bitterness to balance the sweetened condensed milk.
Avoid "Moist" or "Pudding in the Mix" versions if possible, as they can sometimes become overly soft once the caramel is added.
- 1 box (15.25 oz) chocolate cake mix: Why this? Provides the structural framework and deep cocoa base needed for saturation. (Substitute: gluten-free chocolate mix)
- 3 large eggs: Why this? Acts as the primary emulsifier and binder for the cake crumb. (Substitute: 0.75 cup unsweetened applesauce)
- 0.5 cup vegetable oil: Why this? Ensures a moist mouthfeel that doesn't harden when refrigerated. (Substitute: Melted unsalted butter)
- 1 cup water: Why this? Hydrates the dry cocoa and flour particles to activate the leavening. (Substitute: Brewed coffee to enhance chocolate notes)
- 1 can (14 oz) sweetened condensed milk: Why this? Creates a creamy, fudgy interior that never truly "dries out." (Substitute: Coconut condensed milk)
- 1 jar (12 oz) caramel sauce: Why this? Adds a buttery, toasted sugar dimension to the infusion. (Substitute: Butterscotch sauce)
- 1 tub (8 oz) whipped topping: Why this? Provides a stabilized, airy layer that holds up under the toffee weight. (Substitute: Stabilized heavy whipped cream)
- 1 cup crushed toffee bars: Why this? Offers a necessary crunch and saltiness to offset the soft cake. (Substitute: Chopped salted pecans)
Necessary Tools for a Seamless Baking Experience

You don't need a lab full of equipment, but a few specific items make the process much more precise. A 9x13-inch glass or ceramic baking dish is the standard here. Glass is particularly helpful because it allows you to see the "tide line" of the caramel infusion as it works its way down the sides of the cake.
Chef's Tip: Use the handle of a wooden spoon rather than a fork for poking the holes. A fork creates tiny slits that can seal back up, while a spoon handle creates "flavor wells" that stay open to receive the liquid.
You will also want an offset spatula for the whipped topping. This allows you to spread the cream right to the edges without hitting your knuckles on the side of the pan. If you're feeling fancy, a kitchen scale is the best way to ensure your 1 cup of water is exactly 236 grams, which leads to a more consistent rise every time.
Executing the Critical Infusion and Layering Stages
- Preheat and Prep: Set your oven to 350°F (175°C). Grease your 9x13-inch pan thoroughly with butter or non stick spray. Note: This prevents the edges from sticking when you try to slice the saturated cake later.
- Mix the Base: Combine the cake mix, 3 eggs, 0.5 cup oil, and 1 cup water. Whisk until the batter is glossy and no dry streaks of flour remain.
- Bake the Foundation: Pour into the pan and bake for 28–32 minutes. Check for a clean toothpick and a slight pull away from the pan edges.
- The Cooling Window: Remove from the oven and set a timer for exactly 10 minutes. The cake should be warm to the touch but no longer steaming.
- Create the Reservoirs: Use the back of a wooden spoon to poke holes every inch across the surface. Press down about three quarters of the way through the cake.
- Blend the Infusion: While the cake rests, whisk the 14 oz of condensed milk and 12 oz of caramel sauce together until perfectly smooth.
- Saturate the Crumb: Pour the mixture slowly over the cake. Watch as the liquid fills the holes and begins to soak into the surrounding sponge.
- Stabilize the Structure: Let the cake reach room temperature on the counter, then cover and refrigerate for 4 hours. The cake must be cold to the core before the next step.
- Apply the Clouds: Spread the 8 oz of whipped topping in an even, thick layer using your offset spatula.
- The Final Crunch: Sprinkle 1 cup of crushed toffee bars over the top. Serve immediately or keep chilled until the very last second.
Solving Common Texture and Moisture Balance Issues
Even with a foolproof recipe, the "Better Than Sex" title requires perfection in texture. The biggest hurdle is usually the "soggy bottom" syndrome, which happens if the cake is underbaked or the infusion is poured while the cake is too hot.
Why Your Cake Is Too Mushy
If the center of your cake feels like pudding rather than saturated cake, it usually means the holes were poked while the cake was straight out of the oven. The steam prevents the liquid from distributing evenly, causing it to pool at the bottom.
| Problem | Root Cause | Solution |
|---|---|---|
| Topping is runny | Cake was too warm | Ensure the 4 hour chill is strictly followed before topping |
| Dry edges | Infusion didn't reach sides | Pour the caramel mixture in a spiral, starting from the outside in |
| Toffee is soft | Humidity or early topping | Add the toffee bits only 10 minutes before you plan to serve |
Common Mistakes Checklist
- ✓ Never skip the 10 minute resting period; it's the thermal bridge for absorption.
- ✓ Don't use a fork; the holes need to be at least 1/4 inch wide.
- ✓ Use a "heavy" caramel sauce; thin syrups will simply vanish into the cake without adding body.
- ✓ Ensure your eggs are at room temperature for a better emulsion in the batter.
- ✓ Resist the urge to use low-fat condensed milk; the fat is what stabilizes the "fudge" layer.
Scaling and Volume Adjustments
If you are hosting a smaller gathering, you might want to scale this down. However, I usually recommend making the full batch it's one of those rare cakes that tastes even better on day two.
- Halving the Recipe: Use an 8x8-inch pan. Use 2 small eggs (or 1.5 large), and reduce the bake time by about 5-8 minutes. You will need to weigh out exactly half of the box mix.
- Doubling for a Crowd: Do not simply double the pan size; use two separate 9x13-inch pans. This ensures the heat distribution remains consistent and the center doesn't remain raw while the edges burn.
- The "Oreo Twist" Variation: Swap the toffee for crushed chocolate sandwich cookies and use a white cake base for a "Cookies and Cream" profile. If you love this kind of mash up, you'll probably enjoy a Cheesecake Brownie Cake as well.
Adapting the Components for Different Dietary Needs
While the classic version is a sugar lover's dream, you can tweak the components to accommodate guests. For a gluten-free version, simply swap the cake mix for a certified GF chocolate mix. Most GF mixes are slightly thirstier, so you might increase the water by 2 tablespoons to ensure it doesn't get crumbly.
If you need a dairy-free version, look for coconut based sweetened condensed milk and a vegan caramel sauce (often made with coconut cream). Use a plant based whipped topping and check that your toffee bits don't contain dairy solids many dark chocolate toffees are naturally safer for those with minor sensitivities.
Debunking Common Preparation Misconceptions
One major myth is that "the more holes, the better." In reality, if you poke too many holes, you compromise the structural integrity of the cake, and it will fall apart when you try to lift a slice. Aim for about 1 inch of space between each hole.
Another misconception is that the caramel and milk need to be heated together on the stove. This actually makes the mixture too thin. Whisking them at room temperature keeps the viscosity high enough that the liquid "clings" to the crumb rather than just running straight to the bottom of the pan.
Ensuring Longevity and Freshness in Cold Storage
This cake is a meal prepper's dream. Because of the high sugar and fat content in the infusion, it stays moist much longer than a standard sponge cake.
- Fridge: Keep it covered with plastic wrap or a lid for up to 5 days. The toffee will eventually soften, but the cake itself remains excellent.
- Freezer: You can freeze the base after the infusion step (but before the whipped topping). Wrap it tightly in foil. It will stay fresh for 3 months. Thaw in the fridge overnight before adding the cream and toffee.
- Zero Waste Tip: If you have leftover toffee bits, stir them into your morning coffee or sprinkle them over vanilla yogurt. If the cake itself is lingering, you can scoop portions into glasses to make "Better Than Sex Trifles."
Selecting the Ideal Accompaniments for This Dessert
Because this cake is so rich, it demands a beverage that can cut through the sweetness. A strong, dark roast coffee or a double shot of espresso is the traditional pairing. The bitterness of the coffee beans highlights the cocoa in the cake base.
For those who don't do caffeine, a cold glass of whole milk is the classic choice. If you're serving this at a dinner party, a small glass of Tawny Port or a nutty Sherry can complement the caramel and toffee notes beautifully.
Avoid serving it with other sweet items like ice cream, as the cake already provides plenty of "creamy" and "cold" sensations on its own.

Recipe FAQs
Why do they call it Better Than Sex Cake?
It refers to the intense flavor profile created by the infusion. The combination of sweetened condensed milk and caramel soaking into the warm cake creates a rich, pudding like texture that is notoriously indulgent.
What is the Better Than Sex Cake made of?
The cake relies on seven specific pantry staples. You need a chocolate cake mix, eggs, vegetable oil, water, sweetened condensed milk, caramel sauce, whipped topping, and crushed toffee bars.
What makes this dessert so good?
The secret is the absorption technique. By poking large holes with a wooden spoon handle and pouring the sweetened condensed milk and caramel mixture while the cake is at 100°F, you ensure every bite is saturated with moisture. If you enjoyed mastering this liquid infusion technique, see how we use similar principles to create a velvety texture in our Chocolate Cupcakes with Chocolate.
Why did my cake turn out soggy instead of moist?
No, this is a common misconception that more liquid is better. If the cake is soggy, you likely used a thin, pourable syrup instead of a thick caramel sauce, which prevents the proper set from occurring during the four hour refrigeration period.
How to ensure the holes are the right size for the soak?
Use the handle of a wooden spoon to poke holes across the entire surface. Do not use a fork; you need openings that are at least 1/4 inch wide to allow the thick caramel and milk mixture to penetrate deep into the crumb.
How to prevent the toffee topping from melting?
Sprinkle the crushed toffee bars over the whipped topping immediately before serving. Adding them too early causes the moisture from the topping to dissolve the sugar in the candy, which ruins the signature crunch.
Is it necessary to wait for the 10-minute rest after baking?
Yes, the rest period is a critical thermal bridge. Resting for exactly 10 minutes brings the cake to an internal temperature of approximately 100°F, which is the precise heat needed for the crumb to accept the infusion without becoming overly mushy.
Better Than Sex Cake
Ingredients:
Instructions:
Nutrition Facts:
| Calories | 427 kcal |
|---|---|
| Protein | 5 g |
| Fat | 20 g |
| Carbs | 62 g |
| Fiber | 1 g |
| Sugar | 48 g |
| Sodium | 405 mg |
