Old Fashioned Banana Nut Bread
- Time: Active 10 minutes, Passive 60 minutes, Total 70 minutes
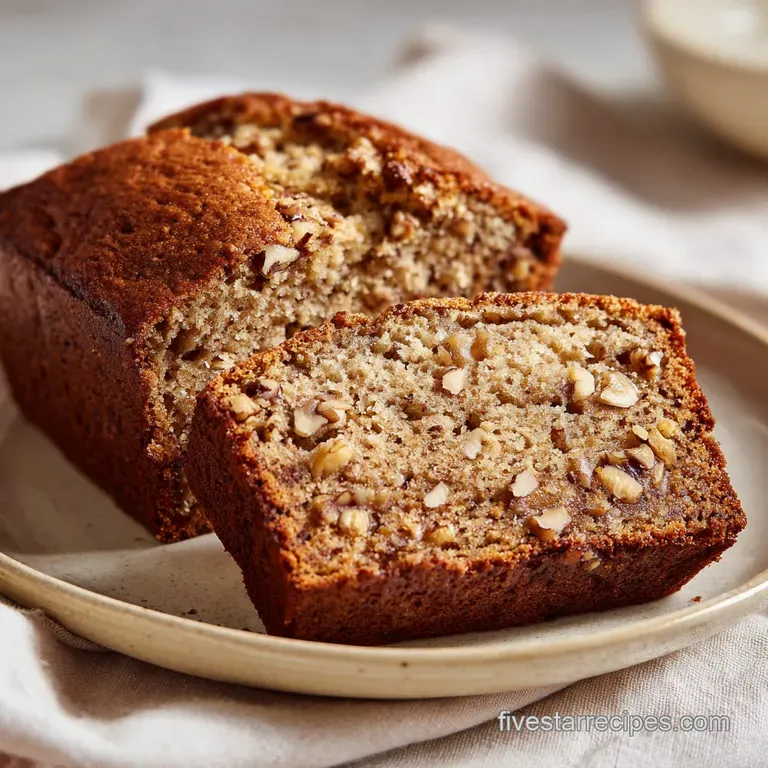
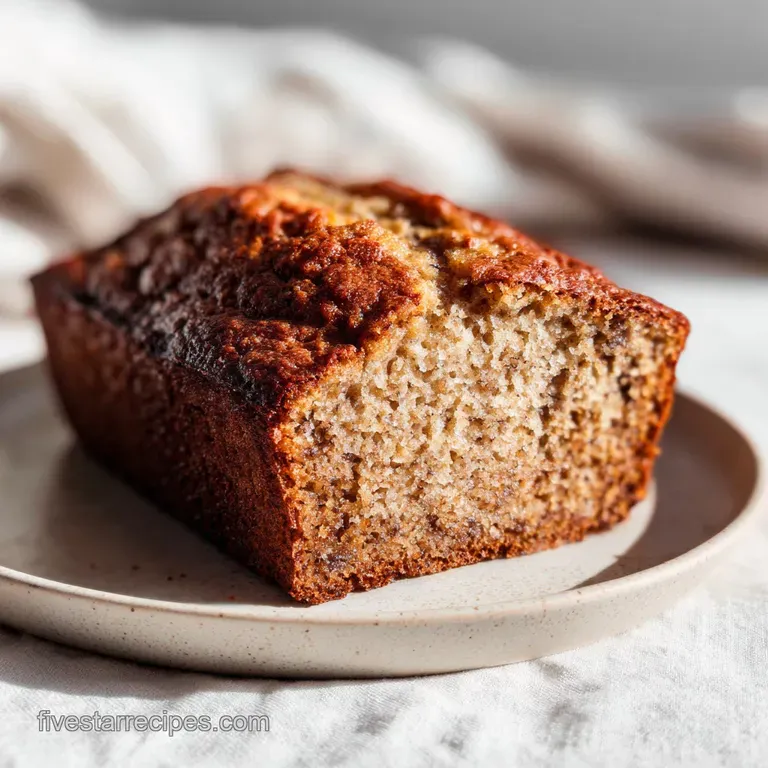
- Flavor/Texture Hook: Velvety crumb with a shatter crisp mahogany crust
- Perfect for: Weekend brunch, gifting, or utilizing overripe pantry staples
- Secrets to This Banana Nut Bread Recipe
- Why the Crumb Stays Moist
- Components for a Five Star Loaf
- Choosing Your Recipe Components Wisely
- Necessary Equipment for the Perfect Loaf
- Step-by-Step Bread Making Guide
- Solving Common Baking Texture Problems
- Creative Flavor and Texture Variations
- Scaling This Recipe Up or Down
- Preservation Methods and Zero Waste Strategies
- Best Ways to Serve Bread
- Debunking Common Baking Myths
- Recipe FAQs
- 📝 Recipe Card
Secrets to This Banana Nut Bread Recipe
Did you know that a banana isn't actually ready for the oven until it looks like something you’d normally toss in the bin? I'm talking about skins that are almost entirely black and fruit that feels like custard inside the peel.
The curiosity lies in the starch to sugar conversion; as a banana ripens, its complex starches break down into simple sugars, and its pH drops. This creates the intense, aromatic sweetness that defines a five star loaf.
If your bananas are still yellow with just a few spots, they lack the cellular breakdown needed to provide that signature moisture we crave.
We've all been there: staring at a loaf that looks beautiful on the outside but is gummy or raw in the center. After testing various hydration levels, I realized the secret isn't just the fruit it's the interplay between the fats and the leavening.
This recipe relies on a specific ratio of melted butter for flavor and sour cream for structural tenderness. The result is a loaf that doesn't just taste good on day one but actually improves by day two as the moisture redistributes through the crumb.
You’re about to bake a bread that fills your kitchen with the scent of toasted nuts and warm cinnamon. It’s a sensory experience that starts with the sizzle of butter and ends with the satisfying crack of a well formed crust.
We aren't just making a quick snack; we’re engineering a gourmet treat with precision and care. Trust me, once you see how the sour cream transforms the texture, you’ll never go back to the basic "three banana" mash again.
Why the Crumb Stays Moist
- Acidic Activation: Sour cream provides lactic acid that reacts with the baking soda, creating a vigorous lift while tenderizing gluten strands for a velvety finish.
- Lipid Saturation: Using melted butter instead of creamed butter ensures the flour particles are coated in fat immediately, which limits gluten development and prevents a "bready" or tough texture.
- Hygroscopic Sugars: The combination of granulated sugar and the natural fructose in 460g of mashed bananas attracts and holds onto water molecules, keeping the loaf fresh for days.
- Maillard Enhancement: Toasting the walnuts for 5–7 minutes before folding them in creates complex flavor compounds that survive the long bake time without turning soggy.
| Thickness | Internal Temp | Rest Time | Visual Cue |
|---|---|---|---|
| 9x5 inch loaf | 200°F - 205°F | 20 minutes | Deep mahogany with a center crack |
| Mini loaves | 195°F - 200°F | 10 minutes | Golden brown, edges pulling away |
| Muffins | 190°F - 195°F | 5 minutes | Springy touch, no raw batter |
The internal temperature is the most reliable "precision checkpoint" for any baker. While the toothpick test is a classic, using a digital thermometer ensures you don't pull the bread while the center is still in a "pudding" state.
Since this recipe is high in moisture from the sour cream and fruit, that 200°F mark is your gold standard for a foolproof result.
Components for a Five Star Loaf
| Ingredient | Science Role | Pro Secret |
|---|---|---|
| Overripe Bananas | Primary Hydrator | Use exactly 460g for consistent moisture levels. |
| Sour Cream | pH Regulator | Full fat is mandatory to provide the necessary lipid barrier. |
| Baking Soda | Chemical Leavener | Sift it with flour to avoid soapy "pockets" in the bread. |
| Toasted Walnuts | Texture Contrast | Toast until fragrant to prevent them from softening in the batter. |
Choosing the right ingredients is the difference between a grocery store loaf and a gourmet experience. For instance, I always reach for sea salt instead of table salt because those larger flakes provide tiny bursts of contrast against the sugar. If you find yourself out of white sugar, you can experiment with alternatives, but keep in mind that a sugar-free Banana Bread requires different binding agents to maintain that moist crumb we’re after here.
Choosing Your Recipe Components Wisely
- 4 large overripe bananas (460g): Look for skins with heavy black spotting. Why this? Provides the foundational flavor and natural sugars for the loaf.
- Substitute: 1.5 cups of applesauce (though it will be less "banana forward").
- 0.5 cup unsalted butter (113g): Melted and slightly cooled. Why this? Offers a rich, nutty flavor that oil simply cannot match.
- Substitute: 0.5 cup neutral oil like avocado or grapeseed.
- 0.75 cup granulated white sugar (150g): Essential for the crust. Why this? Assists in the caramelization of the exterior for a crisp finish.
- Substitute: 0.75 cup packed light brown sugar for a fudgier texture.
- 1 large egg (50g): Room temperature is best. Why this? Acts as the primary binder for the flour and fruit.
- Substitute: 1 tablespoon ground flaxseed mixed with 3 tablespoons water.
- 0.25 cup full fat sour cream (60g): The secret weapon. Why this? Adds moisture and fat without making the batter too thin.
- Substitute: 0.25 cup full fat Greek yogurt (plain).
- 1 tsp pure vanilla extract (4g): Enhances the fruit notes. Why this? Rounds out the sweetness and adds aromatic depth.
- Substitute: 0.5 tsp almond extract for a cherry like undertone.
- 1.5 cups all purpose flour (190g): The structural base. Why this? Provides enough protein for height without being heavy.
- Substitute: 1.5 cups gluten-free 1:1 baking flour.
- 1 tsp baking soda (5g): Reacts with the sour cream. Why this? Provides the lift needed for a light, airy crumb.
- Substitute: 3 tsp baking powder (but reduce salt slightly).
- 0.5 tsp sea salt (3g): Balances the sweetness. Why this? Sharpens the flavors of the walnuts and vanilla.
- Substitute: 0.5 tsp kosher salt.
- 0.5 tsp ground cinnamon (1g): Warm spice note. Why this? Complements the caramelized sugars in the bananas.
- Substitute: 0.5 tsp ground nutmeg or cardamom.
- 1 cup chopped walnuts (100g): Toasted for crunch. Why this? Adds essential texture and healthy fats to every bite.
- Substitute: 1 cup pecans or macadamia nuts.
Necessary Equipment for the Perfect Loaf
For this banana nut bread recipe, you don't need a high end stand mixer. In fact, a simple large mixing bowl and a sturdy silicone spatula are better. Why? Because we want to avoid over aerating the batter.
Using a whisk or a mixer can trap too much air, leading to a loaf that rises too quickly in the oven and then collapses as it cools. A 9x5 inch loaf pan is the standard here; I prefer a heavy gauge aluminized steel pan (like those from USA Pan) because it distributes heat more evenly than thin tin or glass.
If you choose to use a glass pan, you'll need to drop your oven temperature by about 25°F (around 15°C) and keep a close eye on the bake time. Glass holds heat differently and can often cause the edges to scorch before the middle is set. Also, don't forget the parchment paper.
While greasing the pan works, lining it with a "sling" of parchment allows you to lift the entire loaf out cleanly without risking the bottom sticking to the pan.
step-by-step Bread Making Guide
- Preheat your oven to 350°F (175°C). Spread 100g of chopped walnuts on a baking sheet and toast for 5–7 minutes until fragrant and slightly darkened. Note: This step is non negotiable for flavor.
- Grease a 9x5 inch loaf pan or line it with parchment paper, leaving an inch of overhang on the sides for easy removal.
- In a large mixing bowl, mash the 460g of bananas with a fork until they reach a chunky custard consistency.
- Stir in 113g of melted butter, 150g of sugar, the beaten egg, 4g of vanilla, and 60g of sour cream. Mix until the color is uniform.
- Sift 190g of flour, 5g of baking soda, 3g of salt, and 1g of cinnamon directly into the wet base. Note: Sifting prevents clumps of soda which taste bitter.
- Fold the dry ingredients gently with a spatula until no white streaks remain; stop immediately to prevent toughness.
- Fold in the toasted walnuts using just two or three wide sweeps of the spatula.
- Pour the batter into the prepared loaf pan and smooth the top with the back of a spoon.
- Bake for 60 minutes at 350°F (175°C) until a toothpick inserted into the center comes out clean or with a few moist crumbs.
- Allow the bread to sit in the pan for 10 minutes until the structure sets, then transfer to a wire rack to cool completely.
Solving Common Baking Texture Problems
Why Your Bread Sinks
A sunken center usually happens for two reasons: either the oven door was opened too early, causing a sudden temperature drop, or there was too much leavening. If you over measure the baking soda, the bread will rise like a balloon and then "pop" because the gluten structure isn't strong enough to hold that much gas.
Always use a level measuring spoon for your 5g of soda.
If Your Loaf is Too Dense
Density often comes from over mixing. The moment flour touches wet ingredients, gluten begins to form. If you stir too vigorously, those gluten chains become tight and elastic, resulting in a rubbery texture rather than a tender one. Fold the batter just until the flour is hydrated.
Another culprit could be under ripe bananas; they lack the air incorporating sugars and moisture of the blackened ones.
| Problem | Root Cause | Solution |
|---|---|---|
| Burnt Top, Raw Center | Oven too hot or rack too high | Move to middle rack; tent with foil. |
| Greasy Bottom | Butter was too hot when added | Let melted butter cool to room temp. |
| Bitter Aftertaste | Baking soda not mixed well | Sift soda with flour before adding. |
If you're dealing with a particularly stubborn oven, consider using an oven thermometer. Many home ovens are off by 25°F or more, which can drastically alter the 60 minutes cook time required for this loaf.
If you notice the bread browning too quickly at the 30 minute mark, a simple piece of aluminum foil tented over the top will protect the crust while the center continues to bake.
Common Mistakes Checklist
- ✓ Never use cold eggs; they can cause the melted butter to seize and clump.
- ✓ Avoid mashing bananas into a pure liquid; a few small chunks provide better texture.
- ✓ Don't skip the walnut toasting; raw nuts can turn soft and "woody" in the batter.
- ✓ Ensure your baking soda is fresh by testing a pinch in vinegar (it should fizz violently).
- ✓ Let the loaf cool completely before slicing to prevent the steam from making the crumb gummy.
Creative Flavor and Texture Variations
When you're ready to branch out from the classic nut bread recipe, the possibilities are endless. For a simple banana nut bread with pecans, just swap the walnuts 1:1. Pecans have a higher oil content and a sweeter, more buttery finish that pairs beautifully with the cinnamon. If you want a tropical twist, you might consider how a Hawaiian Banana Bread uses pineapple or coconut to change the hydration just be careful not to add too much extra liquid.
For a Dark Chocolate Twist
Fold in 0.5 cup of dark chocolate chips (60% cacao or higher) along with the walnuts. The bitterness of the chocolate cuts through the sugar of the bananas perfectly. Since chocolate adds fat, you might find the loaf takes an extra 5 minutes in the oven.
For a Refined sugar-free Version
You can replace the 150g of white sugar with an equal amount of coconut sugar or 0.5 cup of maple syrup. If using syrup, reduce the sour cream by 2 tablespoons to maintain the correct batter consistency. This will result in a darker, more moist loaf with a hint of caramel flavor.
Scaling This Recipe Up or Down
If you're baking for a crowd and want to double this recipe, keep a few things in mind. While you can double the 460g of bananas and 190g of flour easily, spices like cinnamon should only be increased to 1.5x (about 1.5g) to avoid overpowering the fruit.
When baking two loaves at once, ensure there is at least two inches of space between the pans in the oven for proper air circulation. You may need to rotate the pans halfway through the 60 minutes to ensure even browning.
For those cooking for one or two, you can easily halve the recipe. Use one small egg (or half a large beaten egg) and a smaller 8x4 inch pan. Reduce the bake time by about 10-15 minutes, as smaller volumes of batter reach their target internal temperature much faster.
If you're feeling adventurous, you can even bake the batter in a muffin tin just check them after 18-22 minutes.
| Servings | Bananas | Flour | Pan Size | Cook Time |
|---|---|---|---|---|
| 5 people | 230g | 95g | 8x4 pan | 45 minutes |
| 10 people | 460g | 190g | 9x5 pan | 60 minutes |
| 20 people | 920g | 380g | Two 9x5 pans | 65 minutes |
Preservation Methods and Zero Waste Strategies
This banana nut bread stays incredibly moist for up to 4 days if stored correctly. Once the loaf is completely cool, wrap it tightly in plastic wrap. This "traps" the moisture. If you leave it on a plate uncovered, the starches will undergo retrogradation, which is a fancy way of saying they'll turn hard and stale.
For the best flavor, I actually think this bread is better on day two!
- Fridge: Up to 1 week. Note that the fridge can dry out bread, so wrap it twice.
- Freezer: Up to 3 months. Slice the loaf first and place parchment paper between slices. This allows you to grab one piece at a time for a quick toast.
- Zero Waste Tip: Don't throw away those black banana peels! You can soak them in water for 48 hours to create a nutrient rich "tea" for your houseplants. The potassium and phosphorus are like a vitamin boost for your indoor jungle.
Best Ways to Serve Bread
While a plain slice is a masterpiece on its own, you can take this five star loaf to the next level with a few simple additions. My personal favorite is to thick cut a slice and sear it in a pan with a little salted butter. This creates a "crust on a crust" that is absolutely decadent. If you're looking for more variety in your morning routine, you might even try a Zucchini Banana Bread for a hit of extra veggies.
For a gourmet presentation, serve a warm slice with a dollop of mascarpone cheese and a drizzle of hot honey. The creamy, tangy cheese mimics the sour cream in the batter, while the honey highlights the floral notes of the vanilla.
If you have leftovers that have gone a bit dry, don't worry this bread makes the most incredible French toast you've ever had. Because it's so dense, it can soak up a lot of custard without falling apart in the pan.
Debunking Common Baking Myths
One of the biggest myths in baking is that you should "over mash" your bananas until they are a smooth liquid. In reality, leaving small, pea sized chunks of fruit in the batter creates "flavor pockets" in the finished loaf.
These chunks caramelize during the 60 minutes in the oven, providing a variety of textures in every bite.
Another misconception is that more bananas equal a more moist bread. If you exceed the 460g recommended in this recipe, you risk the bread becoming heavy and "soggy" rather than moist. There is a delicate balance between the fruit's water content and the flour's ability to provide structure.
Stick to the weight based measurements for the most consistent, foolproof results every single time.

Recipe FAQs
What is the secret to the best banana bread?
Toast your walnuts before adding them. Heating the nuts for 5 7 minutes until fragrant transforms their raw, woody texture into a deep, nutty crunch that defines a professional quality loaf.
What are some common mistakes to avoid when making banana bread?
Never overmix the batter. Once you fold the dry ingredients in, stop as soon as the flour disappears; overworking the gluten leads to a tough, dense loaf rather than a tender crumb. If you enjoyed mastering delicate dough handling here, you will find the same principle of minimal agitation applies to achieving a light finish.
What type of nut is best for banana bread?
Walnuts are the gold standard. Their slightly bitter edge perfectly balances the high sugar content of the bananas, and they retain a satisfying structure during the 60-minute bake time.
What are the ingredients for banana nut bread?
You need bananas, butter, sugar, egg, sour cream, vanilla, flour, baking soda, salt, cinnamon, and walnuts. Specifically, use 460g mashed overripe bananas, 113g melted unsalted butter, 150g sugar, 1 egg, 60g sour cream, 4g vanilla, 190g flour, 5g baking soda, 3g sea salt, 1g cinnamon, and 100g toasted
walnuts.
How to ensure the bread doesn't turn out gummy?
Cool the loaf completely on a wire rack before slicing. Cutting into the bread while it is still warm traps steam inside the crumb, which inevitably results in a sticky, gummy texture.
Is it true that I should use cold butter for the batter?
No, this is a common misconception. You must use melted butter to ensure it incorporates evenly with the mashed bananas, creating a moist, consistent crumb throughout the entire loaf.
How to mash the bananas properly?
Use a fork to mash the fruit until it reaches a chunky custard consistency. Leaving a few small pieces of banana creates pockets of moisture and better flavor distribution compared to pureeing them into a thin, watery liquid.
Old Fashioned Banana Nut Bread

Ingredients:
Instructions:
Nutrition Facts:
| Calories | 333 kcal |
|---|---|
| Protein | 4.8 g |
| Fat | 17.7 g |
| Carbs | 41.8 g |
| Fiber | 2.4 g |
| Sugar | 24.6 g |
| Sodium | 235 mg |
