Creamy Roasted Garlic Cauliflower Soup: Silky and Nutty
- Time: Active 15 minutes, Passive 45 minutes, Total 60 minutes
- Flavor/Texture Hook: Silky smooth with a charred, nutty depth
- Perfect for: Sophisticated dinner parties or an elegant weekend lunch
- Creating the Best Cauliflower Soup Creamy Roasted Garlic
- Unique Benefits of This Gourmet Soup
- Ingredient Deep Dive Analysis
- Essential Components for a Sophisticated Texture
- Professional Tools for a Silky Finish
- Detailed Phases of the Cooking Process
- Resolving Potential Textural and Flavor Issues
- Creative Adaptations for Diverse Dietary Needs
- Widespread Kitchen Misconceptions Debunked
- Maintaining Quality Through Proper Storage
- Artful Pairings to Complete the Meal
- Recipe FAQs
- 📝 Recipe Card
Creating the Best Cauliflower Soup Creamy Roasted Garlic
We have all been there, standing over a pot of what promised to be a comforting meal, only to find ourselves staring at a bowl of pale, watery, and remarkably bland white sludge. It is the classic pitfall of the home cook: boiling cauliflower until it loses its soul.
When you boil this vegetable, it absorbs water like a sponge, diluting its natural sugars and leaving behind a sulfurous, uninspired flavor that no amount of salt can truly fix. It is, quite frankly, a culinary heartbreak when you are expecting a gourmet experience but end up with something that tastes like wet cardboard.
This specific method is my targeted fix for that exact tragedy. We are not just cooking vegetables; we are performing a total flavor metamorphosis. By introducing the cauliflower to a 400°F oven, we trigger a transformation that builds a foundation of savory complexity.
The edges of the florets don't just cook; they shatter into mahogany colored bits of concentrated flavor. When combined with a whole head of garlic that has been softened into a sweet, golden paste, the result is a soup that feels incredibly expensive and sophisticated, despite its humble origins.
What you can expect from this recipe is a texture that is nothing short of velvety. We achieve this not just through heavy cream, but through the high speed emulsification of the roasted fibers themselves. The aroma that will fill your kitchen as the garlic roasts in its own skin is enough to make anyone a believer.
This is a dish designed for those moments when you want dinner to feel like a special occasion, providing a masterclass in how simple techniques can yield a five star result.
Unique Benefits of This Gourmet Soup
Roasting is the non negotiable step that separates a mediocre soup from a masterpiece. When cauliflower is subjected to high heat, the moisture evaporates, and the natural sugars begin to brown. This creates a depth of flavor that a steamer basket could never hope to achieve.
- Concentrated Caramelization: over High heat roasting removes excess moisture, intensifying the natural sweetness of the cauliflower and creating those charred, savory edges.
- Allium Transformation: Roasting a whole head of garlic in its skin mellows the sharp, aggressive bite of raw cloves into a creamy, buttery, and sweet paste.
- Emulsified Silkiness: The combination of softened roasted starches and heavy cream creates a stable, aerated emulsion that feels incredibly light yet luxurious on the palate.
- Acidity Balance: A final touch of freshly squeezed lemon juice cuts through the richness of the cream and the roasted fats, brightening every single note.
| Method | Total Time | Texture Outcome | Flavor Profile |
|---|---|---|---|
| Traditional Boiling | 25 minutes | Thin or grainy | Bland, slightly sulfurous |
| Roasted (This Recipe) | 60 minutes | Velvety and aerated | Nutty, sweet, and complex |
| Pressure Cooking | 35 minutes | Very soft but wet | Muted, lacks caramelization |
Choosing the roasting method is an investment in the final sensory experience. While boiling might save you thirty minutes, it costs you the entire soul of the dish. The time spent in the oven is largely passive, allowing the heat to do the heavy lifting of building flavor while you diced your shallots or enjoy a glass of wine.
Ingredient Deep Dive Analysis
Selecting the right components is the first step toward a gourmet result. We aren't just looking for "cauliflower" and "garlic"; we are looking for the freshest specimens that will withstand the heat of a 400°F oven and emerge transformed.
| Ingredient | Science Role | Pro Secret |
|---|---|---|
| Cauliflower (900g) | Provides structure and nutty base notes | Break into tiny florets to maximize surface area for browning |
| Whole Garlic Head | Acts as a sweet, aromatic emulsifier | Roast in the skin to steam the cloves into a spreadable confit |
| Extra Virgin Olive Oil | Conducts heat and adds fruity fat | Use a high-quality oil as it carries the roasted flavors into the broth |
| Heavy Cream | Provides a luxurious mouthfeel | Add at the very end to prevent the fat from breaking or curdling |
For the most sophisticated result, I always recommend using a vegetable broth that isn't overly dominant. You want the roasted garlic to be the star of the show. If you find yourself looking for a hearty pairing, this soup sits beautifully alongside a side of creamy mashed potatoes for a truly indulgent vegetarian feast.
Essential Components for a Sophisticated Texture
The ingredient list for the best cauliflower soup creamy roasted garlic is intentionally streamlined to allow the primary flavors to shine. Every item has been measured to ensure the balance between the earthiness of the vegetable and the richness of the dairy is maintained.
- 1 large head cauliflower (approx. 900g): Look for a head that is heavy for its size with tightly closed florets and no dark spots. Why this? Larger heads provide more starch for a naturally thicker, creamier soup base.
- 1 whole head garlic: Fresh garlic should feel firm when squeezed. Why this? Roasting a whole head provides a mellow, sweet depth that pre peeled cloves cannot match.
- 4 tbsp extra virgin olive oil, divided: Divided use ensures both roasting and sautéing are properly lubricated.
- 1 tsp sea salt: Fine sea salt dissolves more evenly than coarse kosher salt in this liquid base.
- 0.5 tsp cracked black pepper: Freshly cracked provides a floral heat that pre ground pepper lacks.
- 1 medium shallot, finely diced: Shallots offer a more refined, less watery sweetness than standard yellow onions. Why this? Their high sugar content helps them disappear into the aromatic base of the soup.
- 4 cups low sodium vegetable broth: This allows you to control the final salinity of the dish.
- 0.5 tsp dried thyme: Adds a subtle, earthy herbal note that complements roasted vegetables.
- 1 tsp lemon juice, freshly squeezed: Essential for balancing the heavy fats.
- 0.5 cup heavy cream: This is the key to that "five star" restaurant mouthfeel.
In a pinch, you can swap the shallot for the white parts of two leeks, which adds a lovely buttery quality. If you are looking for a dairy-free alternative, full fat coconut milk works remarkably well, though it will shift the flavor profile toward something more tropical and sweet.
Professional Tools for a Silky Finish
To achieve a master level result, your equipment matters just as much as your ingredients. While you can certainly make this with basic tools, certain pieces will make the process much smoother and the final texture more refined.
A large, rimmed baking sheet is essential for the roasting phase. You want enough surface area so the cauliflower isn't crowded; if the florets are on top of each other, they will steam instead of roast, and you'll lose that mahogany crust we are hunting for.
I prefer a heavy duty aluminum sheet that distributes heat evenly across the entire surface.
For the blending phase, a high speed blender is your best friend. While an immersion blender is convenient, it rarely achieves the same level of aeration and silkiness. A high speed blender like a Vitamix or Ninja will pulverize the fibers and the roasted garlic until the soup is completely smooth and light.
If you must use an immersion blender, be prepared to blend for a full 5 minutes and perhaps pass the soup through a fine mesh sieve afterward to remove any remaining grit.
Finally, a heavy bottomed Dutch oven or a thick stainless steel pot is necessary for the sautéing and simmering stages. These pots retain heat effectively, ensuring that your shallots cook evenly and the broth simmers gently without scorching the delicate cauliflower at the bottom.
Detailed Phases of the Cooking Process
Phase 1: The Caramelization Roasting
Preheat your oven to 400°F (200°C). This temperature is high enough to brown the vegetables quickly without burning them to a bitter crisp.
Break the cauliflower into small, uniform florets and toss them directly on the baking sheet with 3 tablespoons of olive oil, the sea salt, and the black pepper. Ensure every piece is glistening.
Take the whole head of garlic and slice the top 1/4 inch off to expose the tops of the cloves. Drizzle a tiny drop of oil over the exposed surface, wrap it tightly in a small piece of aluminum foil, and nestle it among the cauliflower florets.
Roast for 25–30 minutes until the cauliflower edges are mahogany colored and charred. The aroma at this stage should be intensely nutty and sweet. Remember to reserve a few of the prettiest charred florets for your final garnish.
Phase 2: Building the Aromatic Base
While the roasting finishes, place your Dutch oven over medium heat. Add the remaining 1 tablespoon of olive oil and the diced shallots. Sauté the shallots for about 5 minutes until they are translucent and fragrant, but not browned.
We want their sweetness to act as a background note, not a dominant flavor.
Once the garlic is out of the oven and cool enough to handle, carefully squeeze the cloves out of their skins directly into the pot. They should slide out easily as a soft, golden paste. Use a wooden spoon to mash the garlic into the shallots, creating a thick, aromatic base that will dissolve into the broth.
Phase 3: The Simmer and Infuse
Add the roasted cauliflower florets (minus your garnish) to the pot along with the 4 cups of vegetable broth and the dried thyme. Stir everything together and bring the mixture to a gentle simmer. Reduce the heat and let it simmer for 10 minutes.
This step is crucial because it allows the roasted flavors to hydrate the broth and the thyme to release its oils. You are essentially creating a concentrated roasted cauliflower tea that will form the body of your soup.
Phase 4: The Transformation (Blending)
Carefully transfer the contents of the pot to a high speed blender. Be cautious when blending hot liquids; never fill the blender more than halfway and hold the lid down with a kitchen towel. Add the freshly squeezed lemon juice and the heavy cream.
Blend on high for 60 seconds until the liquid is completely smooth and aerated. You will see the color lighten and the texture become almost mousse like. Return the soup to the pot to warm through if necessary, then taste and adjust the salt or pepper to your preference.
Resolving Potential Textural and Flavor Issues
Even with a perfect recipe, things can occasionally go sideways in the kitchen. Understanding why a soup feels "off" is the first step toward fixing it before it hits the table.
Why Your Soup Feels Gritty
A grainy or gritty texture usually stems from undercooked cauliflower or an underpowered blender. If the cauliflower wasn't roasted until soft through the center, the fibers won't break down entirely.
Similarly, if you used a standard food processor instead of a blender, the blades aren't fast enough to create a true emulsion.
| Problem | Root Cause | Solution |
|---|---|---|
| Gritty Texture | Undercooked cauliflower or low speed blending | Simmer for 5 more minutes and blend on high for 60 seconds |
| Flat Flavor | Lack of acidity or insufficient salt | Add an extra squeeze of lemon juice or a pinch of sea salt |
| Too Thick | Too much evaporation during roasting | Whisk in 1/4 cup of warm broth or water until desired consistency |
If the flavor feels flat, it is almost always an issue of salt or acid. Cauliflower has a natural sweetness that needs salt to pop, and the richness of the roasted garlic and heavy cream needs the lemon juice to provide contrast. Do not be afraid to add a tiny bit more lemon if the soup feels "heavy" on the tongue.
Common Mistakes Checklist:
- ✓ Pat the cauliflower dry before oiling; excess water leads to steaming rather than roasting.
- ✓ Don't skip wrapping the garlic; if left exposed, the cloves will turn bitter and hard.
- ✓ Avoid boiling the soup after adding the cream; high heat can cause the dairy to separate.
- ✓ Use a high speed blender for at least one full minute to achieve that restaurant quality silkiness.
Creative Adaptations for Diverse Dietary Needs
This recipe is incredibly versatile and can be adapted to fit almost any dietary requirement without sacrificing that gourmet feel. If you are looking to scale the recipe down for a solo dinner, simply halve all ingredients and use a smaller baking sheet.
For a half batch, reduce the roasting time by about 5 minutes as the smaller volume will cook faster.
When scaling up for a large gathering, be careful not to crowd the baking sheets. Use two separate sheets for the cauliflower and rotate them halfway through the roasting time. When doubling the spices, I recommend starting with 1.5 times the amount of salt and thyme, then tasting at the end; spices often don't need a literal 2x increase to provide the same impact in larger volumes.
For a vegan version of this soup, the heavy cream can be replaced with full fat coconut milk or a high-quality cashew cream. Coconut milk provides a similar fat content but adds a subtle tropical note that pairs beautifully with the roasted garlic.
If you want to keep the flavor profile strictly savory, cashew cream is the better bet as it has a more neutral, nutty profile that mimics dairy remarkably well.
Widespread Kitchen Misconceptions Debunked
One common myth is that you can achieve the same flavor by sautéing the cauliflower in a pan. While sautéing does provide some browning, it cannot replicate the 360 degree dry heat of an oven.
Roasting allows for deep moisture evaporation from the core of the vegetable, which is what creates that intense concentration of flavor. Sautéing often leaves the center of the floret raw and the exterior oily.
Another misconception is that the garlic must be peeled before roasting. In fact, roasting the garlic in its skin is what allows it to steam and soften into that "confit" texture. If you roast naked cloves, they often develop a hard, leathery skin and a bitter, burnt flavor.
The skin acts as a protective pressurized chamber that transforms the harsh allium into a mellow masterpiece.
Finally, some cooks believe that an immersion blender is "just as good" as a stand blender. While a stick blender is a fantastic tool for rustic soups like a velvety meat sauce, it lacks the sheer RPMs needed to break down the fibrous structure of roasted cauliflower into a truly smooth liquid. For this specific dish, the stand blender is what provides that airy, elegant finish.
Maintaining Quality Through Proper Storage
This soup is an excellent candidate for make-ahead meals, as the flavors of the roasted garlic and thyme actually deepen after a night in the refrigerator. Store the soup in an airtight glass container for up to 4 days. When reheating, do so gently over low heat on the stovetop.
Avoid the microwave if possible, as uneven heating can cause the cream to break and create an oily film on the surface.
If you choose to freeze this soup, it will stay fresh for up to 3 months. However, be aware that the texture may change slightly upon thawing; the emulsion between the vegetable fibers and the cream can sometimes separate.
To fix this, simply give the thawed soup a quick 30 second whirl in the blender after reheating to restore that silky consistency.
To practice zero waste cooking, do not throw away the cauliflower leaves or the thick center stem. The stem can be peeled, chopped, and roasted right alongside the florets it has the same flavor and texture once blended.
The leaves can be tossed in a little oil and salt and roasted until they are as crispy as kale chips, making a fantastic, crunchy garnish that adds a rustic touch to your elegant bowl.
Artful Pairings to Complete the Meal
To truly turn this soup into a special occasion meal, consider what you serve alongside it. Because the soup is so rich and velvety, it needs textures that offer contrast. A thick slice of sourdough bread, toasted with a rub of raw garlic and a drizzle of olive oil, is the classic choice for dipping.
If you are serving this as a starter for a larger dinner party, it pairs beautifully with a main course that has a bit of acidity or brightness. A roasted chicken with lemon and herbs or a crisp green salad with a sharp vinaigrette would provide the perfect balance. If you are looking for more vegetable forward inspiration, you might consider how the creamy textures here complement other sides like a Johnny Marzetti dish or a simple roasted asparagus.
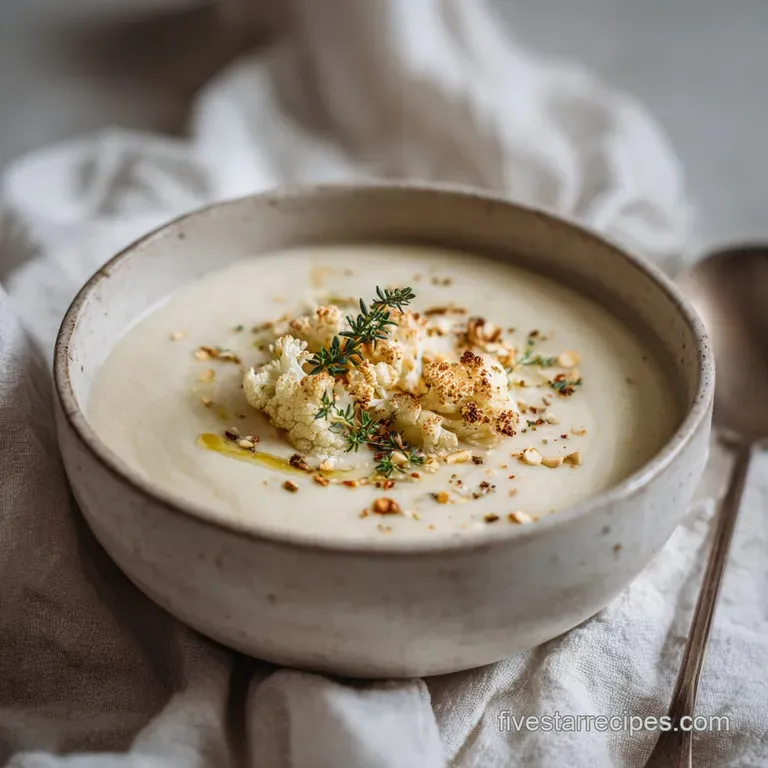
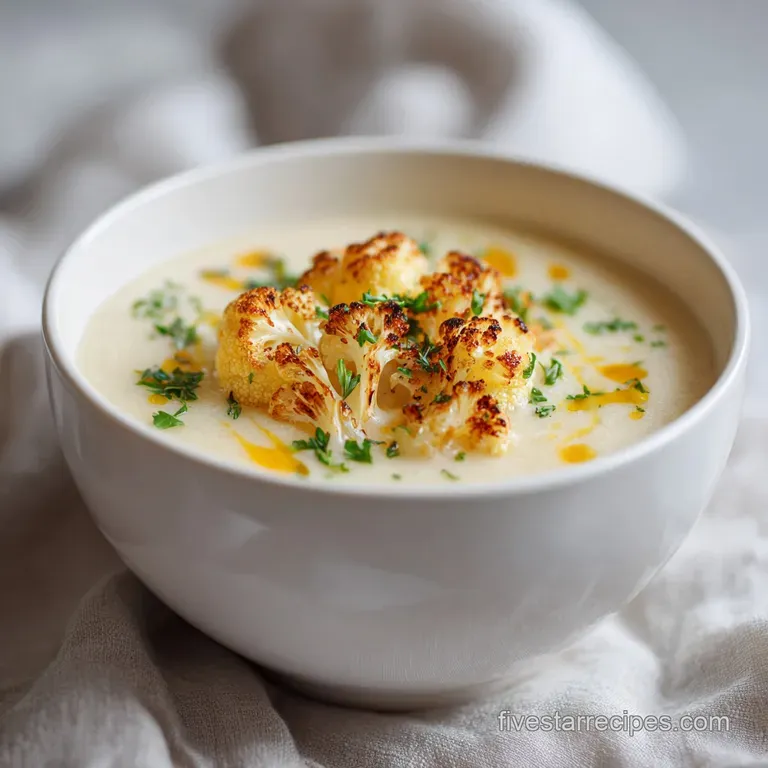
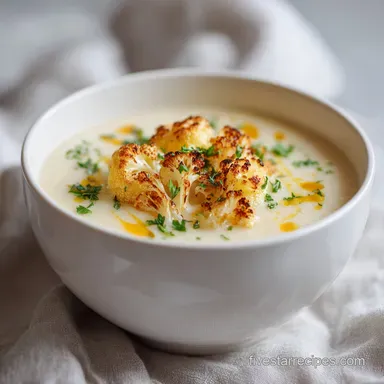
The final presentation is where you can really show off your gourmet touch. Use those reserved charred florets, a tiny drizzle of your best extra virgin olive oil, and perhaps a sprinkle of fresh thyme leaves or microgreens.
The contrast between the smooth, pale soup and the dark, caramelized cauliflower garnish tells your guests exactly what to expect: a thoughtful, chef level dish made with love and precision.

Recipe FAQs
Is it better to boil or roast the cauliflower for this soup?
Roasting is significantly better. Boiling turns the vegetable into a water logged sponge, whereas roasting at 400°F concentrates natural sugars and creates a deep, nutty complexity that boiling simply cannot achieve.
How to achieve the silkiest texture for this soup?
Use a high speed blender on the highest setting. Blending at high speed incorporates air into the heavy cream and cauliflower, creating a velvet like aeration that is impossible to replicate with a standard immersion blender or food processor.
Can I prepare this soup ahead of time?
Yes, you can roast the vegetables up to 24 hours in advance. Store the roasted cauliflower and garlic in an airtight container in the fridge, then simply proceed with the sautéing, simmering, and blending steps when you are ready to serve.
Is it true that I should peel the roasted garlic before adding it to the pot?
No, this is a common misconception. Once roasted, you simply squeeze the softened garlic cloves out of their papery skins directly into the Dutch oven to mash them into a rich paste.
How to prevent the garlic from burning while roasting?
Wrap the garlic head tightly in foil before placing it on the baking sheet. This creates a steam packet effect that softens the cloves into a golden, sweet puree while the cauliflower florets achieve their mahogany colored char at 400°F.
What should I serve with this creamy cauliflower soup?
Serve with a protein heavy side to balance the meal. If you enjoyed mastering the temperature dependent flavor development here, apply those same principles to our Greek chicken meatballs for a perfectly balanced dinner.
How to fix the soup if it tastes too thick?
Whisk in a small amount of warm vegetable broth until you reach your desired consistency. Adding warm liquid ensures the temperature remains stable without thinning out the flavor or breaking the emulsion of the heavy cream.
Creamy Roasted Garlic Cauliflower Soup
Ingredients:
Instructions:
Nutrition Facts:
| Calories | 257 kcal |
|---|---|
| Protein | 5.6 g |
| Fat | 20.1 g |
| Carbs | 16.7 g |
| Fiber | 3.8 g |
| Sugar | 5.9 g |
| Sodium | 782 mg |
