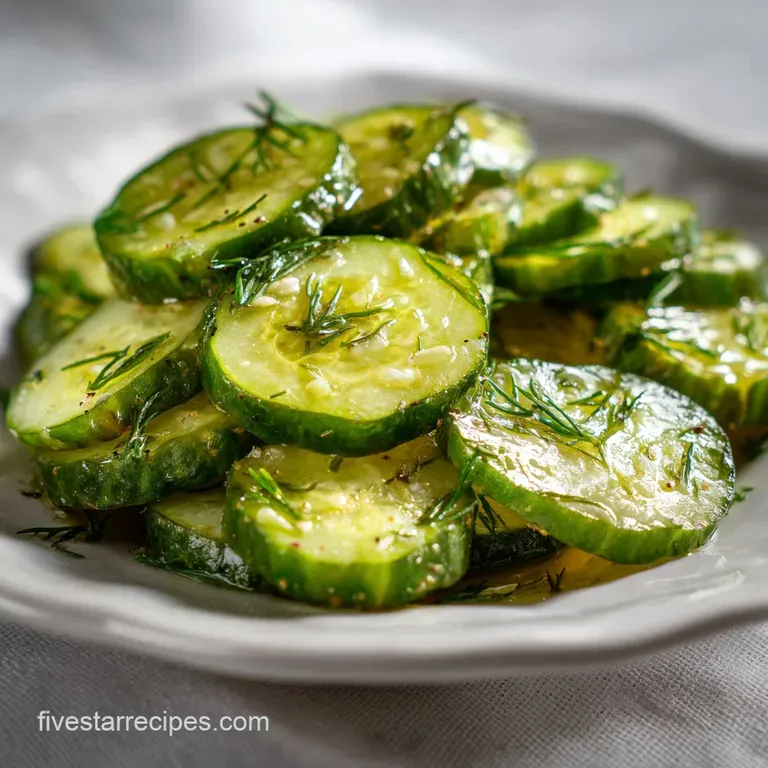
Dill Pickle Slices: the Cold Shock Snap
- Time: Active 30 minutes, Passive 2 hours 10 mins, Total 2 hours 40 mins
- Flavor/Texture Hook: Vibrant acidity with a glass like shatter
- Perfect for: High end burger toppings, bold appetizers, or charcuterie starters
- Mastering These Bold And Crunchy Dill Pickle Slices
- The Science Behind The Brine
- Quick Recipe Specs And Timing
- Fresh Ingredients For Bold Flavor
- Required Gear For Perfect Slices
- Clear Step By Step Instructions
- Avoiding Soggy Slices And Mistakes
- Bold Twists And Flavor Swaps
- Myths About Homemade Pickles
- Proper Storage And Waste Tips
- Stunning Starters And Serving Ideas
- Recipe FAQs
- 📝 Recipe Card
Mastering These Bold And Crunchy Dill Pickle Slices
The first time I pulled a jar of these out of the fridge, the aroma of garlic and dill hit me so hard it felt like a summer afternoon in a jar. I remember the literal "snap" sound echoing in the kitchen when I bit into the first slice.
It wasn’t that limp, yellowed thing you find at the bottom of a fast food bag; it was a vibrant, neon green stunner with a bite that actually fought back.
We’ve all been there spending time on a recipe only to end up with soggy, sad cucumbers that taste like nothing but salt. But once you understand how to manipulate the cellular structure of the cucumber, everything changes.
This isn't just about preserving; it’s about creating a bold starter that demands attention on any plate. Trust me, once you see how easy it is to get that professional grade crunch at home, you’ll never look at a commercial jar again.
Whether you're stacking these on a brisket burger or serving them alongside a Healthy Mediterranean Chickpea recipe, the goal is a balance of heat, herb, and acidity. We are building layers of flavor here, from the initial sting of the chili flakes to the lingering, earthy notes of the fresh dill heads. Let's get into the mechanics of how to make this happen.
The Science Behind The Brine
The Physics of the Snap: Submerging the cucumbers in an ice bath before pickling draws out excess moisture and firms up the pectin in the cell walls, ensuring a crisp shatter rather than a mushy bite.
Osmotic Regulation: The 1:1 ratio of white vinegar to filtered water creates an acidic environment that prevents spoilage while allowing the pickling salt to penetrate the flesh evenly.
Tannic Reinforcement: Adding bay leaves provides natural tannins that act as a structural "glue," helping the cucumber slices retain their firmness over long term storage.
| Method Type | Texture Result | Flavor Profile | Best Use Case |
|---|---|---|---|
| Fresh Sliced | Ultra crispy glass like shatter | Vibrant, bright, and herb forward | Gourmet burgers and appetizers |
| Shortcut (Store) | Often soft or rubbery | Heavily salted, often muted herbs | Emergency deli sandwiches |
| Quick Pickled | Tender with a slight bite | Tangy but lacks depth | Last minute taco toppings |
Getting that texture right is the difference between a mediocre snack and a stunning appetizer. If you’ve ever tried our Refrigerator Dill Pickles recipe, you know that the cold pack method is the absolute king of crunch. By avoiding a long boiling process for the cucumbers themselves, we keep the enzymes intact that prevent the slices from turning into mush.
Quick Recipe Specs And Timing
When we talk about precision, we mean it. Pickling is as much a chemistry experiment as it is a culinary art. You need to hit specific checkpoints to ensure safety and flavor. For instance, the slicing thickness is non negotiable aim for 1/4 inch.
Anything thinner will dissolve into the brine, and anything thicker won't absorb the aromatics properly.
| Ingredient | Role in Brine | Pro Secret |
|---|---|---|
| White Vinegar | Acidic Base | Use 5% acidity for a safe, consistent tang. |
| Pickling Salt | Flavor & Cure | Non iodized salt prevents the brine from turning cloudy. |
| Organic Cane Sugar | Balance | A small amount rounds out the harshness of the vinegar. |
| Fresh Dill Heads | Aromatic Depth | The heads provide more intense flavor than just the fronds. |
The timing of the ice bath is another critical checkpoint. Two hours might seem like a long time to wait, but it is the secret to that "wow" factor. It pulls out the heat of the room and shocks the cucumbers into a state of structural integrity that survives the warm brine pour later on.
Fresh Ingredients For Bold Flavor
- 2 lbs pickling cucumbers: Look for Kirby or Persian varieties. Why this? They have thicker skins and smaller seeds, which translates to a better crunch. (Sub: English cucumbers, though they are slightly softer).
- 1 large white onion: Thinly sliced for a sharp, savory bite. (Sub: Red onion for a more colorful jar).
- 2 cups white distilled vinegar: Must be 5% acidity. Why this? Provides the clean, sharp punch classic to North American dills. (Sub: Apple cider vinegar for a fruitier, milder finish).
- 2 cups filtered water: To dilute the acid without adding chlorine flavors.
- 2 tbsp pickling salt: Pure salt without additives. Why this? Prevents cloudiness and off flavors found in table salt. (Sub: Kosher salt use 1.5x the volume).
- 1 tbsp organic cane sugar: Just enough to smooth the edges. (Sub: Honey or agave).
- 8 cloves fresh garlic: Smashed to release oils. (Sub: 1 tsp garlic powder in a pinch).
- 8 heads fresh dill: The floral, earthy heart of the recipe. (Sub: 2 tbsp dried dill seeds).
- 4 tsp yellow mustard seeds: Adds a nutty, pungent pop. (Sub: Brown mustard seeds for more heat).
- 2 tsp black peppercorns: For a slow, warming spice.
- 1 tsp red chili flakes: For a bold, international kick.
- 2 bay leaves: Provides essential tannins.
Chef's Tip: If you want an even more aggressive crunch, add a clean grape leaf or a pinch of loose black tea leaves to each jar. The extra tannins keep the cucumbers incredibly firm.
Required Gear For Perfect Slices
To get those professional looking Dill Pickle Slices, you really need a mandoline slicer. I used to try and hand cut these with a chef's knife, but unless you have the steady hand of a surgeon, you’ll end up with uneven pieces that cook at different rates.
A mandoline ensures every single chip is exactly 1/4 inch thick, which means every bite has the same texture.
You’ll also need wide mouth mason jars. I prefer the pint sized ones for slices because they are easier to pack tightly. If you leave too much space between the slices, they’ll float to the top and won't be fully submerged in the brine, which is a recipe for spoilage.
A stainless steel funnel is also a lifesaver pouring hot vinegar brine is not something you want to do with a shaky hand.
Finally, make sure you have a large non reactive pot (stainless steel or enamel coated) for the brine. Aluminum can react with the vinegar and give your pickles a metallic taste that is absolutely impossible to ignore.
Cleanliness is also huge here; even if you aren't doing a full water bath canning process, your jars should be sterilized and hot when the brine goes in.
Clear step-by-step Instructions
- Prep the cucumbers. Wash the 2 lbs of pickling cucumbers thoroughly in cold water to remove any dirt or debris. Note: Dirt contains bacteria that can soften the pickles.
- Slice with precision. Slice the cucumbers into 1/4 inch rounds using a mandoline. Slice the white onion into thin rings.
- Perform the ice shock. Combine the cucumber and onion slices in a large bowl with the 4 cups of ice cubes. Let them sit for 2 hours until the cucumbers feel rigid and cold to the touch.
- Sterilize your equipment. While the cucumbers chill, wash your jars and lids in hot soapy water and keep them warm.
- Simmer the brine base. In a stainless steel pot, combine the 2 cups vinegar, 2 cups filtered water, 2 tbsp salt, and 1 tbsp sugar. Heat until it reaches a simmer and the solids are completely dissolved.
- Layer the aromatics. Into each jar, place 1 smashed garlic clove, 1 head of dill, 1/2 tsp mustard seeds, 1/4 tsp peppercorns, and a pinch of chili flakes.
- Pack the jars. Drain the ice and water from the cucumbers. Pack the chilled slices and onions tightly into the jars, leaving 1/2 inch of headspace. Ensure they are packed firmly so they don't float.
- Add the liquid gold. Pour the hot brine over the cucumbers, covering them completely while maintaining that 1/2 inch headspace.
- Remove air bubbles. Run a thin spatula or plastic knife along the inside of the jar to release trapped air. Wait for the bubbles to stop rising before sealing.
- Seal and cool. Wipe the rims clean, apply the lids, and let them sit on the counter until they reach room temperature before moving to the fridge.
Chef's Tip: Don't throw away the leftover brine once the pickles are gone. It's liquid gold for marinating chicken or adding a zesty kick to a potato salad.
Avoiding Soggy Slices And Mistakes
The most common heartbreak in pickling is the "soggy slice." Usually, this happens because the blossom end of the cucumber wasn't removed. The blossom end contains enzymes that actively break down the pectin, turning your crisp snack into a mushy mess within days.
Always trim about 1/16th of an inch off the ends if you're doing spears, or just ensure you're using fresh, firm cukes for your slices.
Soft Or Mushy Texture
This is usually caused by heat exposure. If you boil the cucumbers in the brine, they will cook. We want to steep them, not boil them. The ice bath is your insurance policy here. If they still turn out soft, your cucumbers might have been too old before you started.
Cloudy Brine Appearance
Cloudiness can be a sign of spoilage, but more often, it's just the result of using table salt with anti caking agents or using hard water with high mineral content. Always use filtered water and pure pickling salt to keep the aesthetic as clean as the flavor.
| Problem | Root Cause | Solution |
|---|---|---|
| Soggy Slices | Enzymes in the blossom end or over heating | Trim ends and use the 2 hour ice bath shock. |
| Bitter Flavor | Old cucumbers or too much pith | Use Kirby cucumbers and peel a few strips if skin is thick. |
| Hollow Pickles | Cucumbers were dehydrated before pickling | Soak whole cucumbers in cold water for 1 hour before slicing. |
Common Mistakes Checklist
- ✓ Forgot to remove the blossom end of the cucumber.
- ✓ Used iodized table salt which turns the brine murky.
- ✓ Didn't pack the jars tight enough, leading to "floater" spoilage.
- ✓ Poured boiling brine over room temp cucumbers (shock them with ice first!).
- ✓ Used tap water with heavy chlorine or mineral scents.
Bold Twists And Flavor Swaps
If you want to take these Dill Pickle Slices into a different flavor profile, it's incredibly easy to swap a few aromatics. For an international flair, I love adding a few slices of fresh ginger and a star anise pod to the brine.
It gives the pickles a subtle, warming complexity that pairs beautifully with Asian inspired starters or spicy fried chicken.
Another favorite of mine is the "Heat Seeker" version. Instead of just chili flakes, toss in a few sliced habaneros or serrano peppers. The heat intensifies over time as the pickles sit in the fridge, creating a bold, spicy kick that is absolutely stunning on a pulled pork sandwich.
| Servings | Cucumber Weight | Vinegar/Water | Salt Amount |
|---|---|---|---|
| 16 (1 Pint) | 0.5 lbs | 0.5 cup each | 0.5 tbsp |
| 64 (4 Pints) | 2 lbs | 2 cups each | 2 tbsp |
| 128 (8 Pints) | 4 lbs | 4 cups each | 4 tbsp |
If you’re scaling this up for a big summer BBQ, remember that spices don't always scale linearly. If you double the recipe, you don't necessarily need to double the chili flakes unless you want a serious burn. Start with 1.5x the spices and taste the brine before pouring.
For scaling down, it's as simple as dividing by four, but I find making at least two jars is always worth the effort.
Myths About Homemade Pickles
One huge misconception is that you must use a boiling water bath to make safe pickles. While that's true for long term shelf storage at room temperature, refrigerator pickles are perfectly safe because the high acidity and cold temperatures inhibit bacterial growth.
You get a much better crunch by skipping the boiling process.
Another myth is that sugar makes the pickles "sweet." In this recipe, the 1 tbsp of sugar isn't there to make a bread and butter pickle; it’s there to perform a chemical balance. It cuts the sharp, metallic edge of the vinegar and enhances the perception of the salt and herbs.
Without it, the brine can feel one dimensional and overly harsh.
Finally, people often think the "dill" flavor comes only from the fronds. In reality, the most potent oils are in the seeds and the stems. That’s why we use the whole dill head.
If you can't find fresh dill heads at the farmer's market, using a combination of fresh fronds and dried dill seeds is a much better substitute than fronds alone.
Proper Storage And Waste Tips
These Dill Pickle Slices need at least 24 hours in the fridge to develop their full flavor, but they really hit their prime around day five. They will stay safe and crunchy in the refrigerator for up to 2 months, provided they stay submerged in the brine.
Never use your fingers to grab a pickle from the jar the oils and bacteria from your hands can introduce mold. Always use clean tongs or a fork.
When it comes to zero waste, the pickle juice is your best friend. Don't dump it! I use it as a brine for fried chicken letting chicken thighs soak in pickle juice for 4 hours makes them incredibly tender and flavorful.
You can also use the leftover sliced onions in a zesty tartar sauce or chopped up in a tuna salad. Even the garlic cloves from the bottom of the jar are delicious when smashed into a vinaigrette for a bold salad dressing.
Stunning Starters And Serving Ideas
To really show off these pickles, try serving them as a "Pickle Flight" starter. Arrange three small bowls: one with the standard recipe, one with added habaneros for heat, and one with a teaspoon of turmeric added to the brine for a vibrant yellow "deli style" look.
It’s a bold way to kick off a meal and always gets people talking about the textures.
They also make a incredible garnish for a Bloody Mary. Since these slices have that firm snap, they don't get soggy even when sitting in a drink. Stack three of them on a bamboo skewer with a cube of sharp cheddar and a piece of spicy salami for a starter that doubles as a cocktail accessory.
If you’re looking for a more refined presentation, try a "Pickle Carpaccio." Lay the slices out in a single layer on a dark plate, drizzle with a tiny bit of high-quality olive oil, and hit them with a crack of fresh black pepper and some lemon zest. It transforms a humble snack into an international inspired appetizer that feels elevated and fresh. This technique works especially well if you’ve used the creamy garlic butter recipe as your main course, as the acidity of the pickles cuts through the richness of the fish perfectly.

Recipe FAQs
What are dill pickle slices?
They are thin, cross cut sections of cucumbers preserved in a brine. This specific recipe uses vinegar, salt, fresh dill, and garlic to achieve a vibrant acidity and a guaranteed structural snap.
What is the 3 2 1 rule for pickles?
This rule does not apply to this specific cold brine slicing recipe. The 3-2-1 rule typically refers to a basic hot-water bath canning ratio of 3 parts water, 2 parts vinegar, and 1 part sugar for shelf stable pickles.
Are dill pickle slices healthy?
Generally yes, in moderation, but they are high in sodium. They offer very few calories and are rich in probiotics if they are naturally fermented, though this quick pickle relies on acidity for preservation.
How to do sliced dill pickles?
Slice cucumbers into uniform 1/4 inch rounds immediately after a 2-hour ice shock. Pack the chilled slices tightly into sterilized jars layered with your spices, then pour a hot, simmering brine over them and allow them to cool before refrigeration.
Is it true you must use a specialized canning process for refrigerator pickles?
No, this is a common misconception for refrigerator pickles. Since these are intended to be stored cold (below 40°F), a full boiling water bath is unnecessary; the high acidity and cold temperature safely preserve them.
Why do my homemade dill pickles turn out soggy instead of crisp?
Sogginess is usually caused by enzymatic action or insufficient chilling. Always trim off the blossom end of the cucumber and ensure the slices undergo the full 2-hour ice bath to firm up the cell structure before the hot brine is introduced.
When are dill pickle slices ready to eat after jarring?
Allow a minimum of 24 hours, but flavor peaks around Day 5. They are safe to eat sooner, but the aromatics need time to fully infuse the cucumber flesh for the boldest flavor profile.
Crispy Dill Pickle Slices
Ingredients:
Instructions:
Nutrition Facts:
| Calories | 5 kcal |
|---|---|
| Protein | 0 g |
| Fat | 0 g |
| Carbs | 1 g |
| Fiber | 0 g |
| Sugar | 0 g |
| Sodium | 219 mg |
