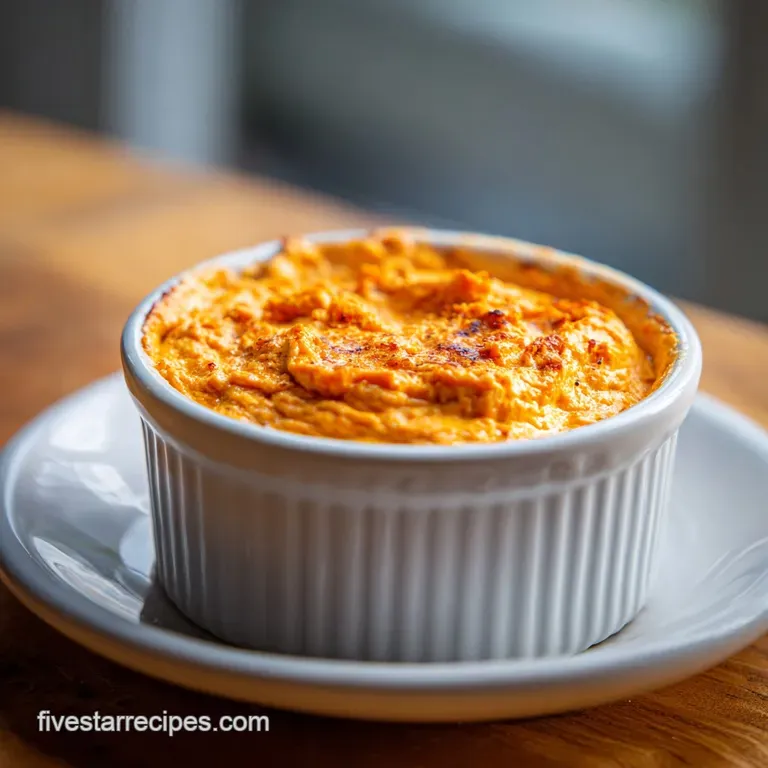
Buffalo Chicken Dip with Canned Chicken

- Time: Active 10 mins, Passive 20 mins, Total 30 mins
- Flavor/Texture Hook: Zesty, bubbly, and shreddy
- Perfect for: Game day crowds or impulsive late night cravings
- The Bold Secret to Perfect Buffalo Chicken Dip
- Essential Specs for This Dish
- Component Analysis for This Dish
- Selecting Your Elements and Substitutes
- Tools for a Stunning Finish
- Achieving the Ideal Bubbling Melt
- Fixing Common Texture Pitfalls
- Adjusting the Batch Size
- Debunking Common Kitchen Myths
- Storage and Waste Prevention
- Creative Starters and Serving Ideas
- Recipe FAQs
- 📝 Recipe Card
The Bold Secret to Perfect Buffalo Chicken Dip
Listen, the second that sharp, vinegary sting of Frank’s RedHot hits the air, my heart skips a beat. There is no aroma quite like it, especially when it starts mingling with melting cheese and toasted garlic in a hot oven.
I remember the first time I whipped this up for a playoff game, I was honestly skeptical about using canned chicken. I assumed it would be mushy or bland, but I was dead wrong.
It turns out that canned chicken is actually the secret to that ideal, shreddy texture that catches every single drop of sauce. When you flake it apart with a fork, it creates a massive surface area that grips the cream cheese and hot sauce.
You get a consistent, punchy flavor in every bite rather than hunting for dry chunks of breast meat.
We are going for a stunning, high impact starter here. This isn't just another boring bowl of orange mush. We want those crispy, browned cheese edges and a dip that stays scoopable even after it sits on the counter for twenty minutes.
Trust me, once you see those first few bubbles popping through the golden crust, you'll never go back to the rotisserie chicken version.
Essential Specs for This Dish
Acid Suspension: The vinegar in the buffalo sauce acts as a surfactant, helping to keep the fats in the cheese from separating into a greasy puddle.
Protein Surface Area: Flaking canned chicken creates jagged edges that trap more sauce than smooth, cubed poultry.
Emulsification Stability: Using Greek yogurt adds a sharp tang while providing extra protein that stabilizes the cream cheese matrix during heating.
| Method | Time | Texture | Best For |
|---|---|---|---|
| Oven | 20 mins | Crispy edges, browned top | Hosting and parties |
| Stovetop | 12 mins | Silky, consistent, very soft | Quick snacking |
| Slow Cooker | 2 hours | Ultra tender, melty | Potlucks and long games |
To get that velvety finish, it's vital to let your ingredients come to room temperature before mixing. If you try to blend cold cream cheese with cold yogurt, you'll end up with stubborn little lumps that refuse to melt, ruining the visual appeal of your stunning starter.
Component Analysis for This Dish
| Ingredient | Science Role | Pro Secret |
|---|---|---|
| Canned Chicken | Structural Base | Drain and pat dry to prevent a watery dip. |
| Frank's RedHot | Flavor & Acidity | The vinegar breaks down protein fibers for a softer bite. |
| Greek Yogurt | Stabilizer | Prevents the cream cheese from "breaking" under high heat. |
| Sharp Cheddar | Fat & Umami | Grate it yourself to avoid anti clumping starches. |
Using a high-quality canned chicken makes a world of difference. Look for "premium chunk" varieties rather than the minced stuff. It gives you more control over the final texture, allowing you to leave some larger flakes for a more substantial mouthfeel.
Selecting Your Elements and Substitutes
- 2 cans (350g each / 12.5 oz) premium chunk chicken breast: Drained and flaked. Why this? Provides the perfect "shreddy" texture for maximum sauce absorption.
- Substitute: 700g shredded rotisserie chicken (similar texture, slightly drier).
- 180ml (0.75 cup) Frank's RedHot buffalo sauce: The classic choice. Why this? High vinegar content balances the heavy fats in the cheese.
- Substitute: Any cayenne based hot sauce mixed with a teaspoon of white vinegar.
- 225g (8 oz) low-fat cream cheese (Neufchâtel): Softened. Why this? Provides the creamy structure without being overly greasy.
- Substitute: Full fat cream cheese for a richer, heavier dip.
- 120ml (0.5 cup) plain non fat Greek yogurt: Sharp and thick. Why this? Adds tang and stabilizes the fats during the bake.
- Substitute: Sour cream (adds more fat, slightly less protein).
- 1 tsp garlic powder: For savory depth.
- Substitute: 2 cloves of freshly minced garlic (sautéed first).
- 0.5 tsp onion powder: For aromatic balance.
- 115g (1 cup) shredded part skim mozzarella cheese: For the "pull." Why this? Melts evenly and creates a stretchy, velvety layer.
- Substitute: Monterey Jack for a creamier, mild finish.
- 60g (0.5 cup) shredded sharp cheddar cheese: For flavor.
- Substitute: Smoked gouda for a bold, campfire twist.
- 30g (0.25 cup) crumbled blue cheese: The classic pairing.
- Substitute: Feta cheese if you prefer a milder, salty kick.
- 2 tbsp chopped fresh chives: For a fresh finish.
- Substitute: Thinly sliced green onion tops.
Tools for a Stunning Finish
You don't need a lab full of gear, but a few specific items help. A wide, shallow baking dish is better than a deep one because it increases the surface area for that crispy cheese crust. I usually reach for a ceramic 9x9 inch dish or a seasoned cast iron skillet if I want the edges to really sizzle.
A sturdy fork is your best friend here for flaking the chicken. Don't use a food processor or you will turn the meat into a paste, which is frankly a crime in the world of dips. You also want a silicone spatula to ensure you scrape every bit of that creamy goodness out of the mixing bowl.
Achieving the Ideal Bubbling Melt
1 | Prep and Hydrate the Protein
Drain the chicken thoroughly and spread it out on a plate. Use a fork to flake it into medium sized pieces. Toss the chicken with the 180ml of buffalo sauce in a small bowl and let it sit for 5 minutes until the meat looks orange and saturated.
Note: This pre soak ensures the spice is inside the meat, not just on it.
2 | Build the Creamy Matrix
In a large mixing bowl, combine the softened 225g cream cheese, 120ml Greek yogurt, garlic powder, and onion powder. Stir vigorously with a spatula until the mixture is velvety and smooth. If you see lumps, keep going; they won't disappear on their own in the oven.
3 | Incorporate the Bulk
Fold the sauce soaked chicken into the cream cheese mixture. Add half of the mozzarella and half of the cheddar. Mix gently until the chicken is evenly distributed. Much like the technique in my Meat Sauce Recipe, keeping the distribution even ensures every bite is balanced.
4 | Layer for the Bake
Transfer the mixture into your baking dish, smoothing it out with the back of a spoon. Sprinkle the remaining mozzarella, cheddar, and the blue cheese crumbles over the top.
5 | Execute the Heat
Preheat your oven to 180°C (350°F). Place the dish on the center rack and bake for 20 minutes until the edges are vigorously bubbling. Note: The cheese should be fully melted but not quite browned yet.
6 | The Broil Finish
Switch the oven to the broil setting for the last 2 minutes. Watch it like a hawk until the cheese develops golden brown spots. This creates a flavor packed crust that shatters slightly when you dip into it.
7 | The Final Touch
Remove from the oven and let it rest for 5 minutes. This allows the fats to re absorb slightly so the dip isn't runny. Sprinkle the fresh chives over the top just before serving until the oniony aroma fills the room.
Fixing Common Texture Pitfalls
Why Your Dip Is Watery
If your dip looks like a soup rather than a spread, the culprit is usually moisture. Canned chicken is packed in water, and if you don't drain it properly, that liquid releases into the cheese as it heats up. Similarly, some "water added" cheeses can cause this issue.
| Problem | Root Cause | Solution |
|---|---|---|
| Liquid on top | Poorly drained chicken | Pat the canned chicken dry with paper towels before mixing. |
| Oily separation | Too much heat/low quality cheese | Use hand grated cheese and don't bake past the bubbling point. |
| Grainy mouthfeel | Cold ingredients | Ensure cream cheese is completely soft before mixing. |
Why Your Dip Is Dry
This happens when you bake it too long or don't have enough "wet" ingredients like yogurt. The chicken acts like a sponge, so if there isn't enough sauce or cream cheese, it will pull moisture from the dairy until it becomes tacky and stiff.
Common Mistakes Checklist
- ✓ Drain the canned chicken through a fine mesh sieve to catch every drop.
- ✓ Soften the cream cheese on the counter for at least 30 minutes before starting.
- ✓ Use a cayenne based sauce like Frank's for the authentic "Buffalo" profile.
- ✓ Grate your own cheddar to avoid the gritty texture of pre shredded bags.
- ✓ Let the dip rest for 5 minutes after baking to set the consistency.
Adjusting the Batch Size
If you are cooking for a small group, you can easily halve this recipe. Use a smaller oven safe ramekin and reduce the bake time by about 5 minutes. Since we use two cans of chicken, it's very easy to just use one and cut the rest of the ingredients down.
For the egg based binders found in some dips, you'd have to whisk and halve them, but here, it's a straight 50% reduction.
When doubling the recipe for a huge party, don't just double the salt or spices. I find that doubling the Frank's RedHot can make the dip a bit too thin. Instead, go for 1.5x the sauce and 2x the chicken and cheese.
Bake in a larger 9x13 inch pan and add about 5-8 minutes to the cook time to ensure the center gets hot and bubbly.
Debunking Common Kitchen Myths
One common myth is that you must use Ranch or Blue Cheese dressing inside the dip for it to be "authentic." Honestly, using bottled dressing often adds unnecessary oils and preservatives that can cause the dip to separate.
Using Greek yogurt and real blue cheese crumbles gives you a much cleaner, bolder flavor profile without the greasy finish.
Another misconception is that canned chicken is lower quality than fresh. While fresh poached breast is great, canned chicken is actually cooked under pressure inside the can, which breaks down connective tissue and makes it incredibly tender.
For a dip, that "pressurized" tenderness is actually a benefit, not a drawback.
Storage and Waste Prevention
Store any leftovers in an airtight container in the fridge for up to 4 days. When you want to reheat it, do so in the oven or a toaster oven rather than the microwave. The microwave tends to make the chicken rubbery and the cheese greasy.
A quick 10 minutes at 160°C (320°F) will bring back that velvety texture.
Don't let the leftovers go to waste! This dip makes a stunning filling for stuffed bell peppers or a spicy topping for a baked potato. You can even stir a few spoonfuls into some hot pasta with a splash of milk to create a quick Buffalo chicken mac and cheese. If you have extra sauce, it works perfectly in a Honey Garlic Glazed recipe for a different dinner later in the week.
Creative Starters and Serving Ideas
The Classic Crunch
You can't go wrong with sturdy tortilla chips or thick cut kettle chips. They provide a satisfying "shatter" that contrasts with the creamy dip. I personally love the blue corn chips for the color contrast they make the orange dip look even more vibrant.
The Low Carb Vessel
If you want to keep things lighter, celery sticks are the traditional choice for a reason. They offer a cool, watery snap that cuts right through the heat of the buffalo sauce. Sliced bell peppers and cucumber rounds also work beautifully and keep the meal keto friendly.
For a Bold Twist
For a real "wow" factor at a party, serve the dip inside a hollowed out sourdough bread bowl. As people dip, they can tear away pieces of the bread that have been soaking up the spicy oils. It's messy, bold, and absolutely incredible. If you enjoy these kinds of textures, you might also like the dumplings in my Knoephla Soup Recipe.

Recipe FAQs
Can you use canned chicken for buffalo chicken dip?
Yes, canned chicken is often preferred. The pre-cooked, flaked texture of canned chicken absorbs the buffalo sauce better than cubed or shredded fresh breast meat, leading to a more consistent flavor throughout.
Can you use canned chicken instead of chicken breast?
Yes, it's an excellent substitute for fresh or poached chicken breast. Canned chicken is already tender and requires minimal handling; just make sure to drain it very well to avoid a watery dip base.
Can I use canned chicken instead of rotisserie chicken?
Absolutely, it works perfectly fine instead of rotisserie chicken. Rotisserie chicken is great, but canned provides a finer, more uniform shredding capability that grips the cheese and sauce exceptionally well.
How to add flavor to canned chicken?
Soak the drained chicken in the buffalo sauce for at least 5 minutes before mixing. Allowing the meat to sit in the sauce lets the vinegar and spices penetrate the fibers, which is key for deep flavor transfer.
Is it true you must use full fat cream cheese for a creamy dip?
False. Using a mix of cream cheese and Greek yogurt provides superior stabilization. The protein in the yogurt acts as an emulsifier, preventing the fat from separating into an oily mess, even when using lower fat cheese.
What’s the best way to ensure the dip is scoopable and not stiff after baking?
Include a binding liquid like Greek yogurt or sour cream, and rest the dip for 5 minutes post bake. This resting period allows the starches and fats to reabsorb moisture, leading to a perfectly velvety texture, much like the binding principles we use in a sturdy Johnny Marzetti Recipe.
How to get a crispier top crust on the dip?
Switch the oven to the broil setting for the final 2 minutes of cooking. Broiling quickly browns the top layer of cheese, creating those desirable crispy edges without overcooking the creamy interior.
Canned Chicken Buffalo Dip
Ingredients:
Instructions:
Nutrition Facts:
| Calories | 199 kcal |
|---|---|
| Protein | 21.2 g |
| Fat | 11.6 g |
| Carbs | 2.1 g |
| Fiber | 0.2 g |
| Sugar | 1.4 g |
| Sodium | 512 mg |
